> ## Documentation Index
> Fetch the complete documentation index at: https://hc.starbridge.ai/llms.txt
> Use this file to discover all available pages before exploring further.
# Set up users, roles, and teams
Once your Bridges are set up, add users, assign their roles, create teams, and subscribe them to the right Bridges.
## User roles
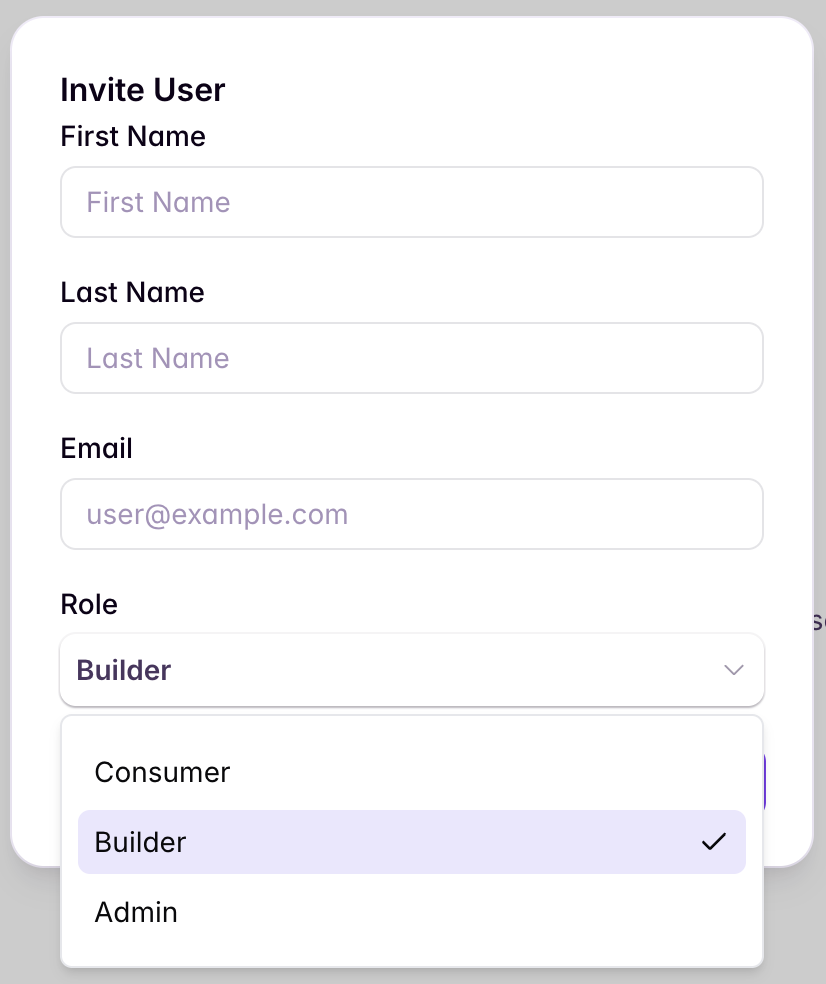
There are 3 user roles in Starbridge:
* View and action signals from shared Bridges
* Receive email digests
* Export Bridges as CSVs
* Use Ask Starbridge and Explore
* Full access to RFP actions
*Everything a Consumer can, plus:*
* Build, configure, and share Bridges
* Define buyer lists
* Access all Bridges in the org
*Everything a Builder can, plus:*
* Add/remove users and assign roles
* Create and manage teams
* Set up integrations, API keys, and SSO
* Configure Bridge credit limits and monitor usage
* [Configure feeds on behalf of users](/builders/configuring-bridges-for-consumers)
You can modify user roles at any time after initial assignment.
## Add users
Go to **Settings → Organization Settings → Users**.
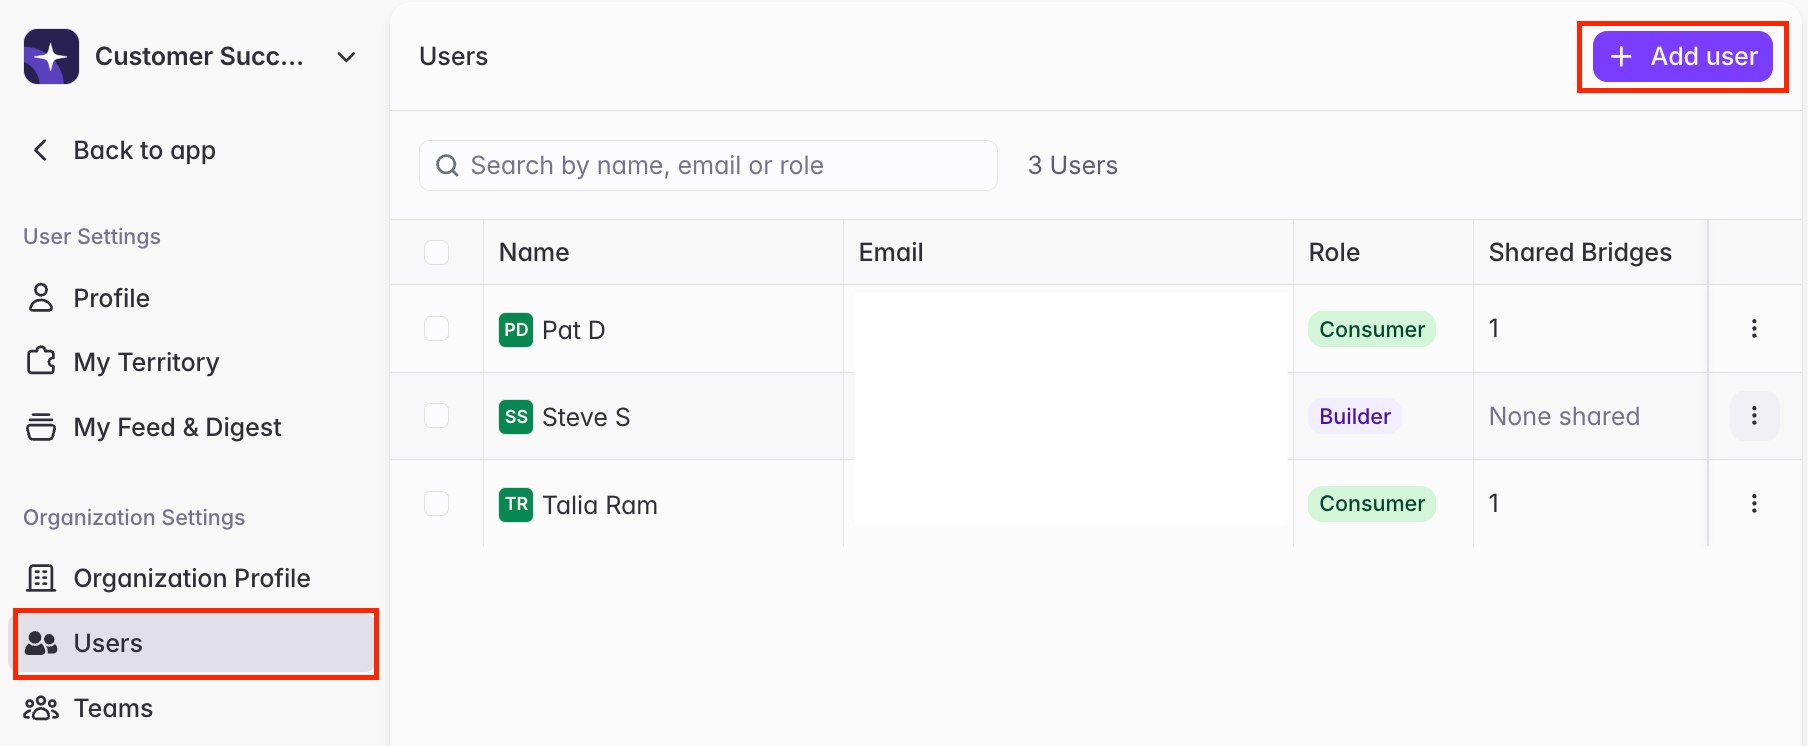
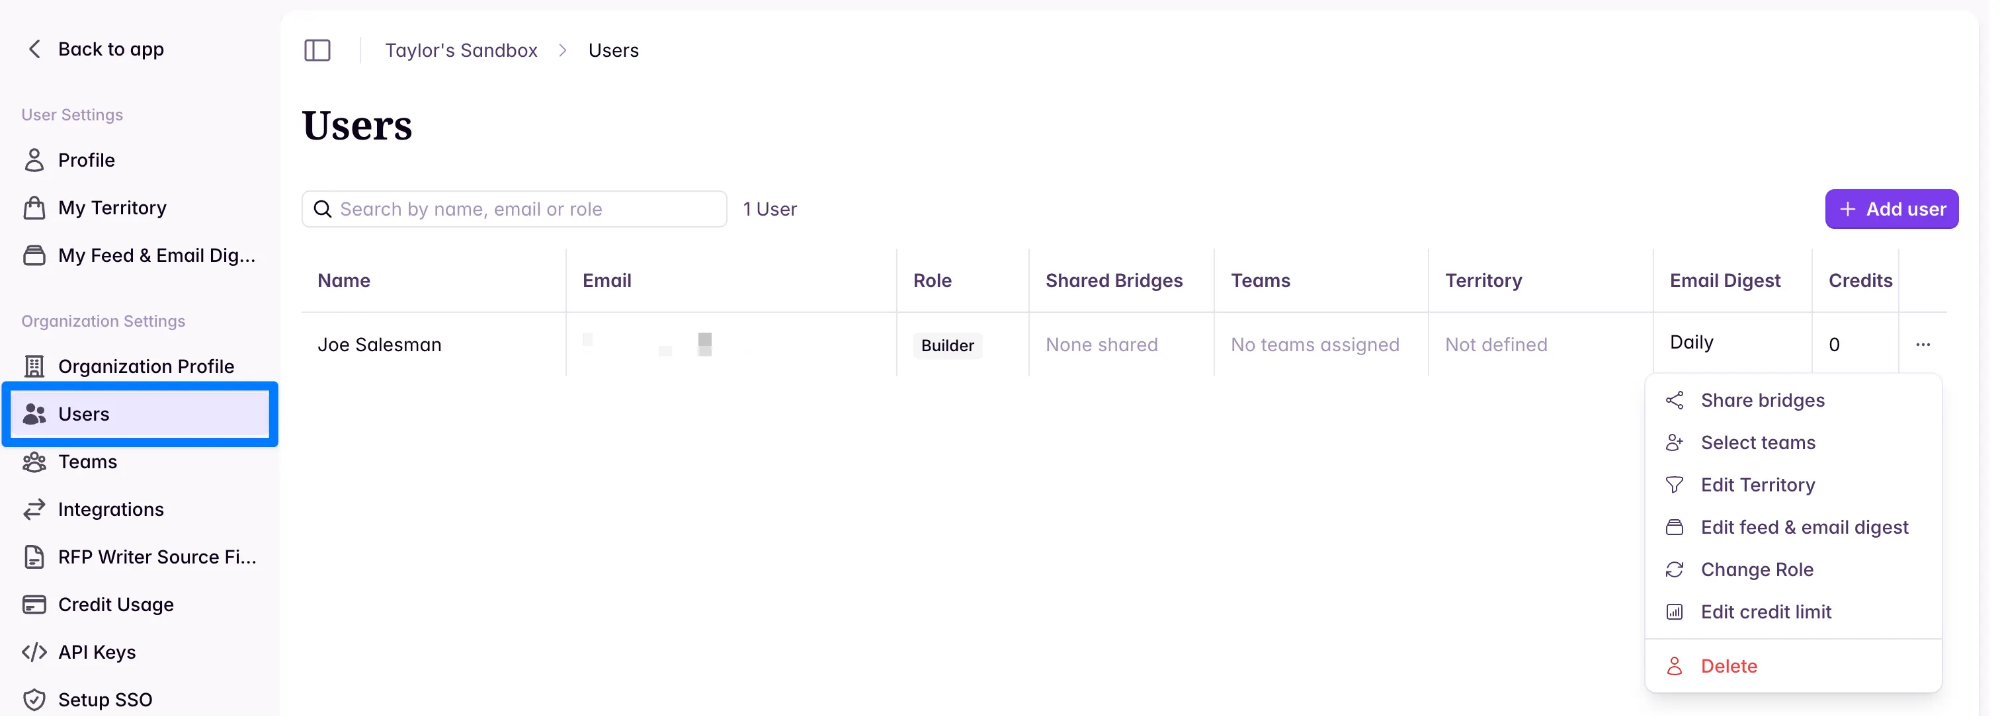 Click **+ Add User**, then specify the user's **Role**.
 ## Set up teams
Group users into teams so Bridges can be shared with everyone at once — all team members automatically get access to any Bridge shared with their team.
Go to **Settings → Teams**.
## Set up teams
Group users into teams so Bridges can be shared with everyone at once — all team members automatically get access to any Bridge shared with their team.
Go to **Settings → Teams**.
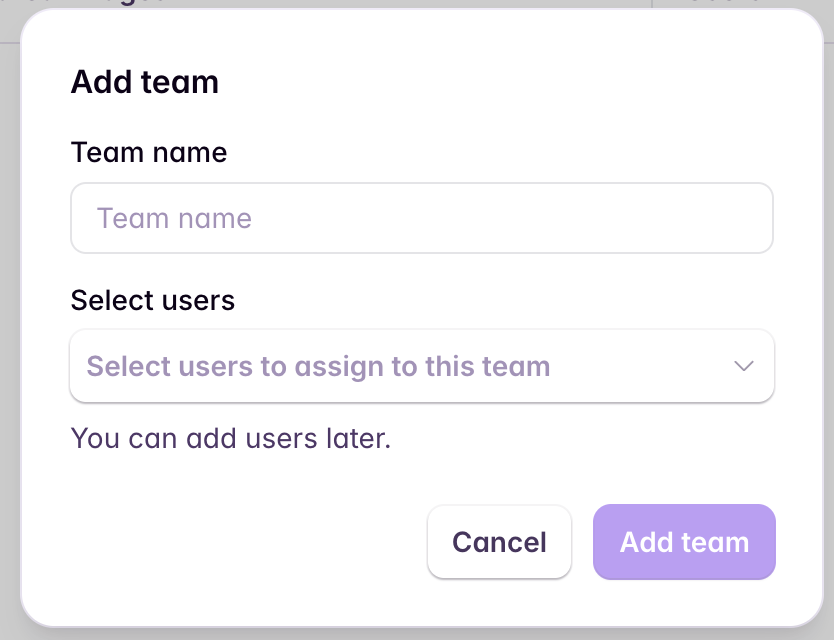
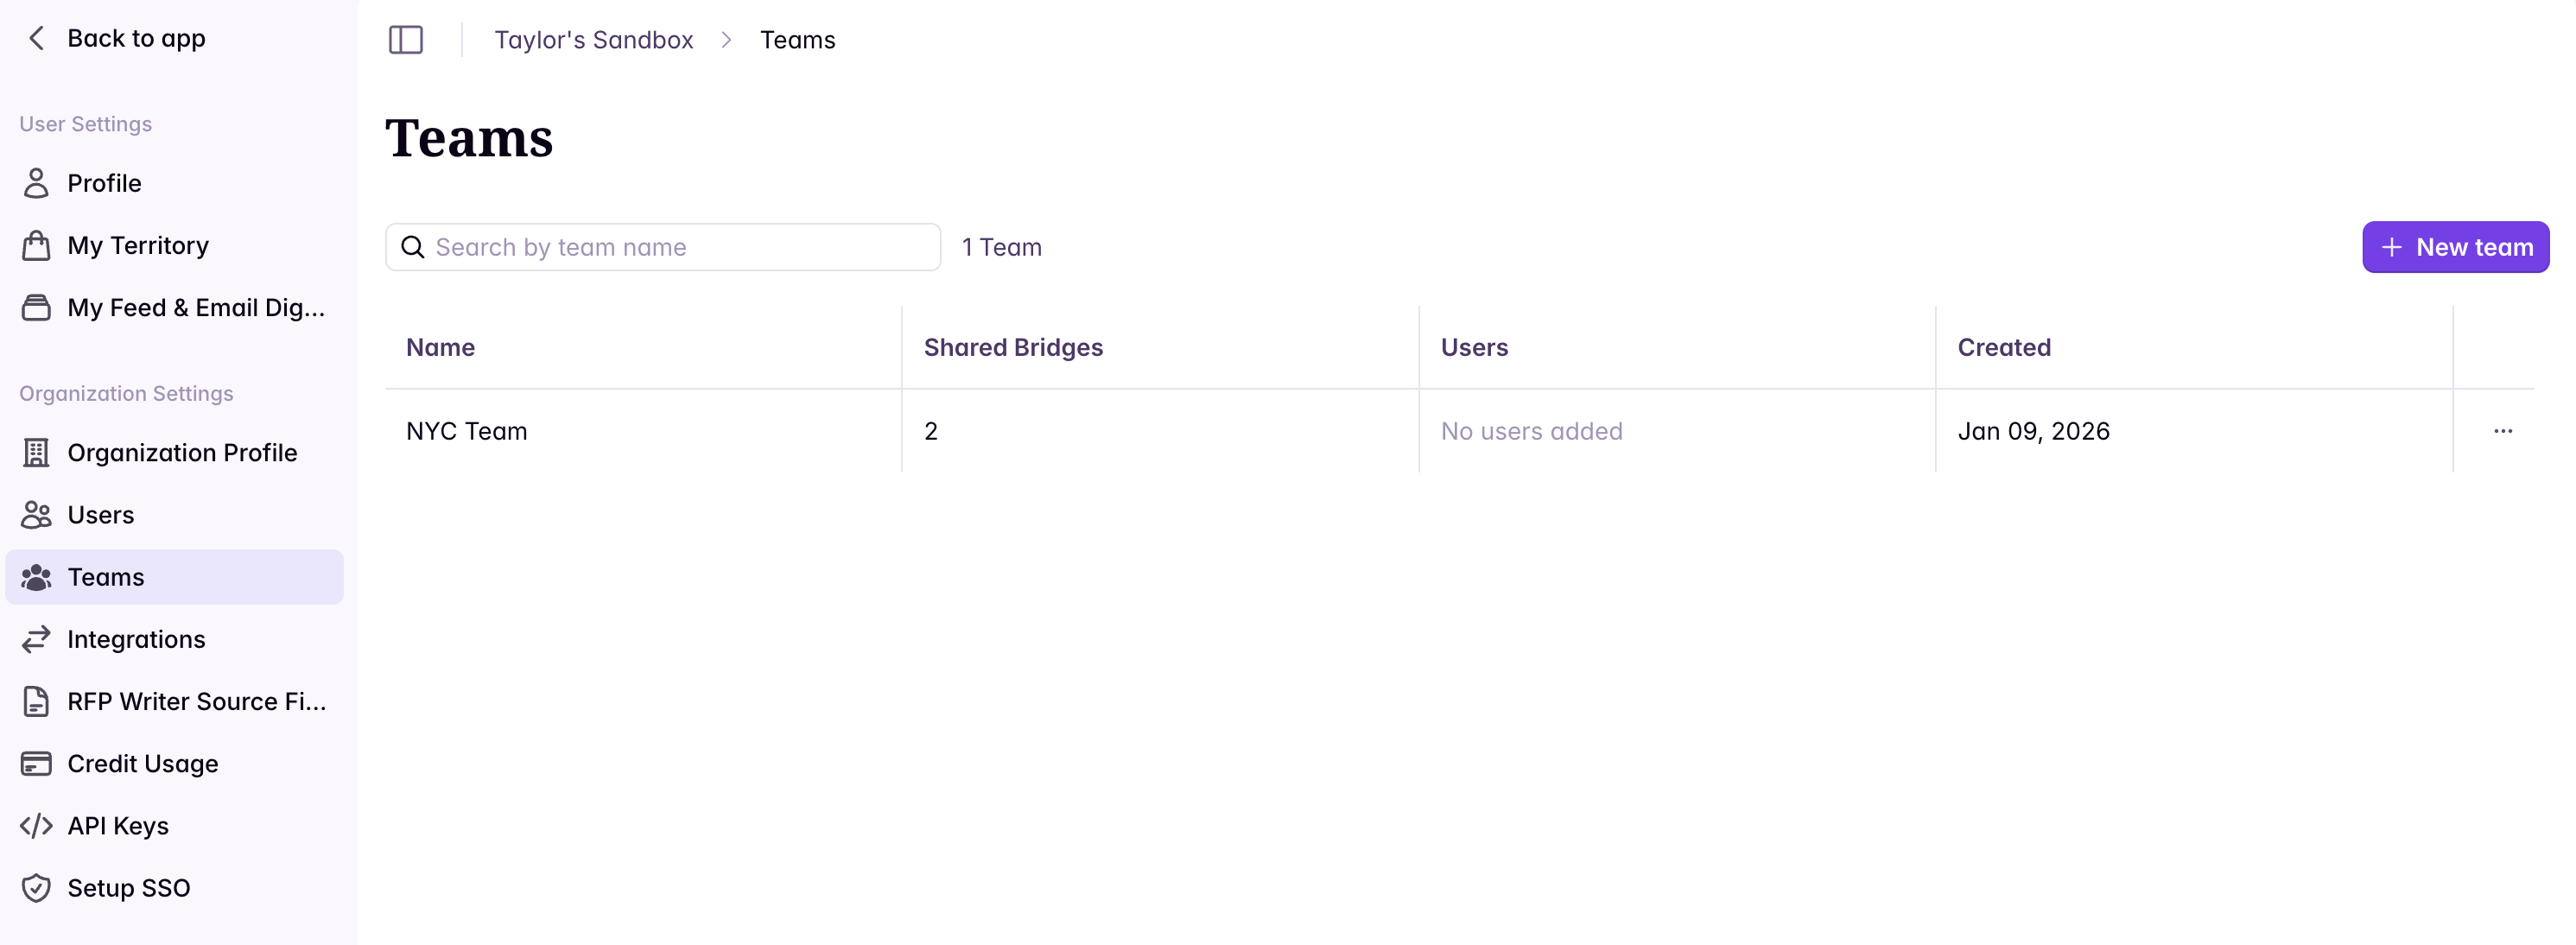 Click **+ New Team**, then enter a team name and add users.
 ## Configure a user's feed
View and adjust any user's Bridge subscriptions and email digest settings.
Go to **Settings → Organization Settings → Users**.
Click the **⋯** menu next to a user → **Configure feed and digest**.
Toggle Bridges on or off and set the user's email digest cadence (daily or weekly).
## Log in as a user
Log in as any Builder or Consumer in your organization to see Starbridge exactly as they do. Use it to **validate a user's setup** — confirm they're subscribed to the right Bridges and getting the right digests after you configure their feed — or to **troubleshoot** an issue a user reports.
Go to **Settings → Organization Settings → Users**.
Click the **⋯** menu next to the user → **Log in as user**. You'll be taken into Starbridge acting as that user.
Click **Exit** in the banner to end the session and return to your settings.
While you're in a session, a banner at the top of the screen reads **"You are signed in as \[user's name]"** so it's always clear whose account you're acting in.
Sessions expire automatically after **20 minutes**. A countdown appears in the final few minutes before you're returned to your own settings.
Only Admins can log in as other users in their organization.
## Related articles
See the full admin checklist demo'd in the platform.
Once users are set up, learn how to share Bridges with your team.
## Configure a user's feed
View and adjust any user's Bridge subscriptions and email digest settings.
Go to **Settings → Organization Settings → Users**.
Click the **⋯** menu next to a user → **Configure feed and digest**.
Toggle Bridges on or off and set the user's email digest cadence (daily or weekly).
## Log in as a user
Log in as any Builder or Consumer in your organization to see Starbridge exactly as they do. Use it to **validate a user's setup** — confirm they're subscribed to the right Bridges and getting the right digests after you configure their feed — or to **troubleshoot** an issue a user reports.
Go to **Settings → Organization Settings → Users**.
Click the **⋯** menu next to the user → **Log in as user**. You'll be taken into Starbridge acting as that user.
Click **Exit** in the banner to end the session and return to your settings.
While you're in a session, a banner at the top of the screen reads **"You are signed in as \[user's name]"** so it's always clear whose account you're acting in.
Sessions expire automatically after **20 minutes**. A countdown appears in the final few minutes before you're returned to your own settings.
Only Admins can log in as other users in their organization.
## Related articles
See the full admin checklist demo'd in the platform.
Once users are set up, learn how to share Bridges with your team.