

Sequences is in beta. The features and packaging on this page may change before general availability. To get access or scale your usage, reach out to your CSA.
Bridges without contacts, buyer lists, and CSV uploads aren’t supported as Sequence sources in the beta.
Building a Sequence
Only Builders and Admins can create Sequences during the beta; Consumers don’t see the Sequences tab but can continue to send one-off emails from Ask Starbridge and feed cards.
- Recommended sequence - Starbridge suggests Sequences tailored to your org based on your organizational business context and existing Bridges, with messages pre-generated for every touchpoint.

- Build from scratch - Build your own Sequence, starting from our available templates. To do so, click + New sequence on the top right corner of the Sequences tab.
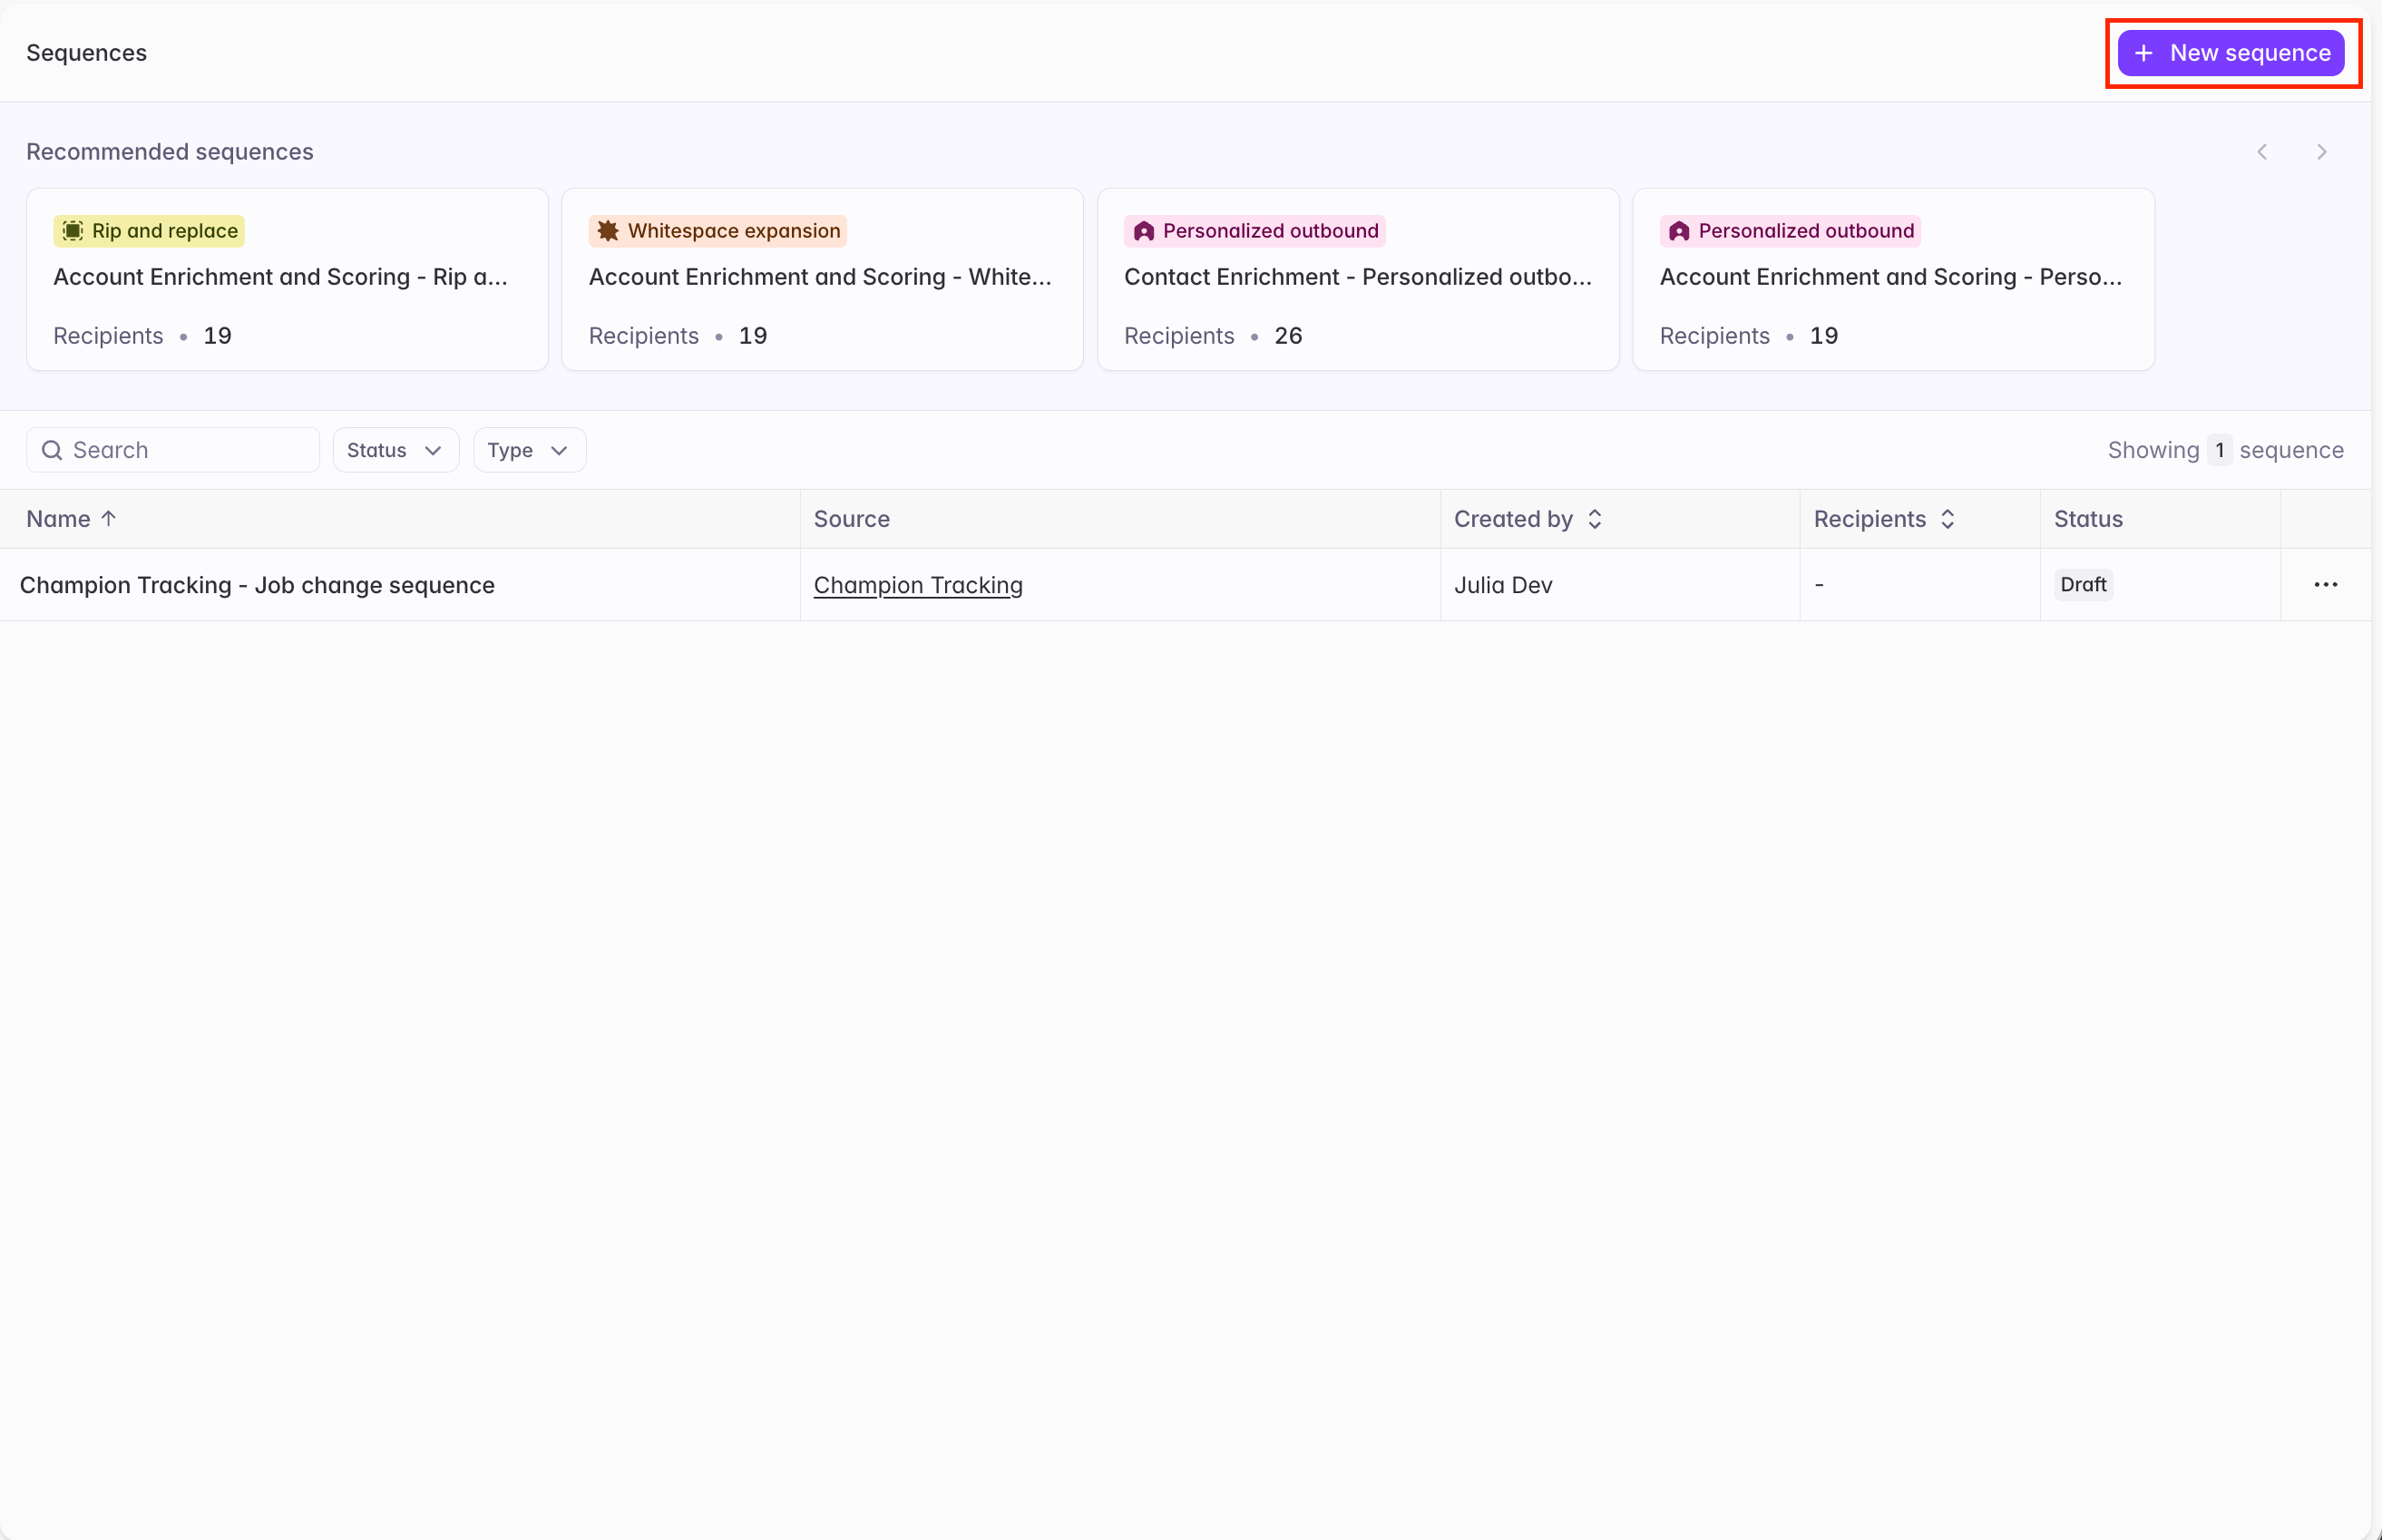
How to create a Sequence from scratch
1
Choose a template
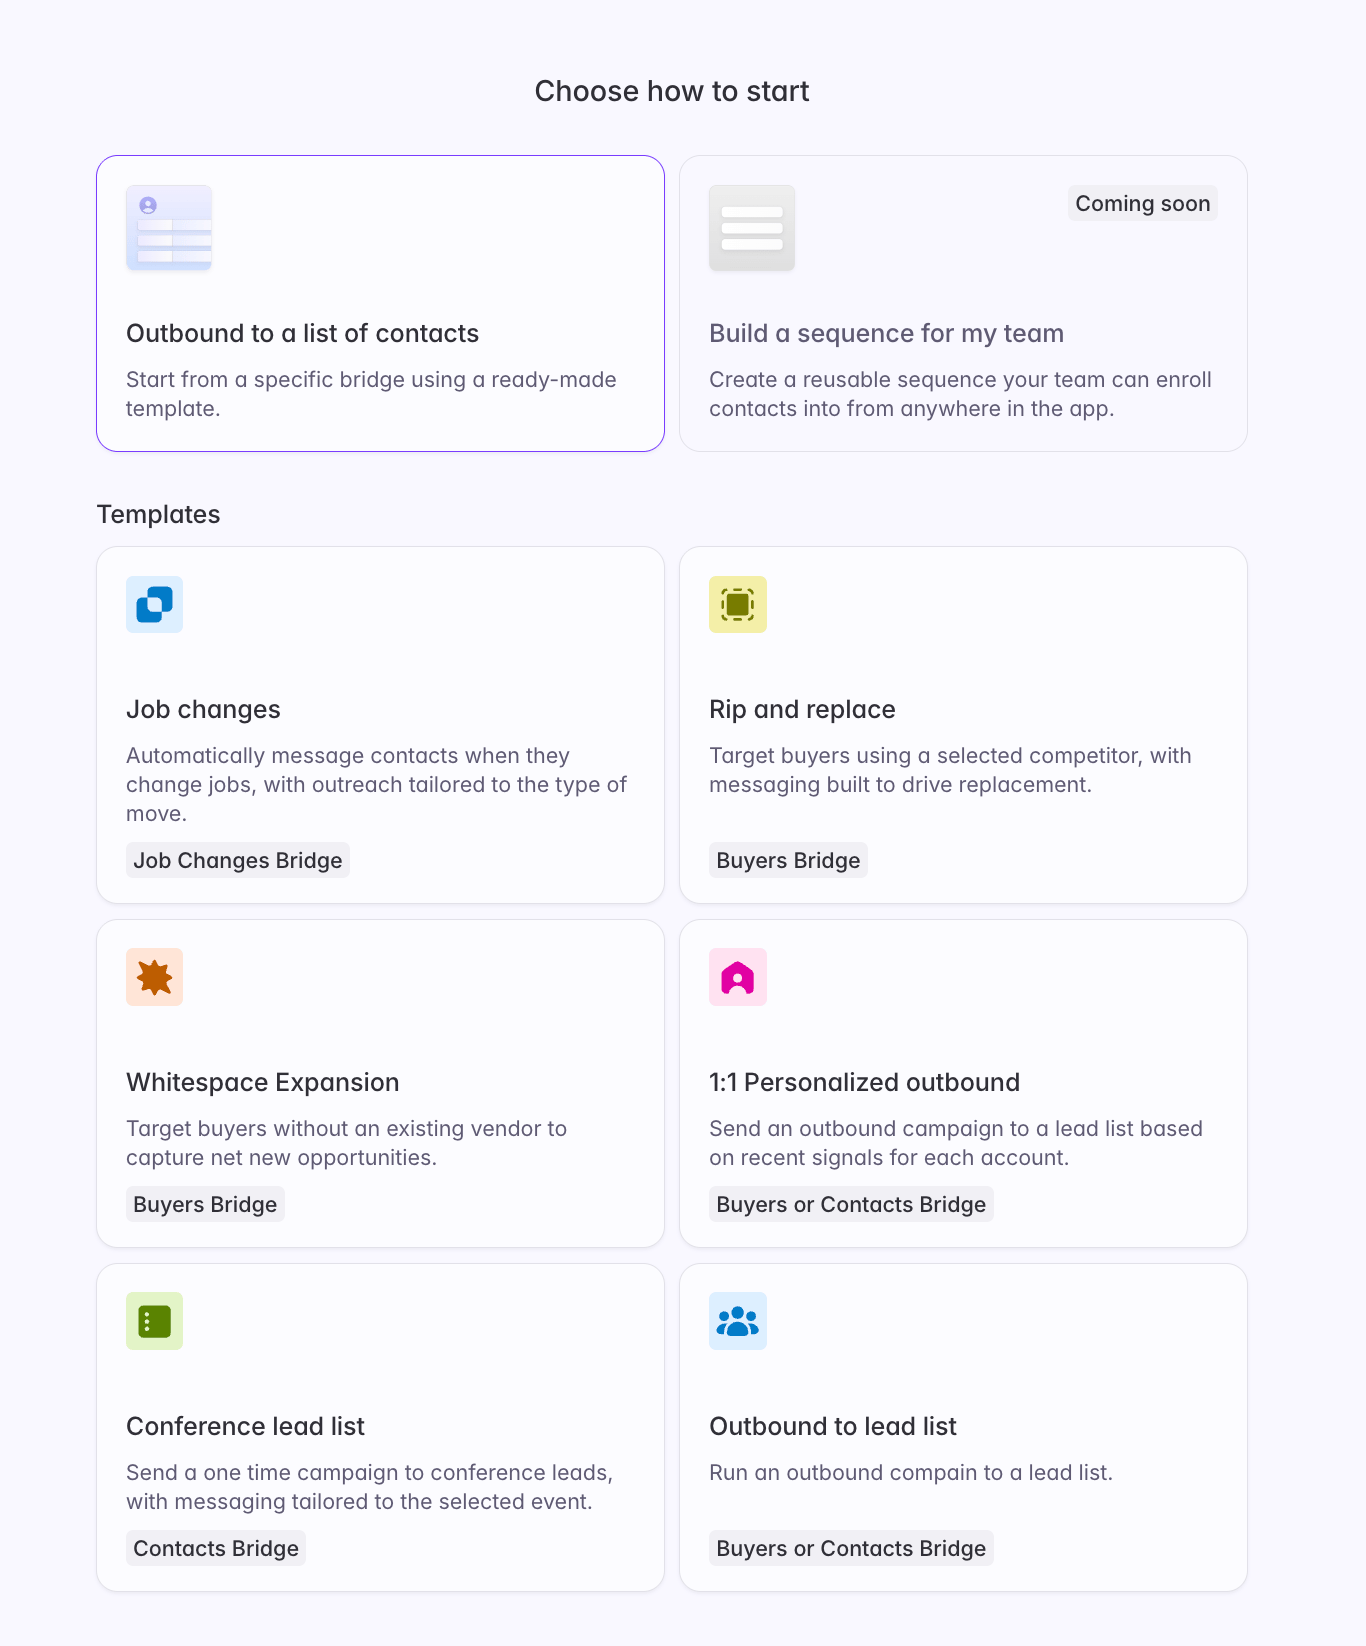
2
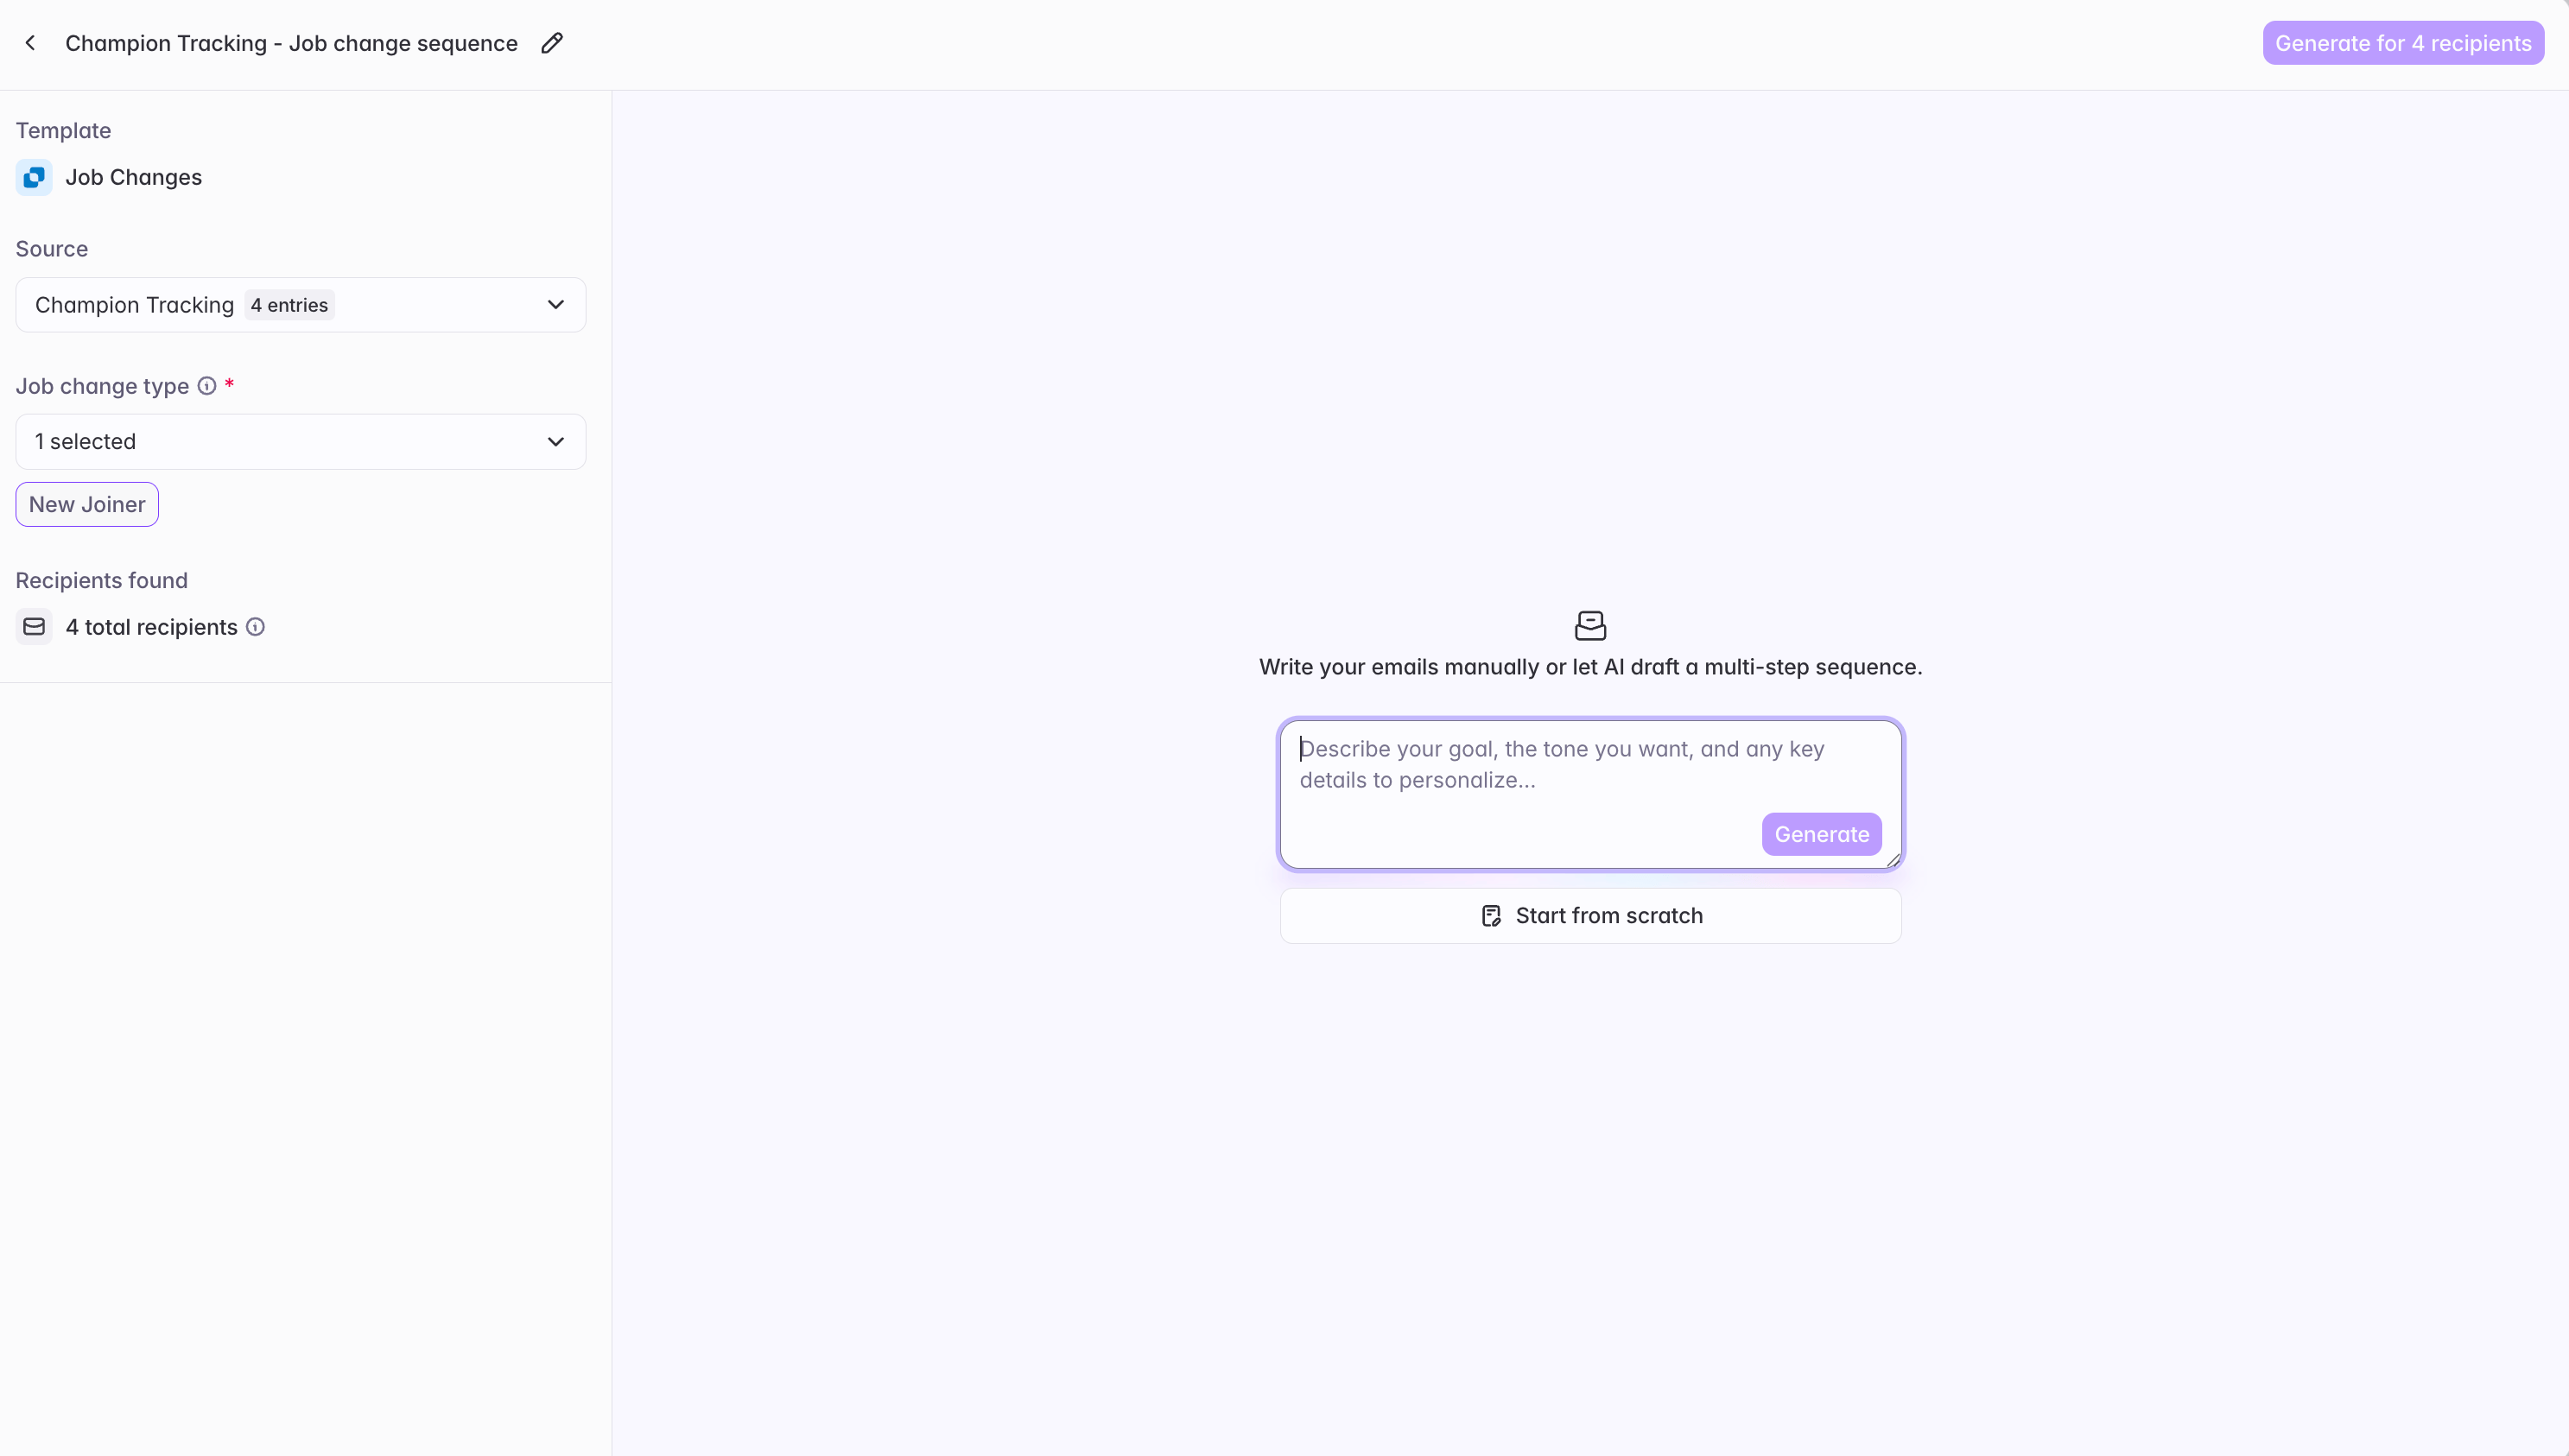
Name it and choose which Bridge to use as a data source
Give your Sequence a unique name, then select a source Bridge.Depending on the Bridge and Sequence template you choose, you may have to provide additional data such as which vendor for a rip & replace campaign, what job changes type for a job changes sequence, etc.You’ll also have to select a contact column (and optionally, a backup contact column) if you choose a bridge with more than one contact column so Starbridge knows which contact to prioritize per account.
3
Create your messages
Build message steps in one of two ways:
-
Generate from a prompt - Describe the Sequence you want, ideally including your desired number of steps and wait time between steps. Starbridge can generate an entire sequence for you, including the copy for each email step.
-
Build steps manually - Add each step manually, and select your wait period. For each step you add manually, you can choose to either write content by hand, or write a short prompt so Starbridge can generate that step’s messaging for you.
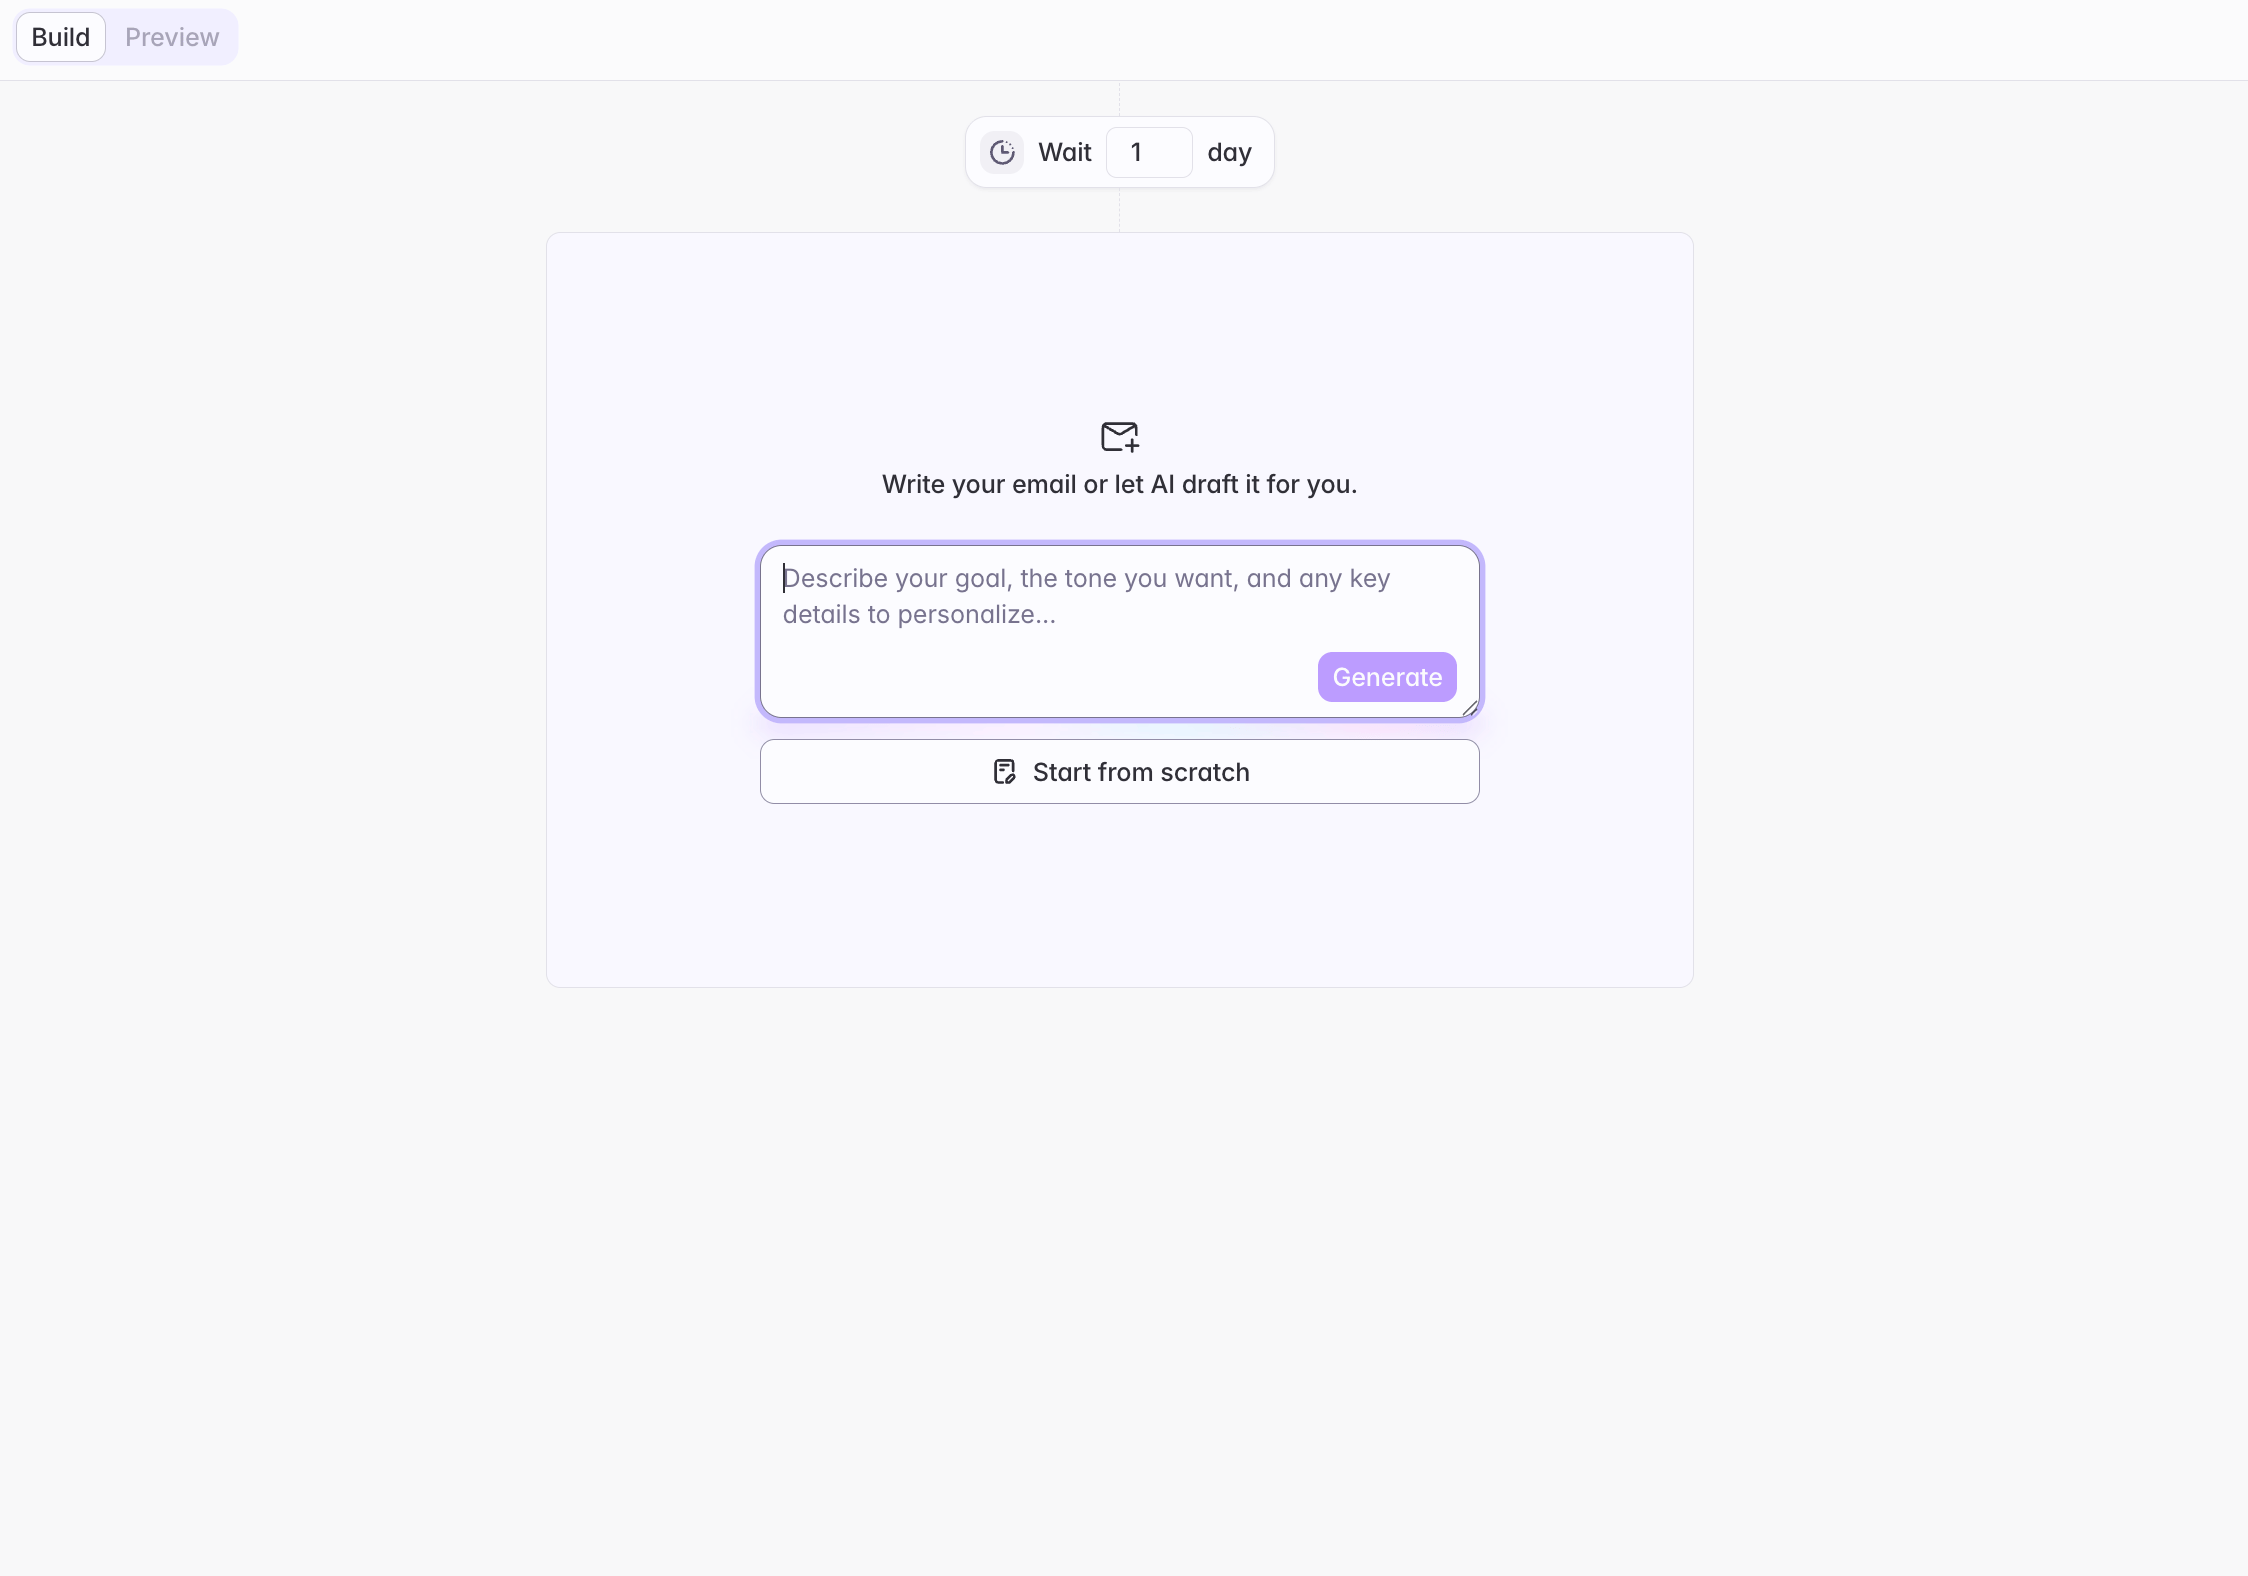
For each email step, you can include AI Personalized Snippets, variables, and configurable fallback for any variable.
4
Preview, then generate
Preview at least one contact before generating the full Sequence; you can preview for up to five random contacts. Preview shows every message with variables and snippets fully resolved.
When you’re satisfied, generate the Sequence for all contacts.
When you’re satisfied, generate the Sequence for all contacts.
Editing a generated Sequence
You can edit a generated Sequence with control over how changes apply:- Edit the structure (steps or cadence) and choose to regenerate messages for all existing contacts or future contacts only
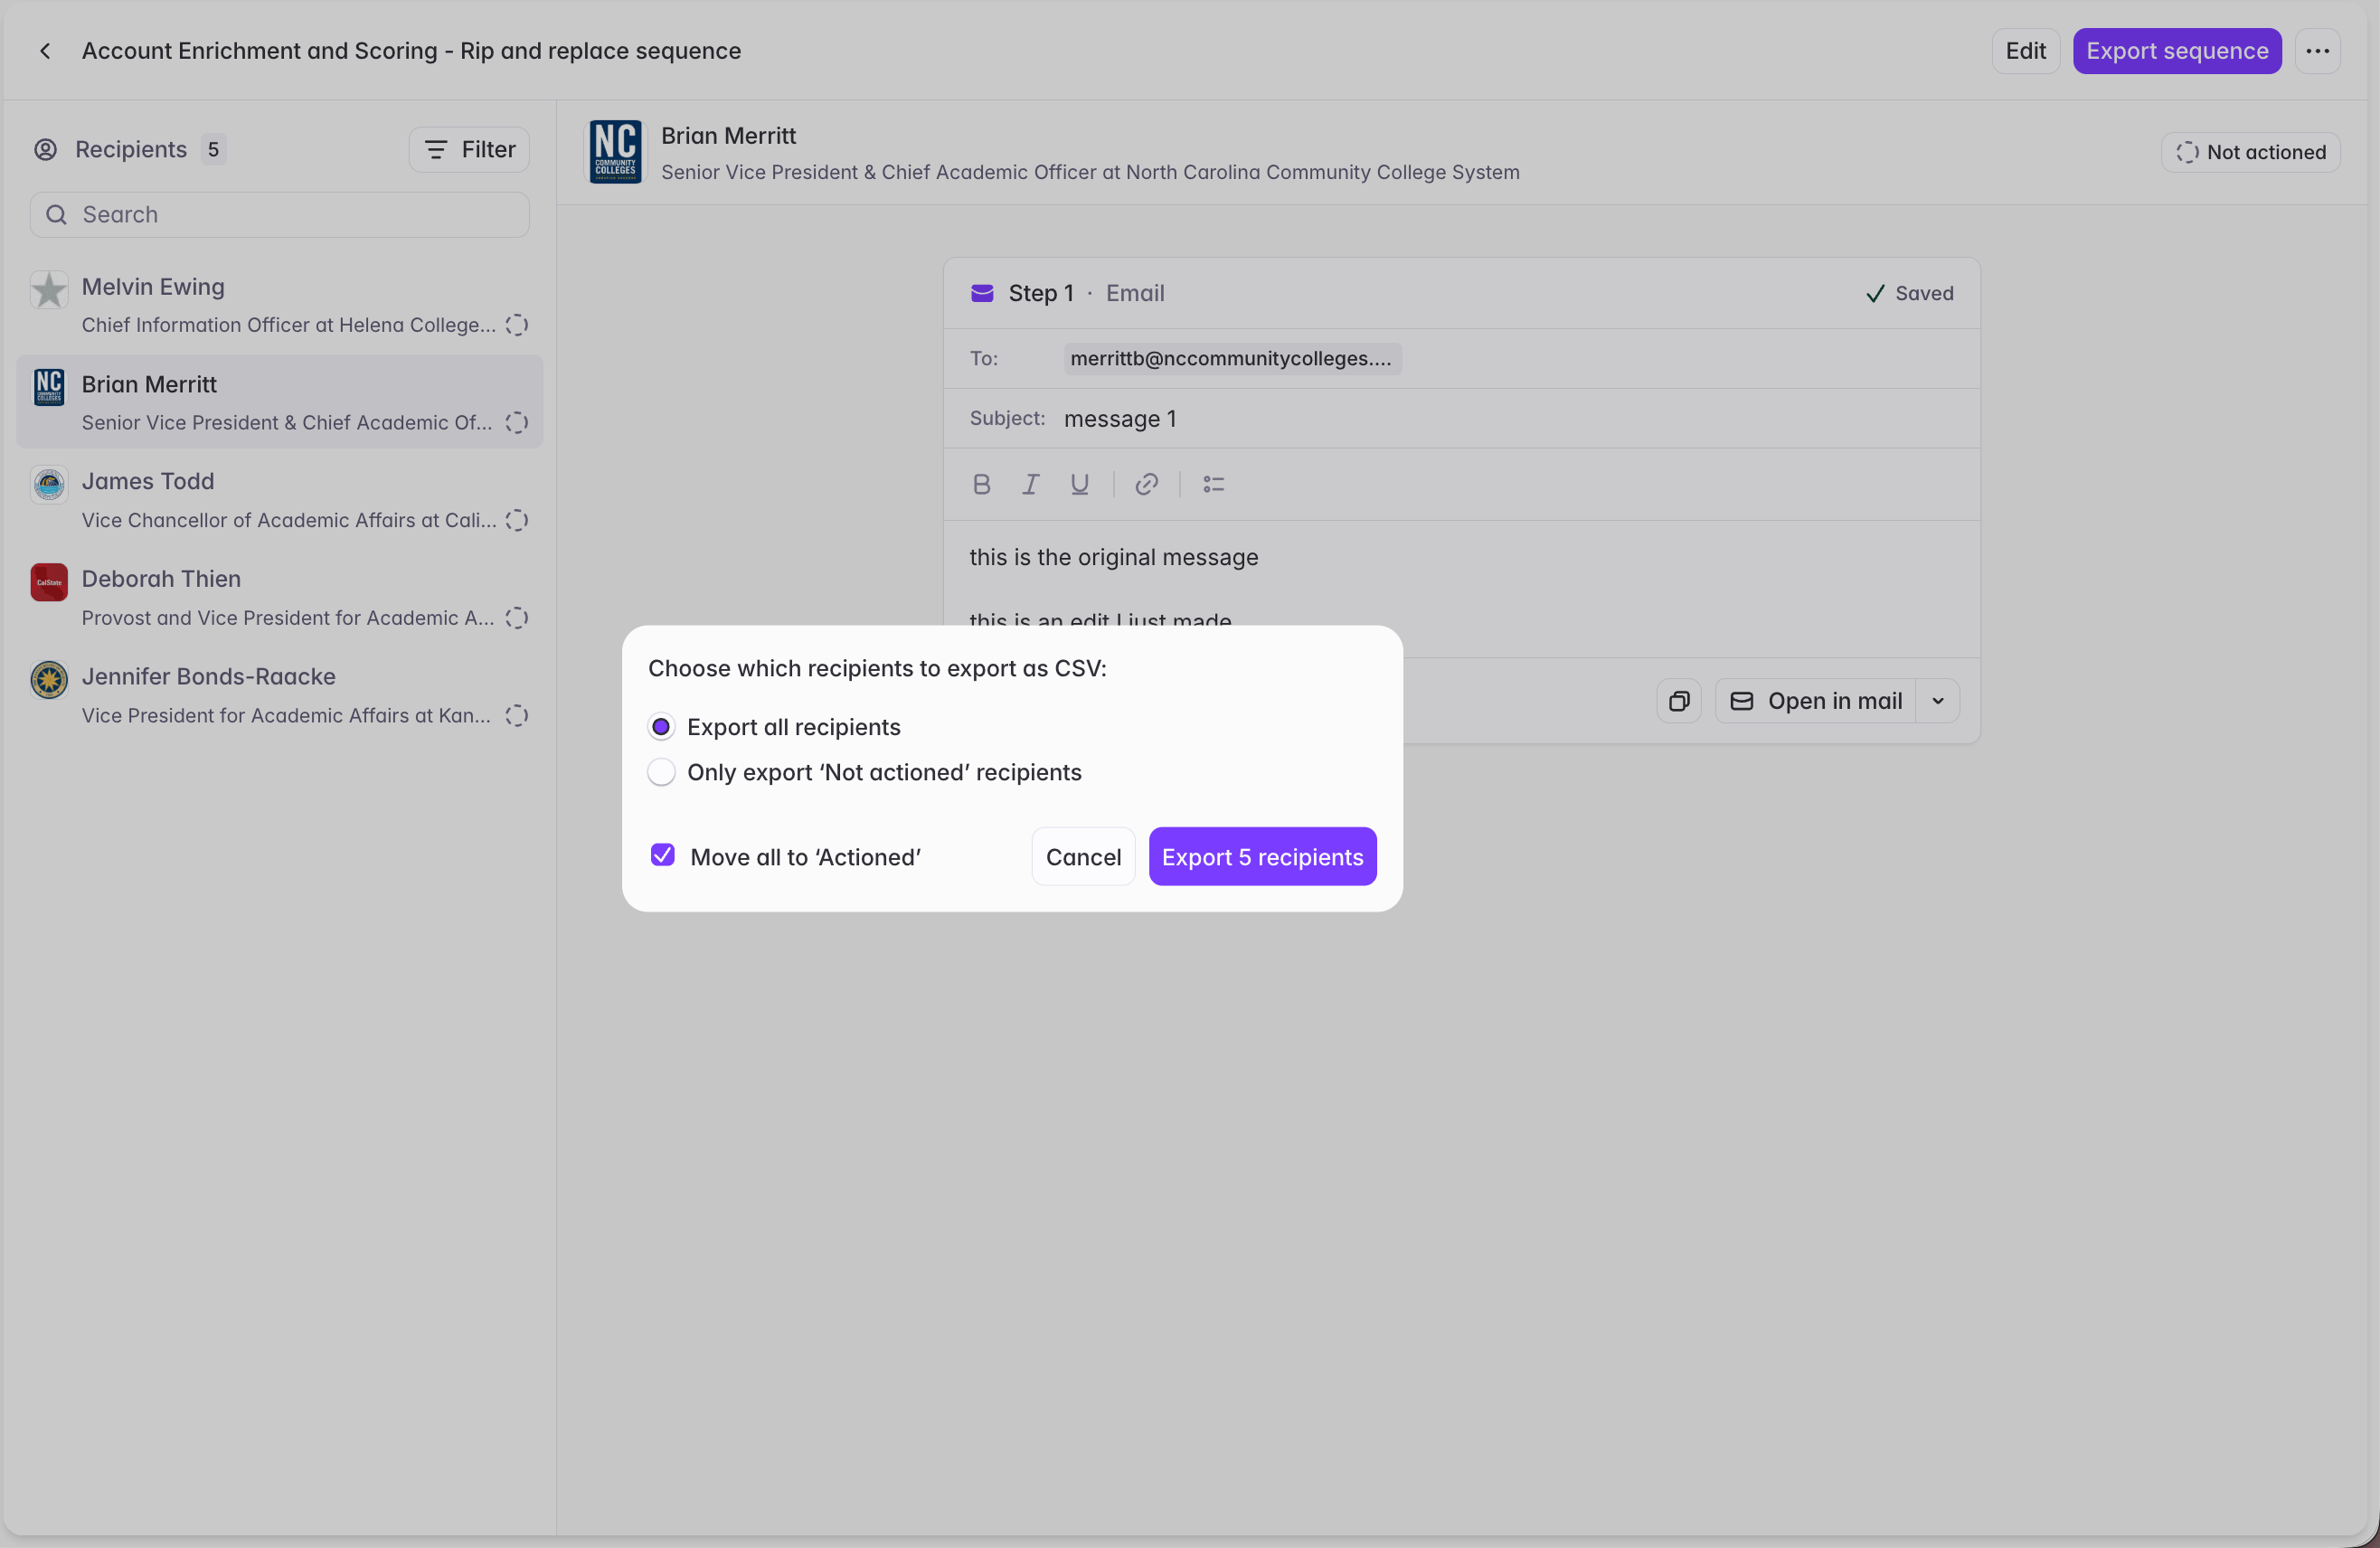
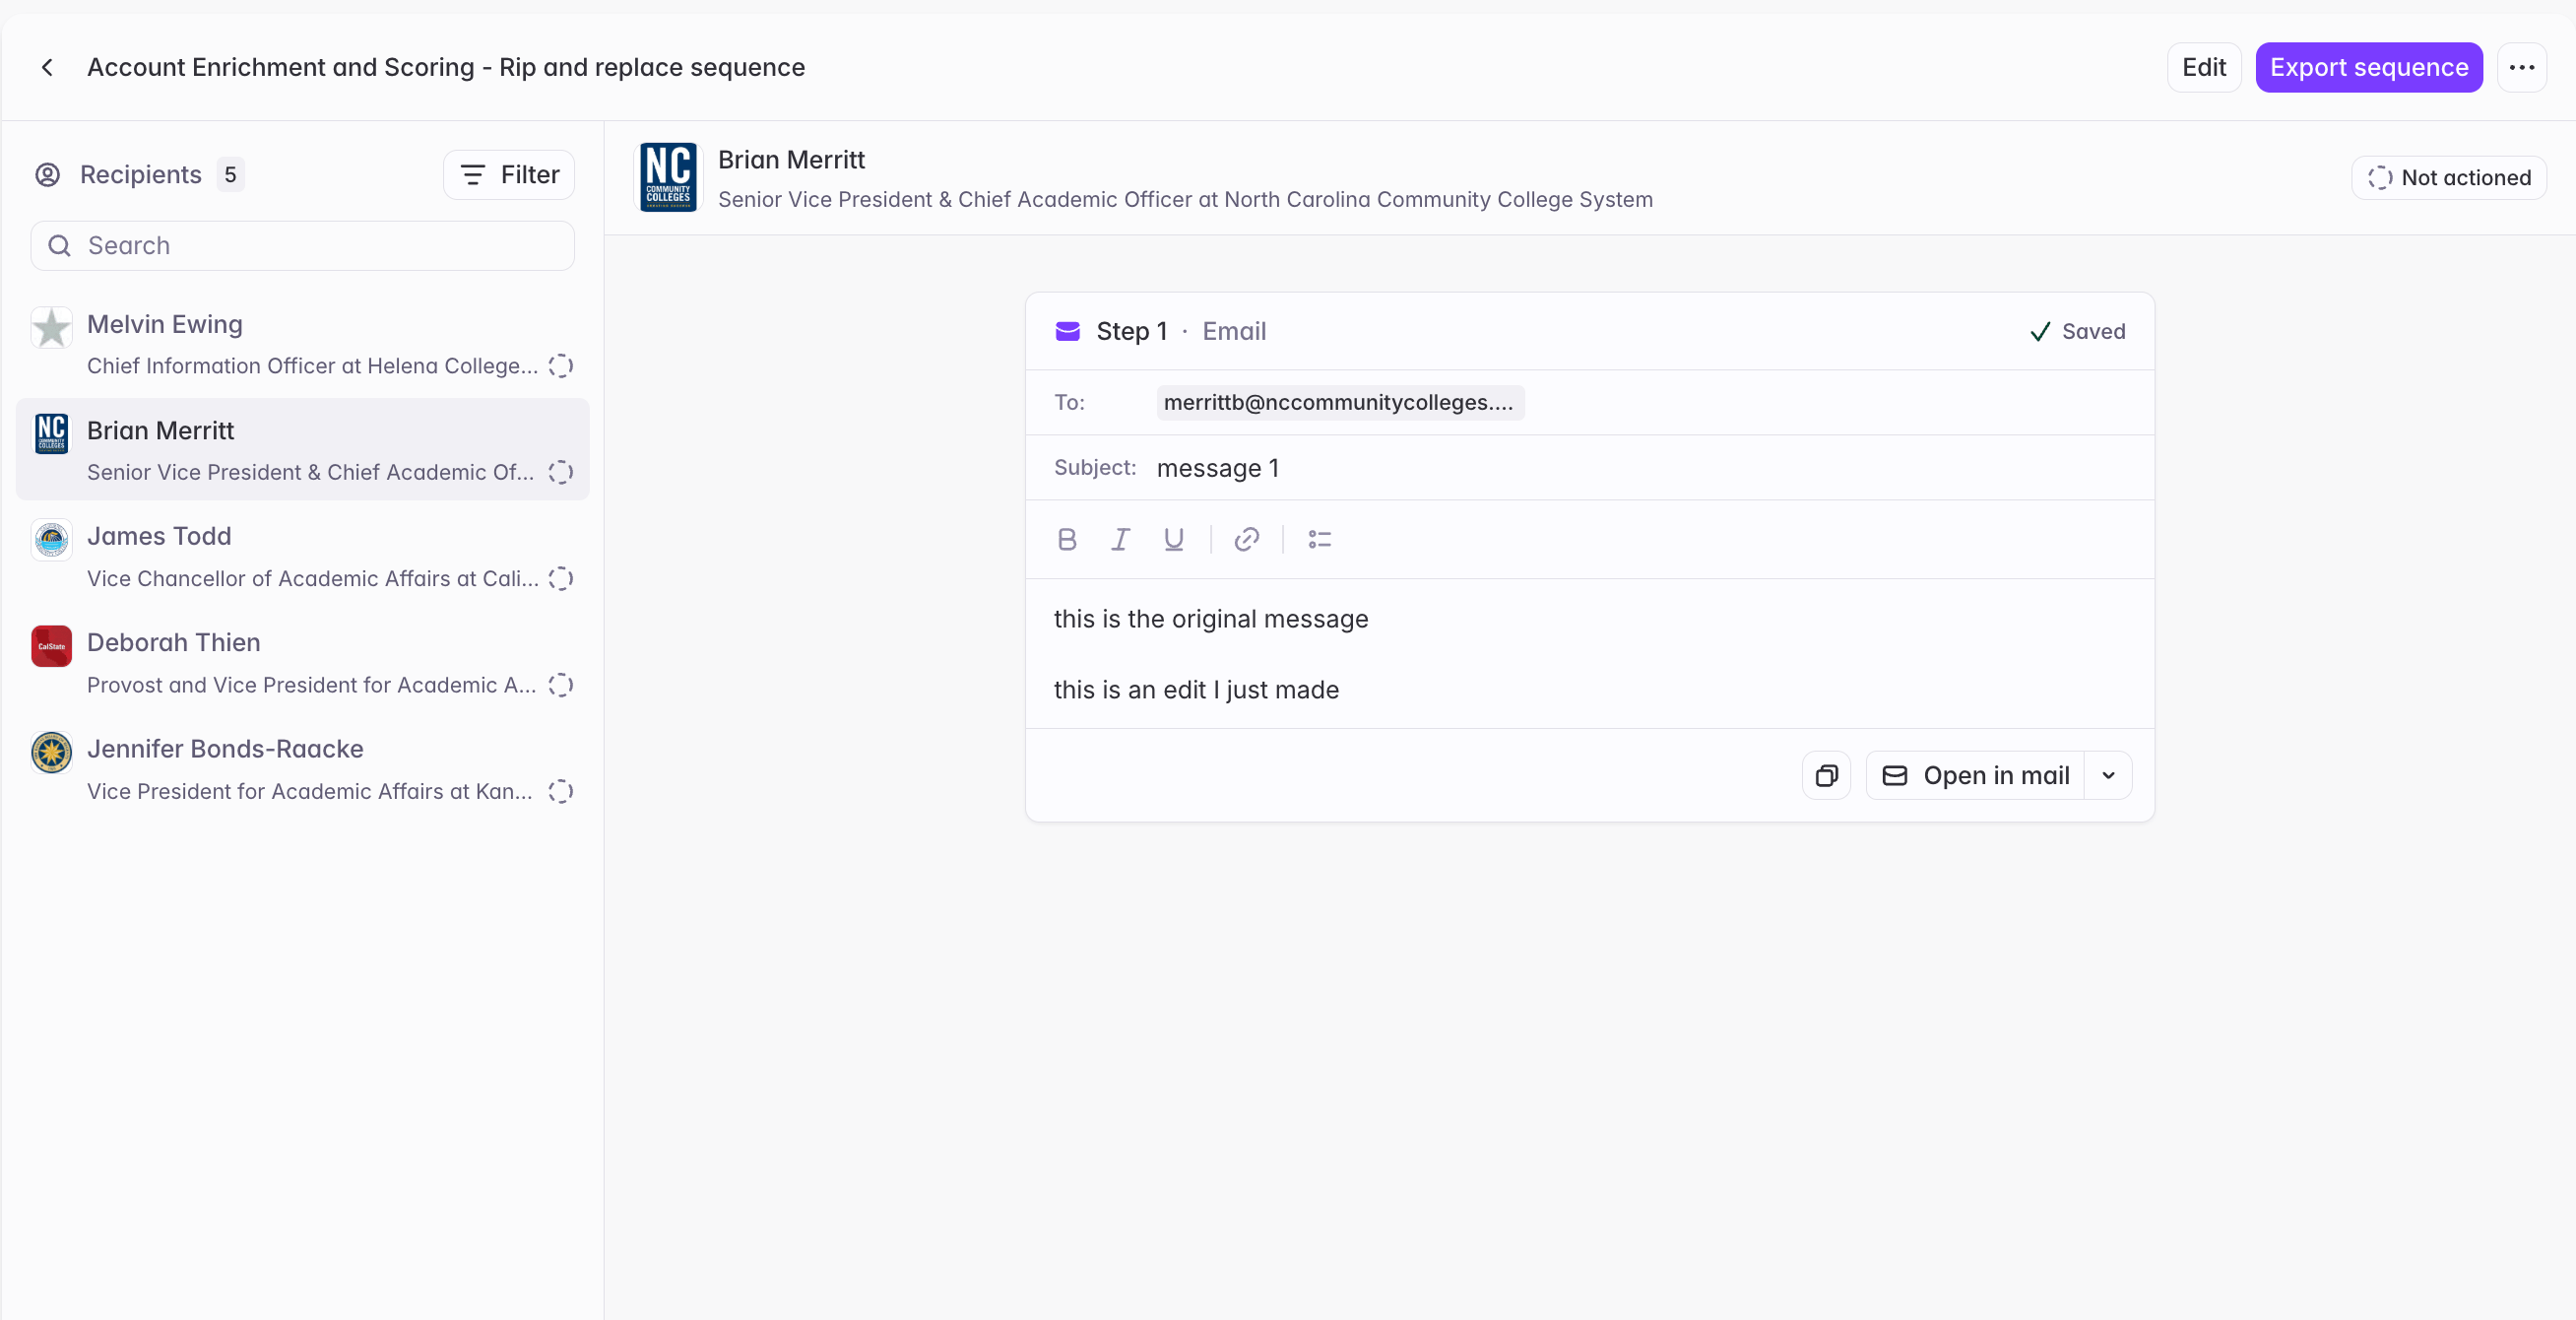
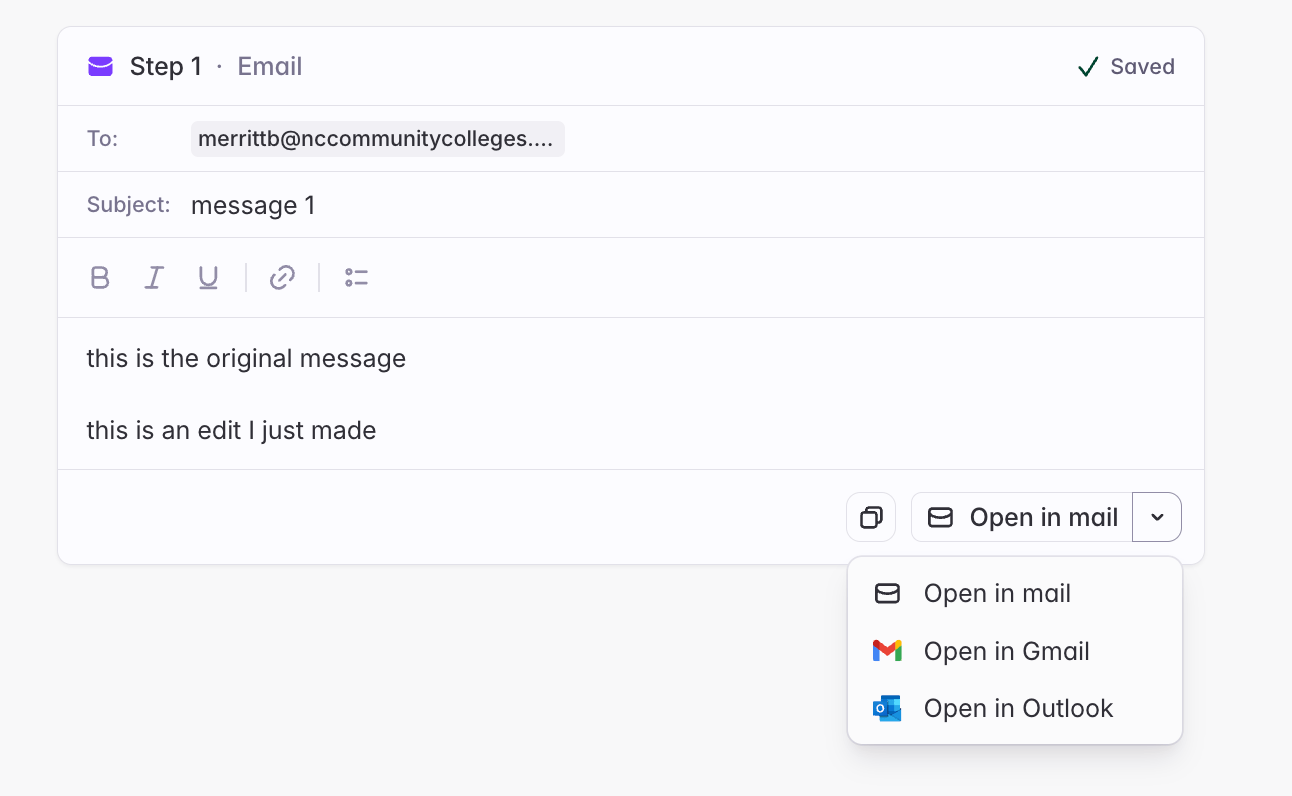
- Edit an individual message on the generated sequence for one contact, without affecting others or future generation - to do so, click into any generated message, type your changes in, and you’ll see an auto-saved indicator on the top right of the composer box.
Sending sequences
There are 3 options for sending Sequences generated in Starbridge:- Option 1 (recommended): Sending directly from Starbridge (see section below)
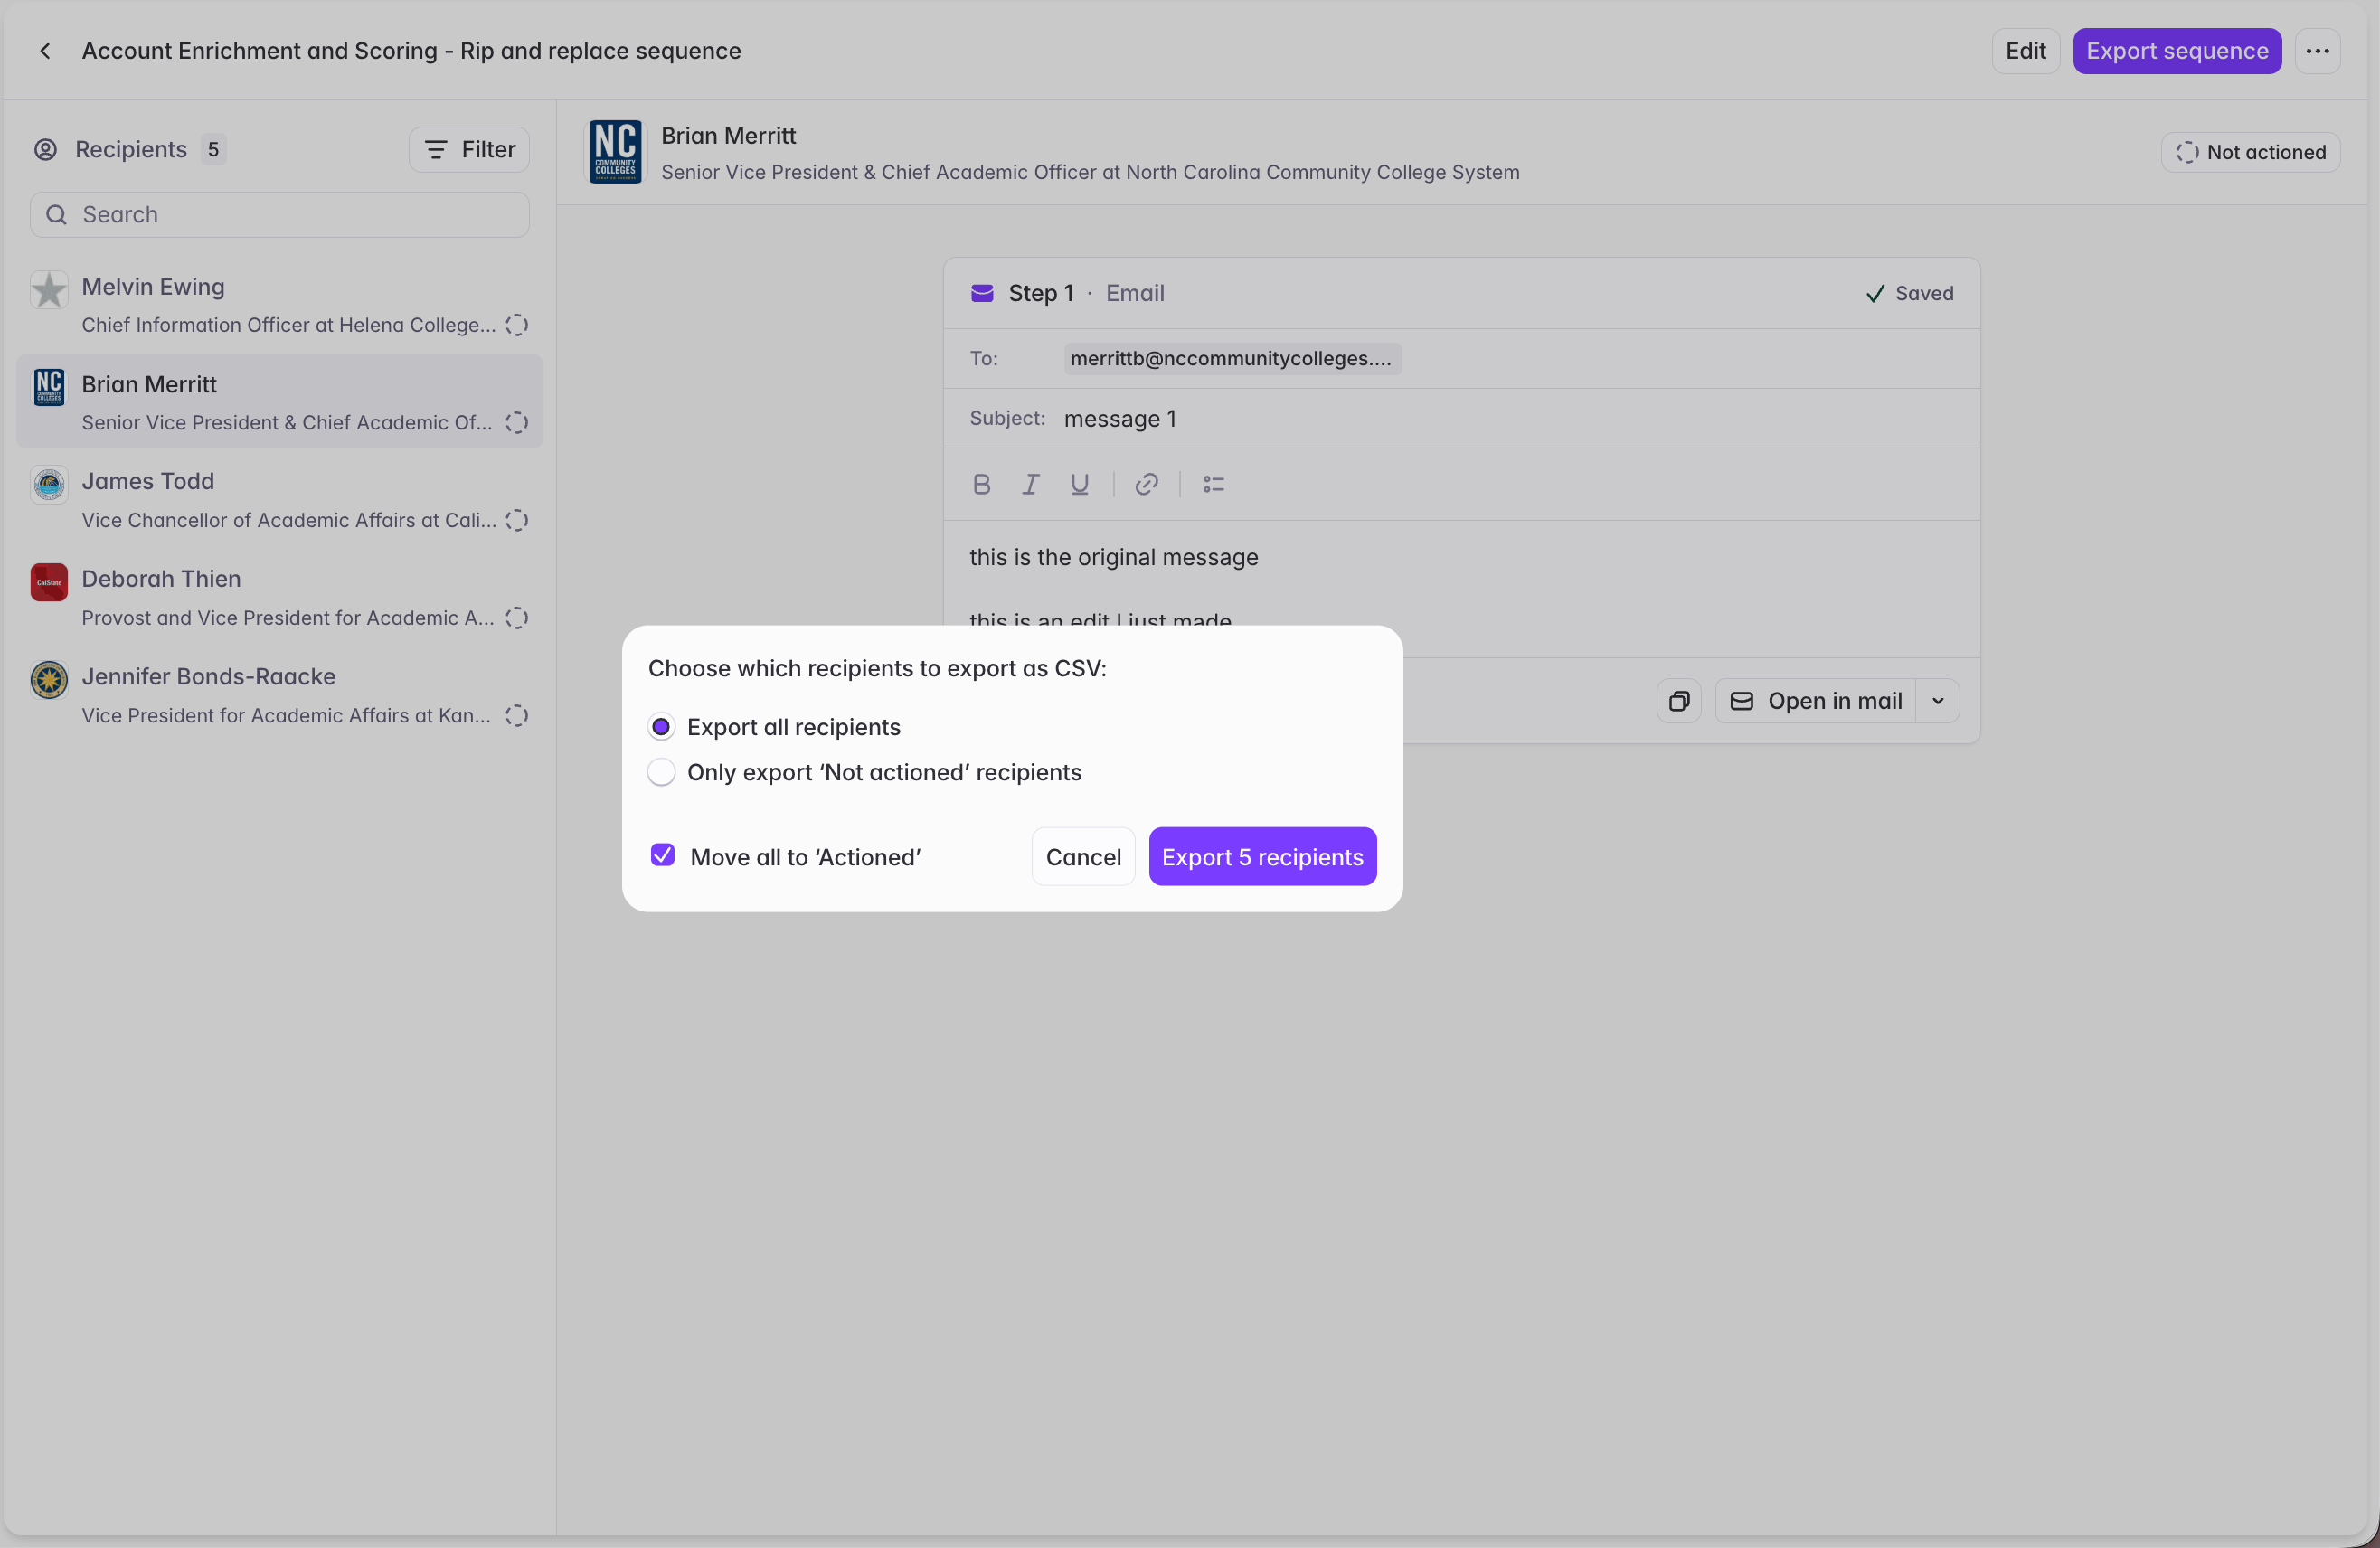
- Option 2: Exporting as a CSV, and importing into an existing Sequencer. You can select which contacts you want to export by contact status.
- Option 3: Send each message via Starbridge’s “Open in mail” functionality
Sending directly from Starbridge
The beta sends Sequence emails from your own connected inboxes - no separate sequencer required. There’s no managed-domain or warm-up infrastructure yet, so sending is currently built for targeted, throttled volume.How to connect inboxes
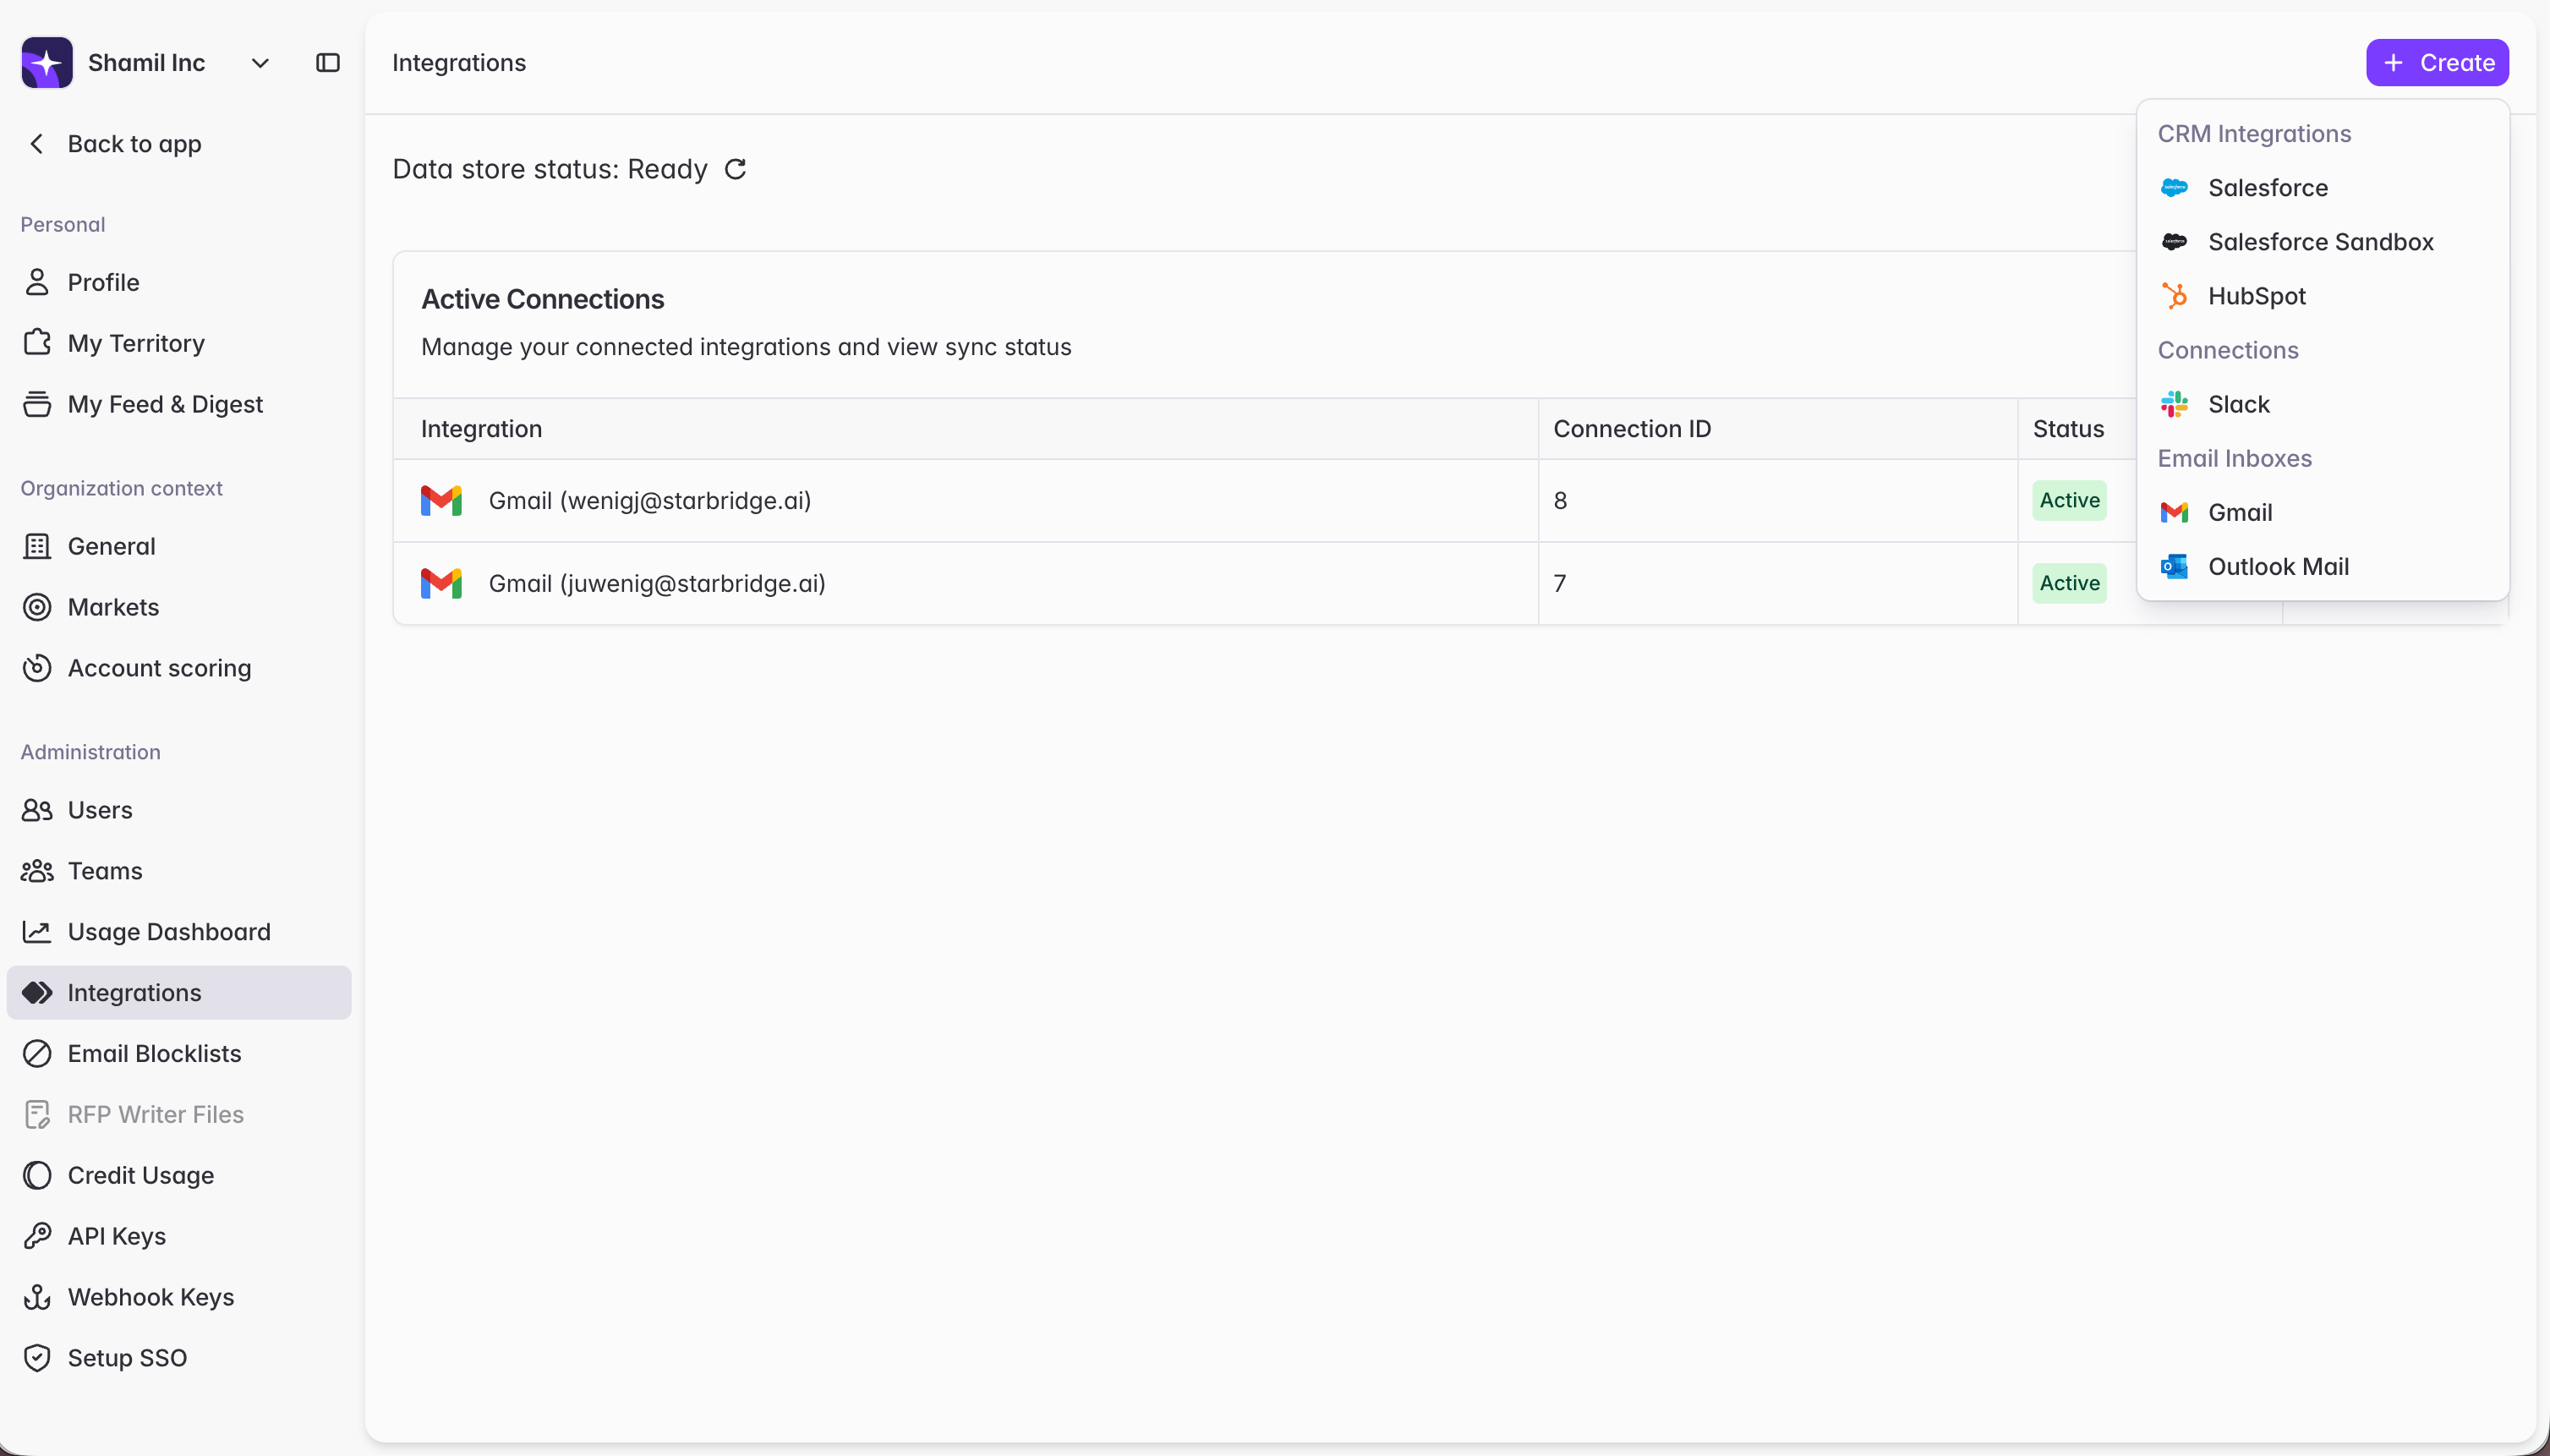
There are two ways of connecting inboxes for Sequences:- Connecting inboxes via Integration Settings: Set up inboxes that are available for use across all Sequences
- Connecting inboxes via a specific Sequence: Set up an inbox to send a specific Sequence from. Inboxes configured in the Sequence flow will then be available to use for other Sequences as well
You must be an admin to connect inboxes via Integration Settings. Both builders and admins can connect inboxes directly from a Sequence.
Connecting an inbox from Integration settings
1
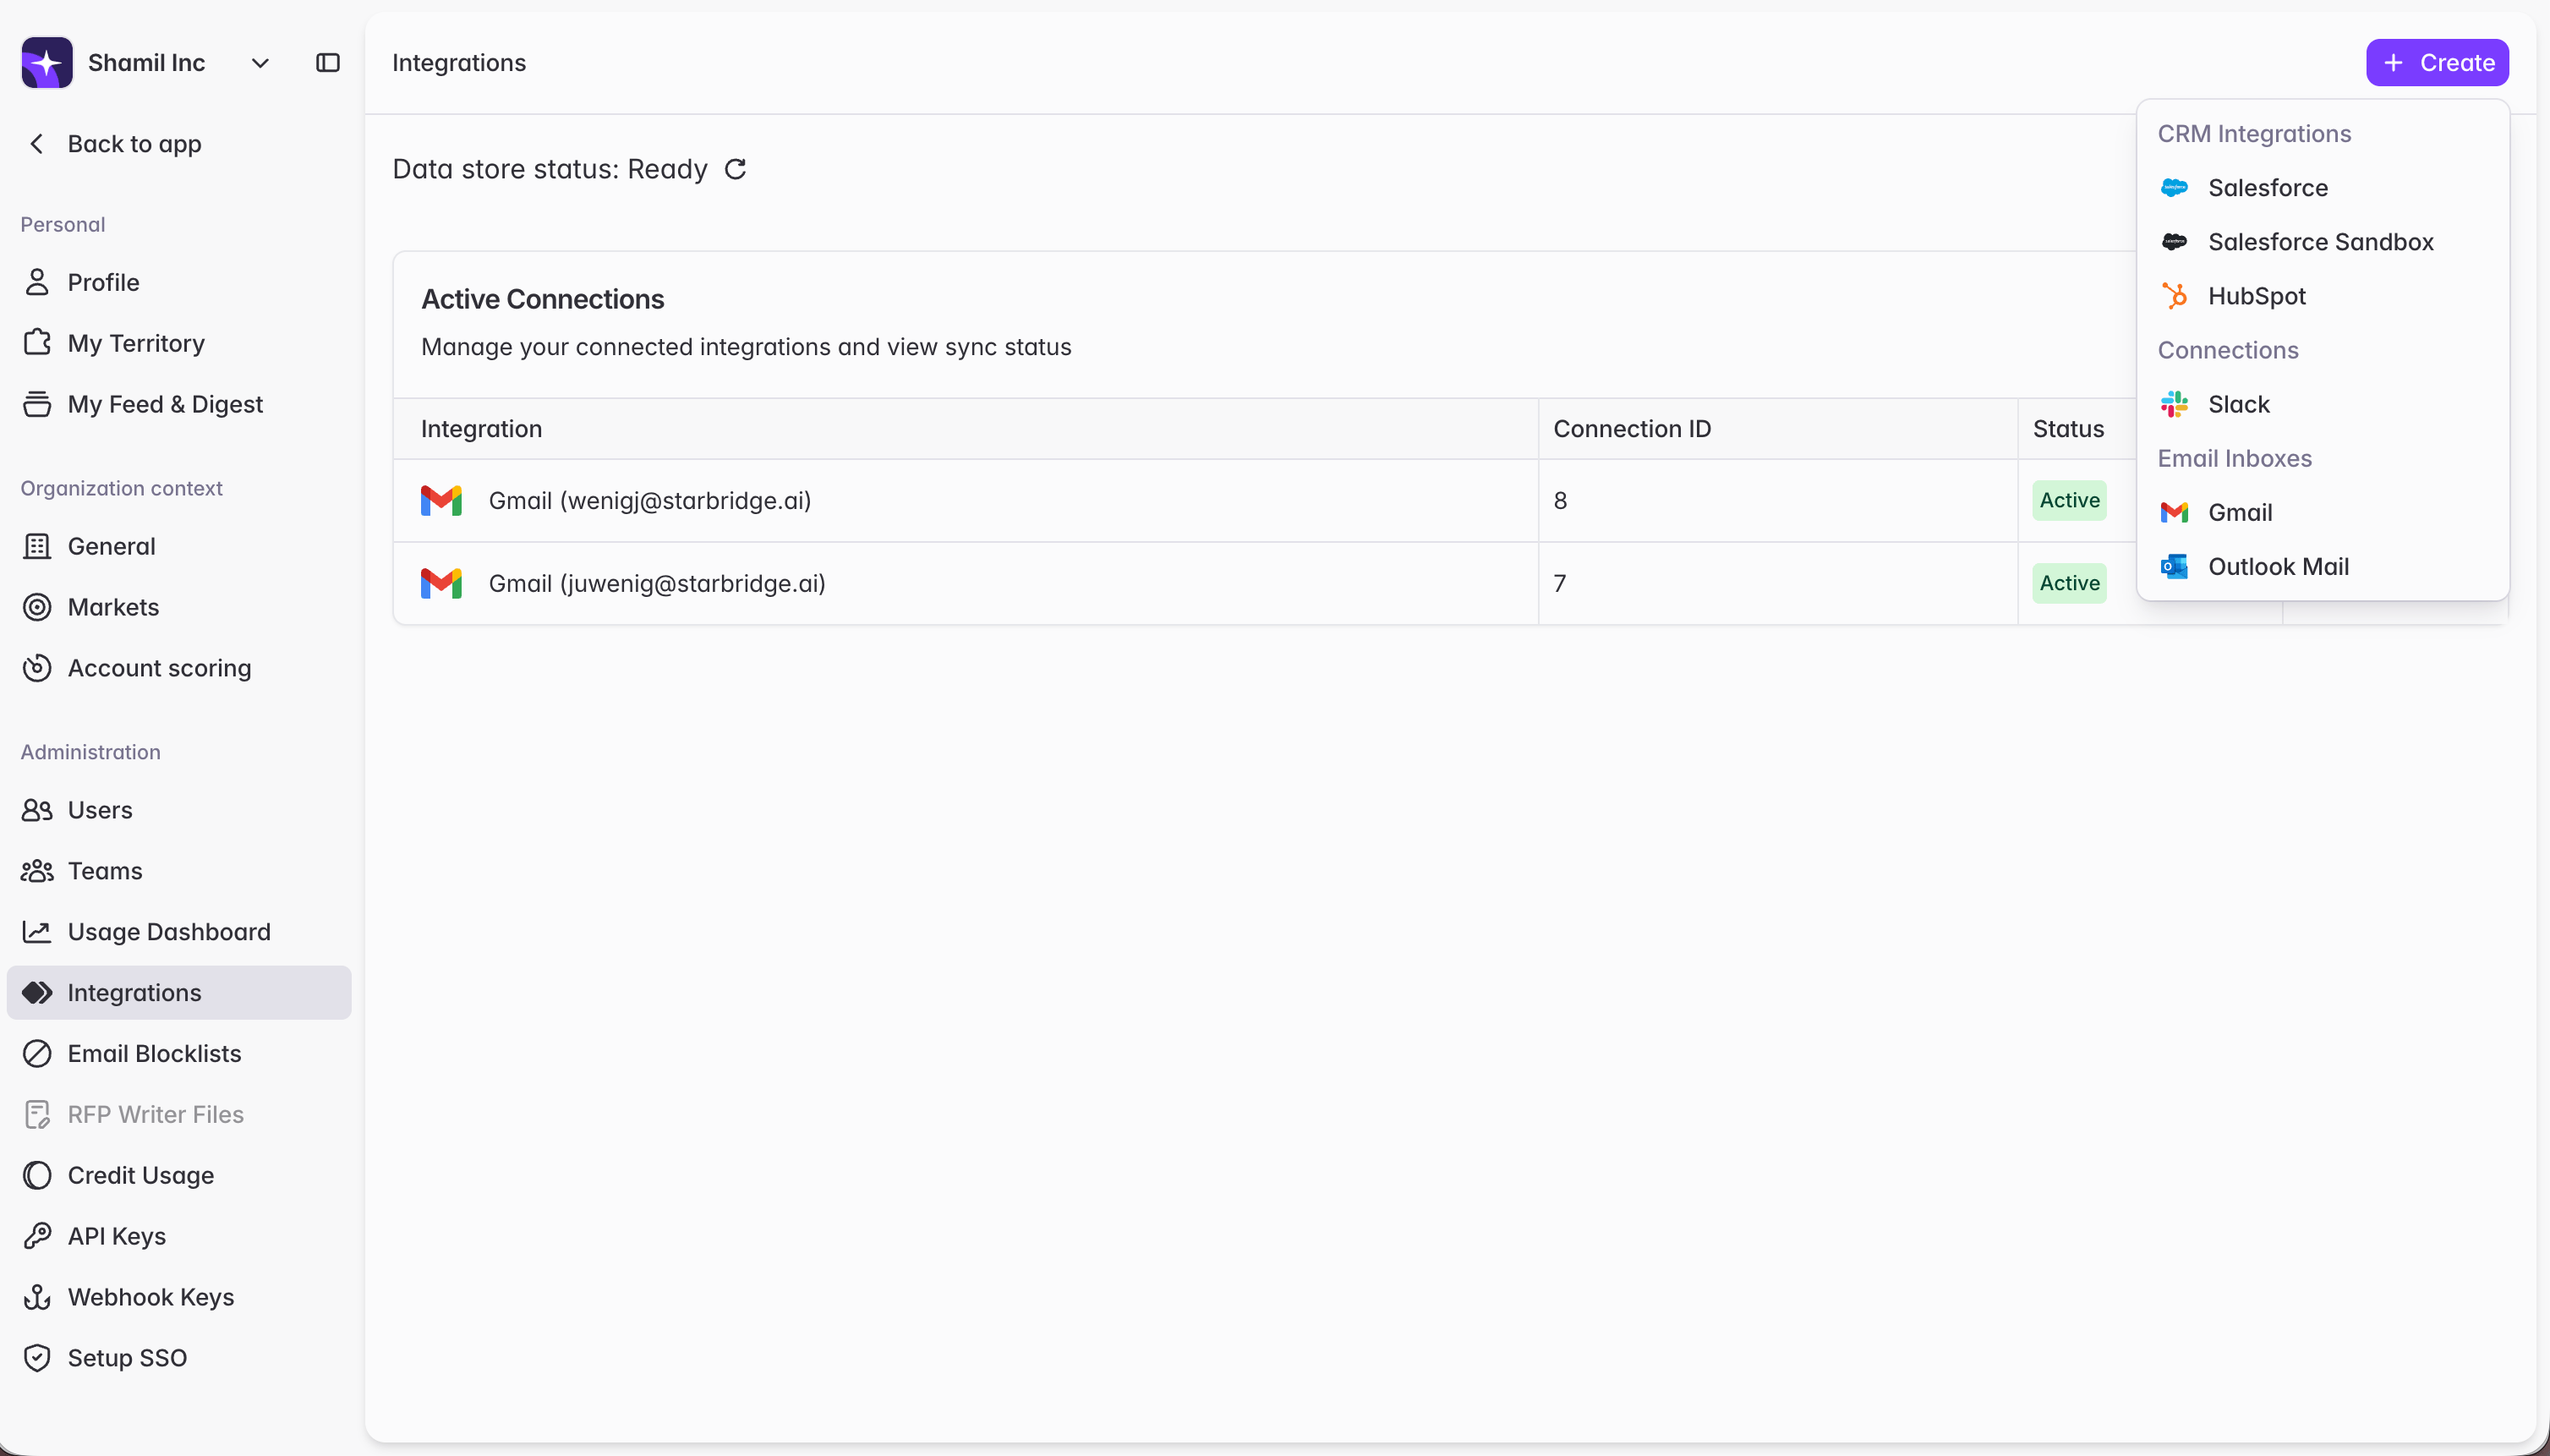
Open Settings → Integrations, and select Gmail or Outlook Mail
2
Connect a Gmail or Outlook inbox via OAuth
You may need to manually refresh the Integrations page to see the connected inbox once the connection is established.
3
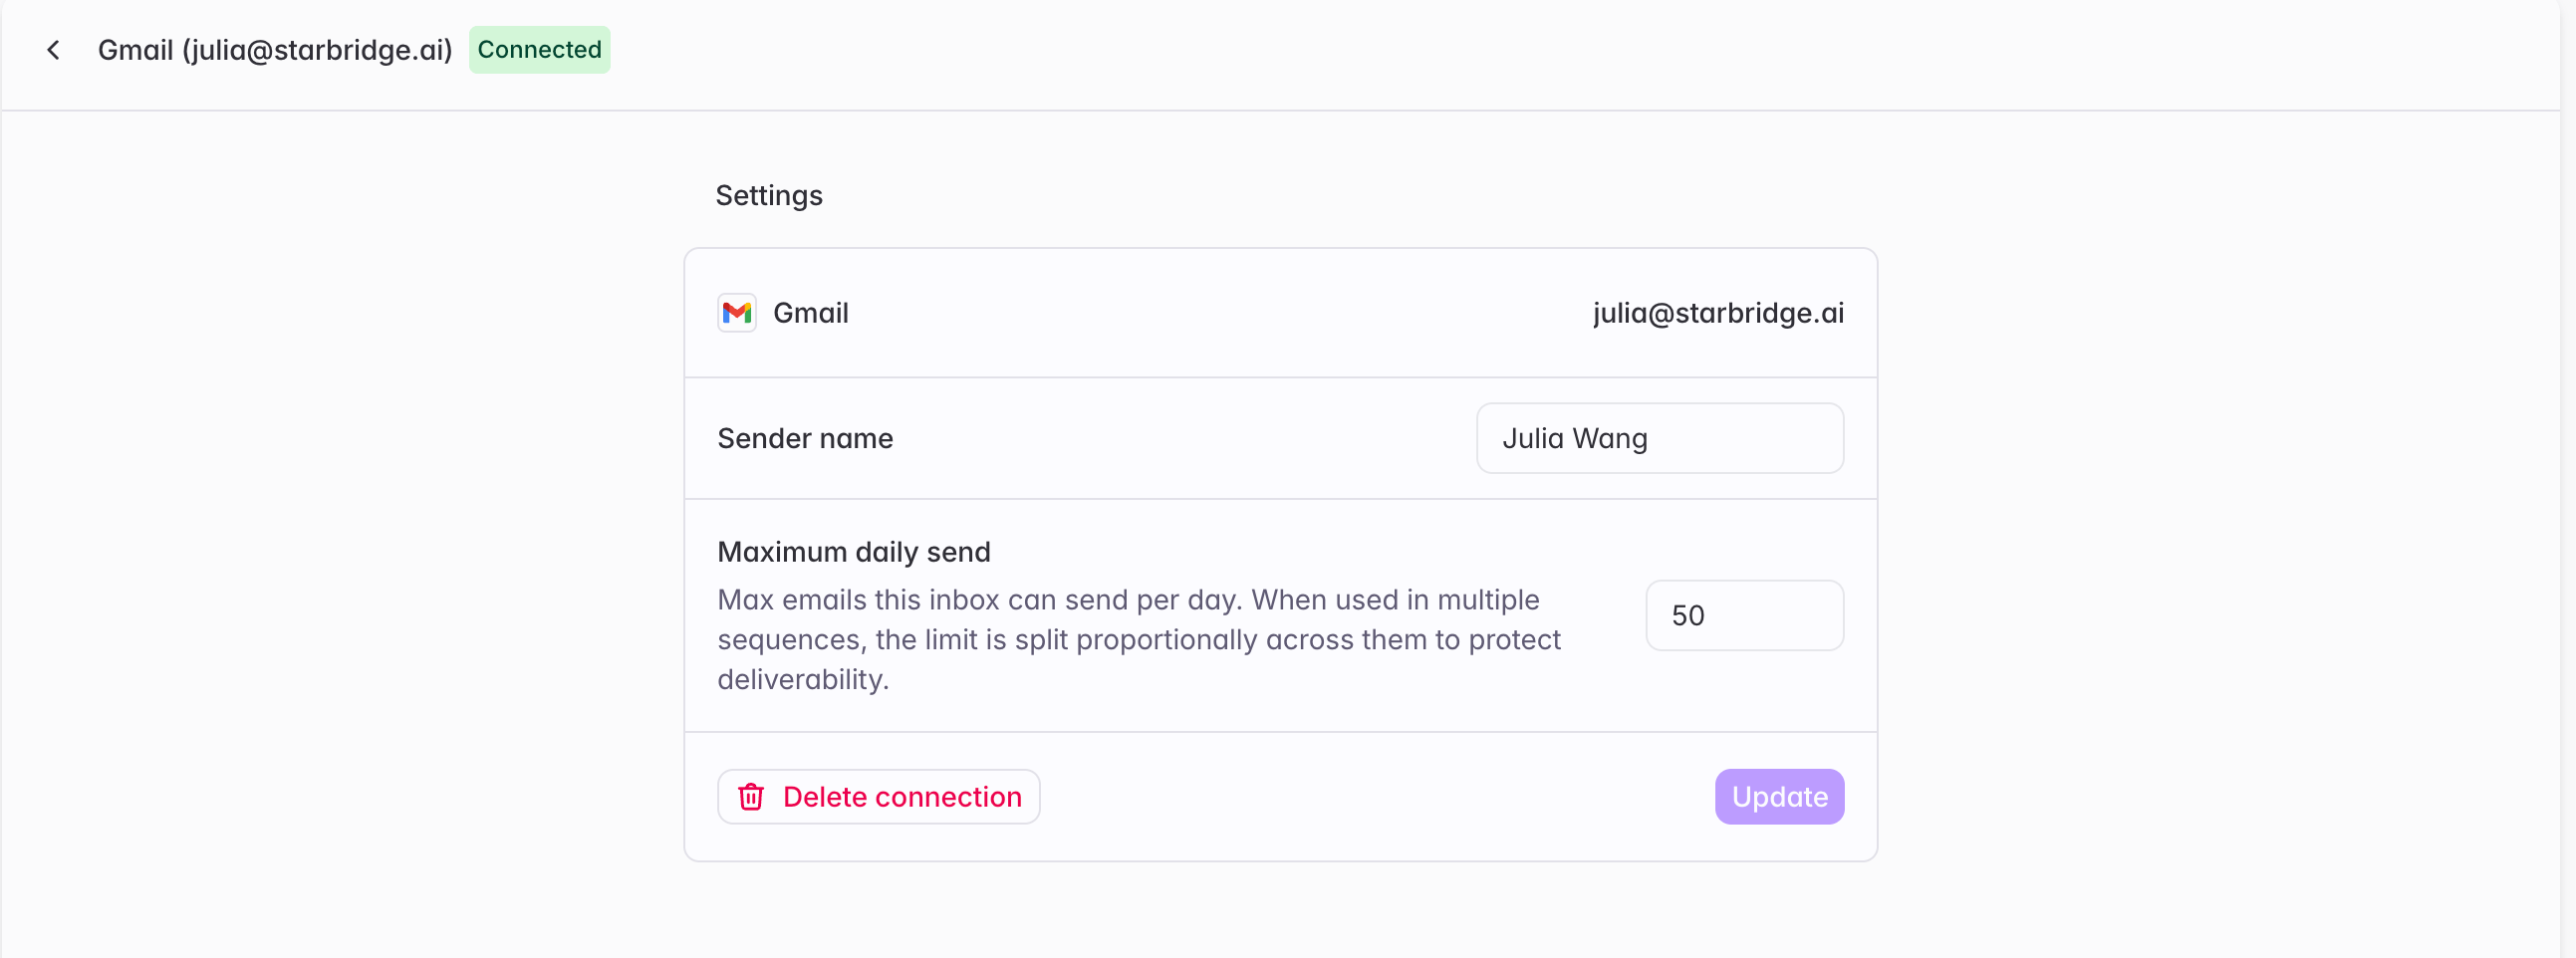
Configure inbox settings
This includes your sender name, maximum emails that can be sent from this inbox daily. For beta, we support a maximum of 50 emails sent daily from each inbox.
Connecting an inbox from a specific Sequence
Once you’ve built and generated a Sequence, you can connect an inbox via the “Settings” tab in a Sequence, or by clicking the “Send via Starbridge” button on the top right of the Sequence.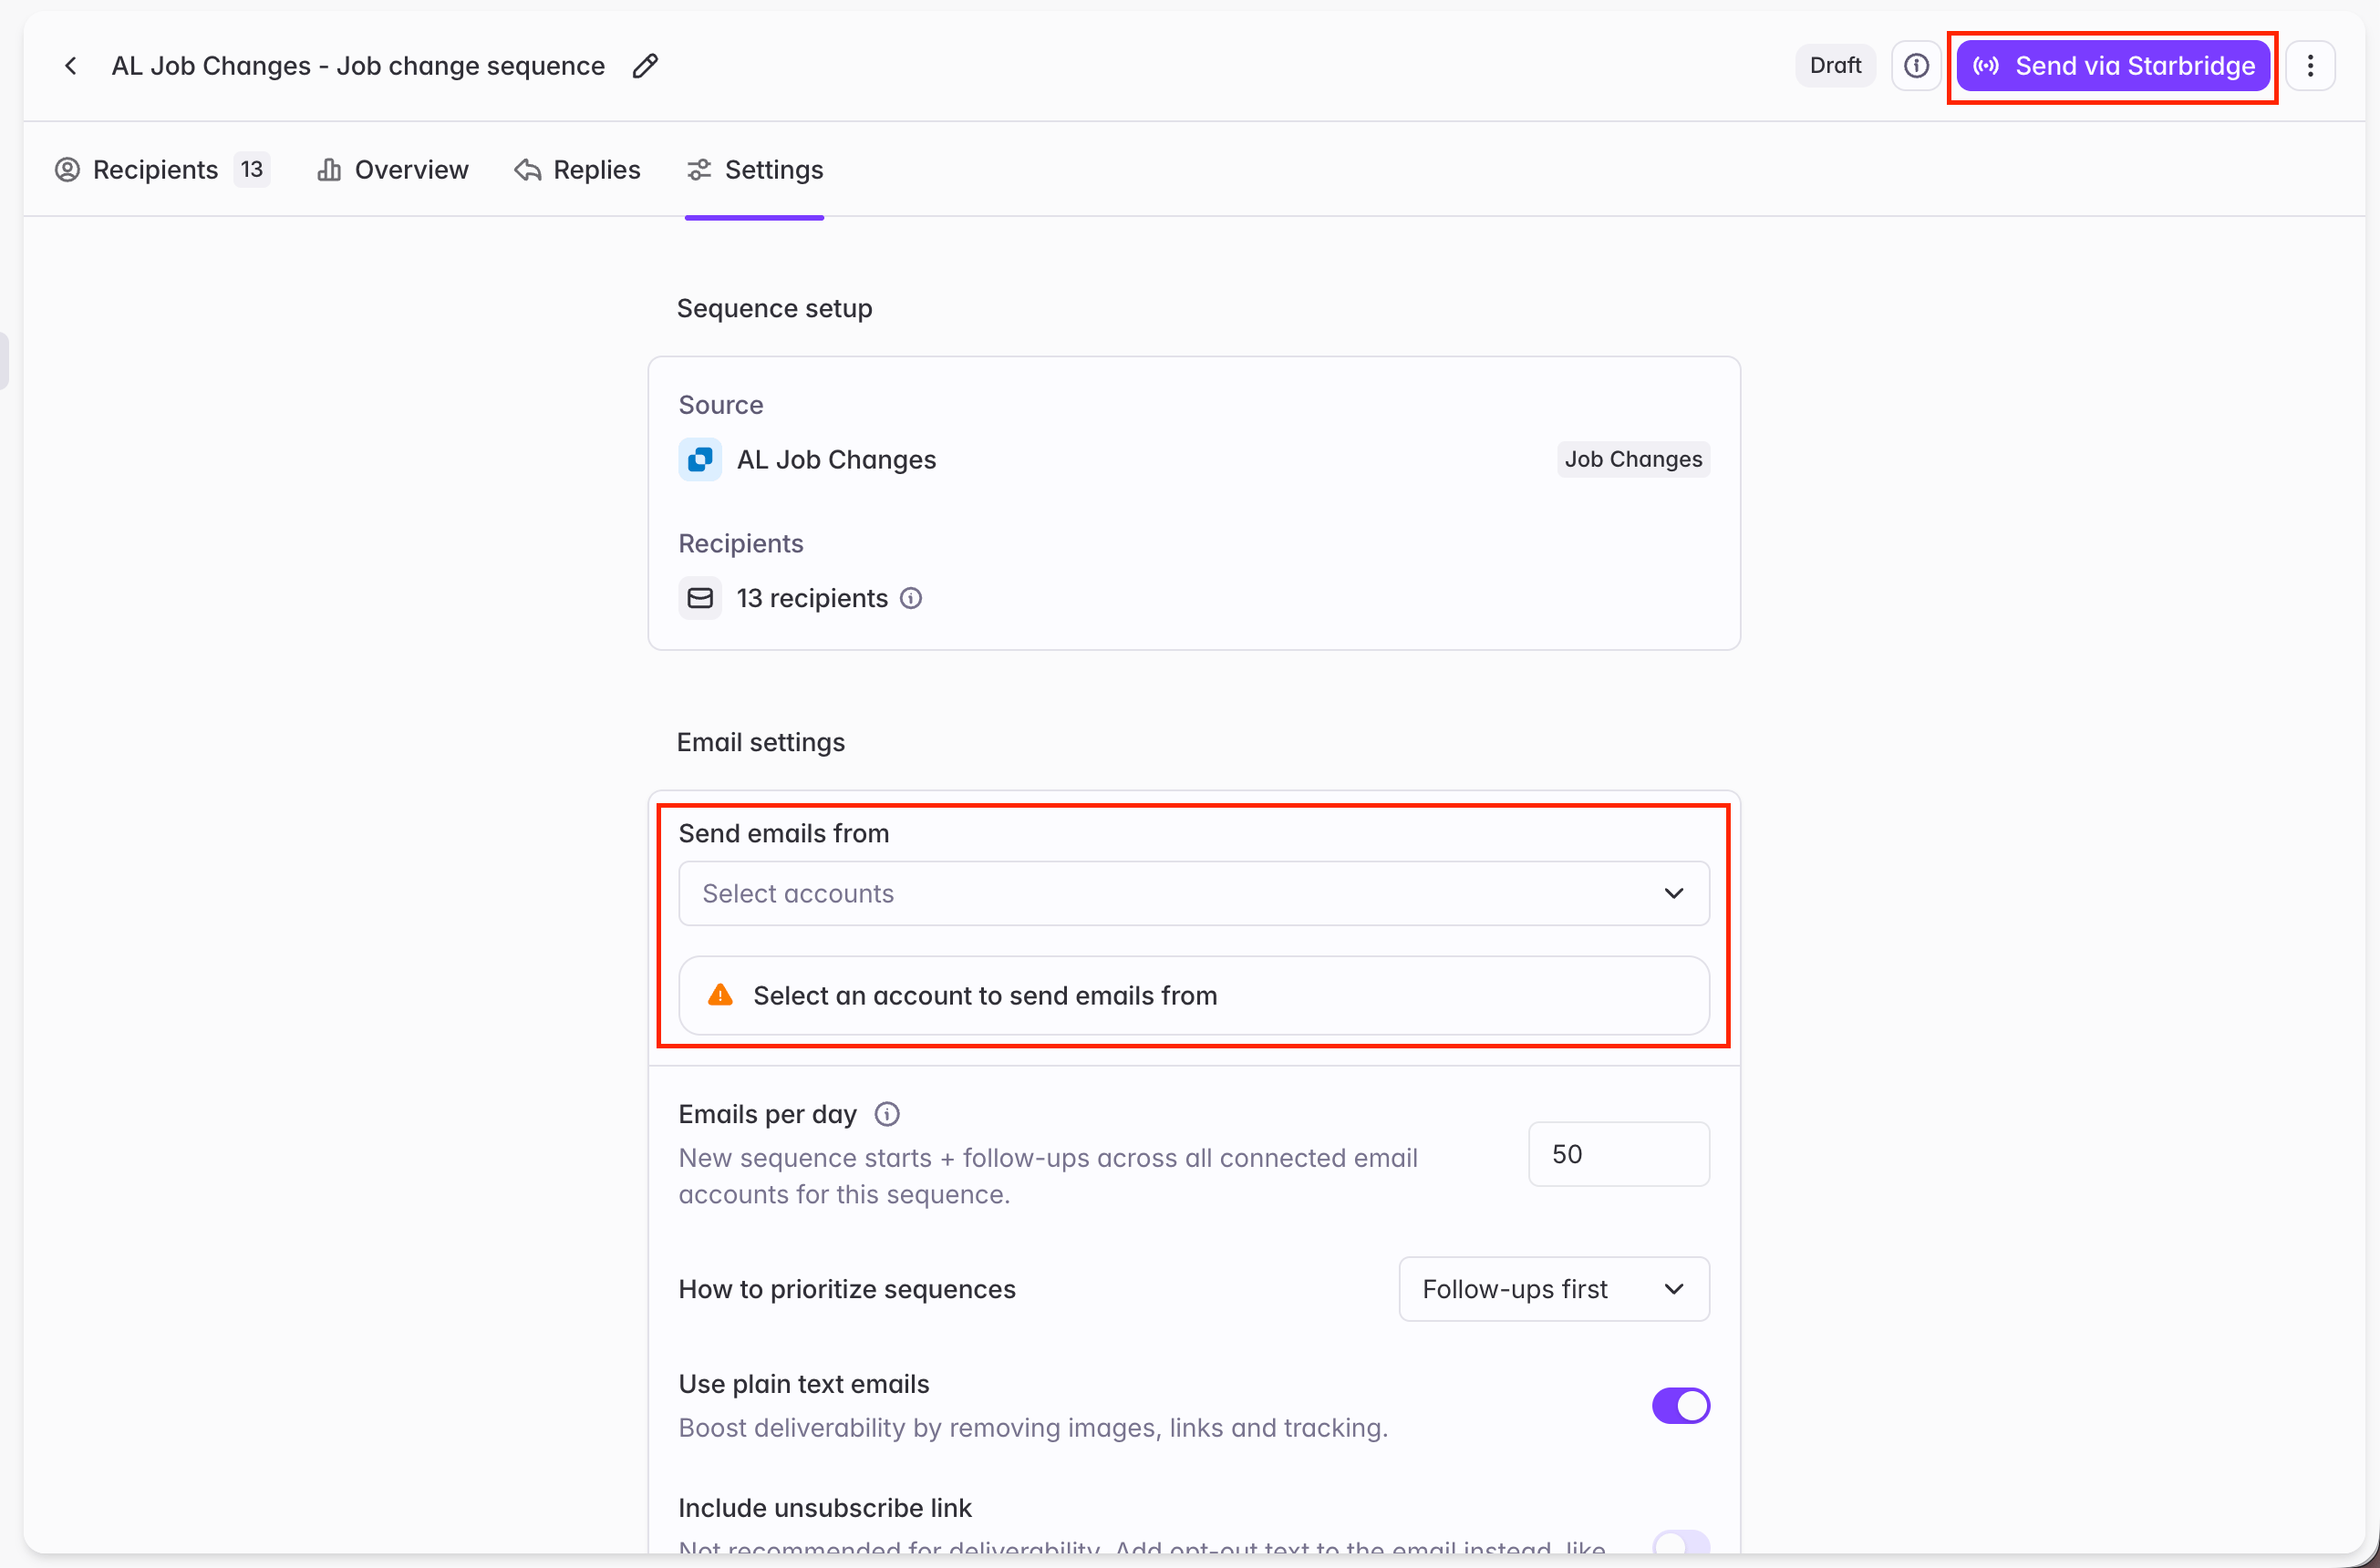
Configure send settings
After you’ve connected an inbox and chosen a sending inbox for a Sequence, you need to configure the Send settings for the Sequence in the Settings tab.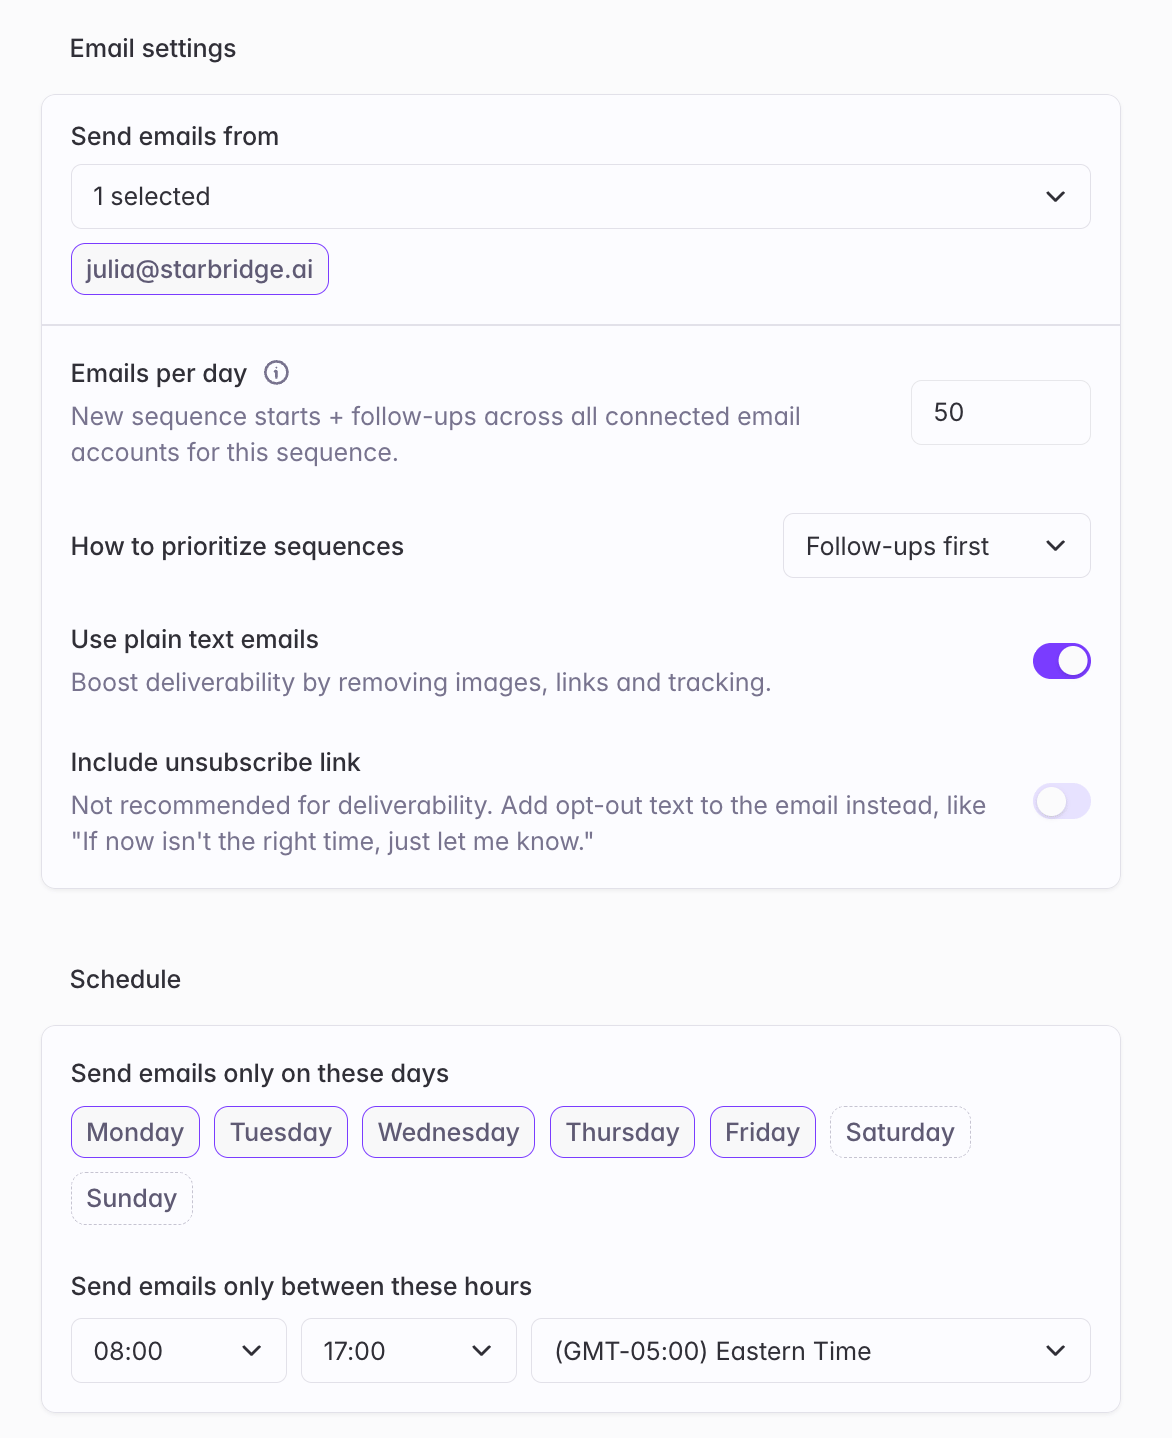
If a rep’s personal inbox is part of a shared sending pool and an email sends from that pool, it follows the Sequence’s send settings - not the rep’s user-level send settings.
Deliverability & email compliance
Starbridge protects deliverability and compliance automatically via:- Unsubscribe handling - Starbridge will automatically remove any contacts from Sequences who have unsubscribed from emails. They will not receive any messaging from you going forward.
- Blocklists - In Settings → Email Blocklists, admins can add individual emails/domains or bulk upload a CSV of email addresses/domains to exclude from all sending. When a contact is added to a blocklist, they will automatically be removed from any Sequences they’re actively enrolled in. Contacts on your Blocklist will not be enrolled in any future Sequences.
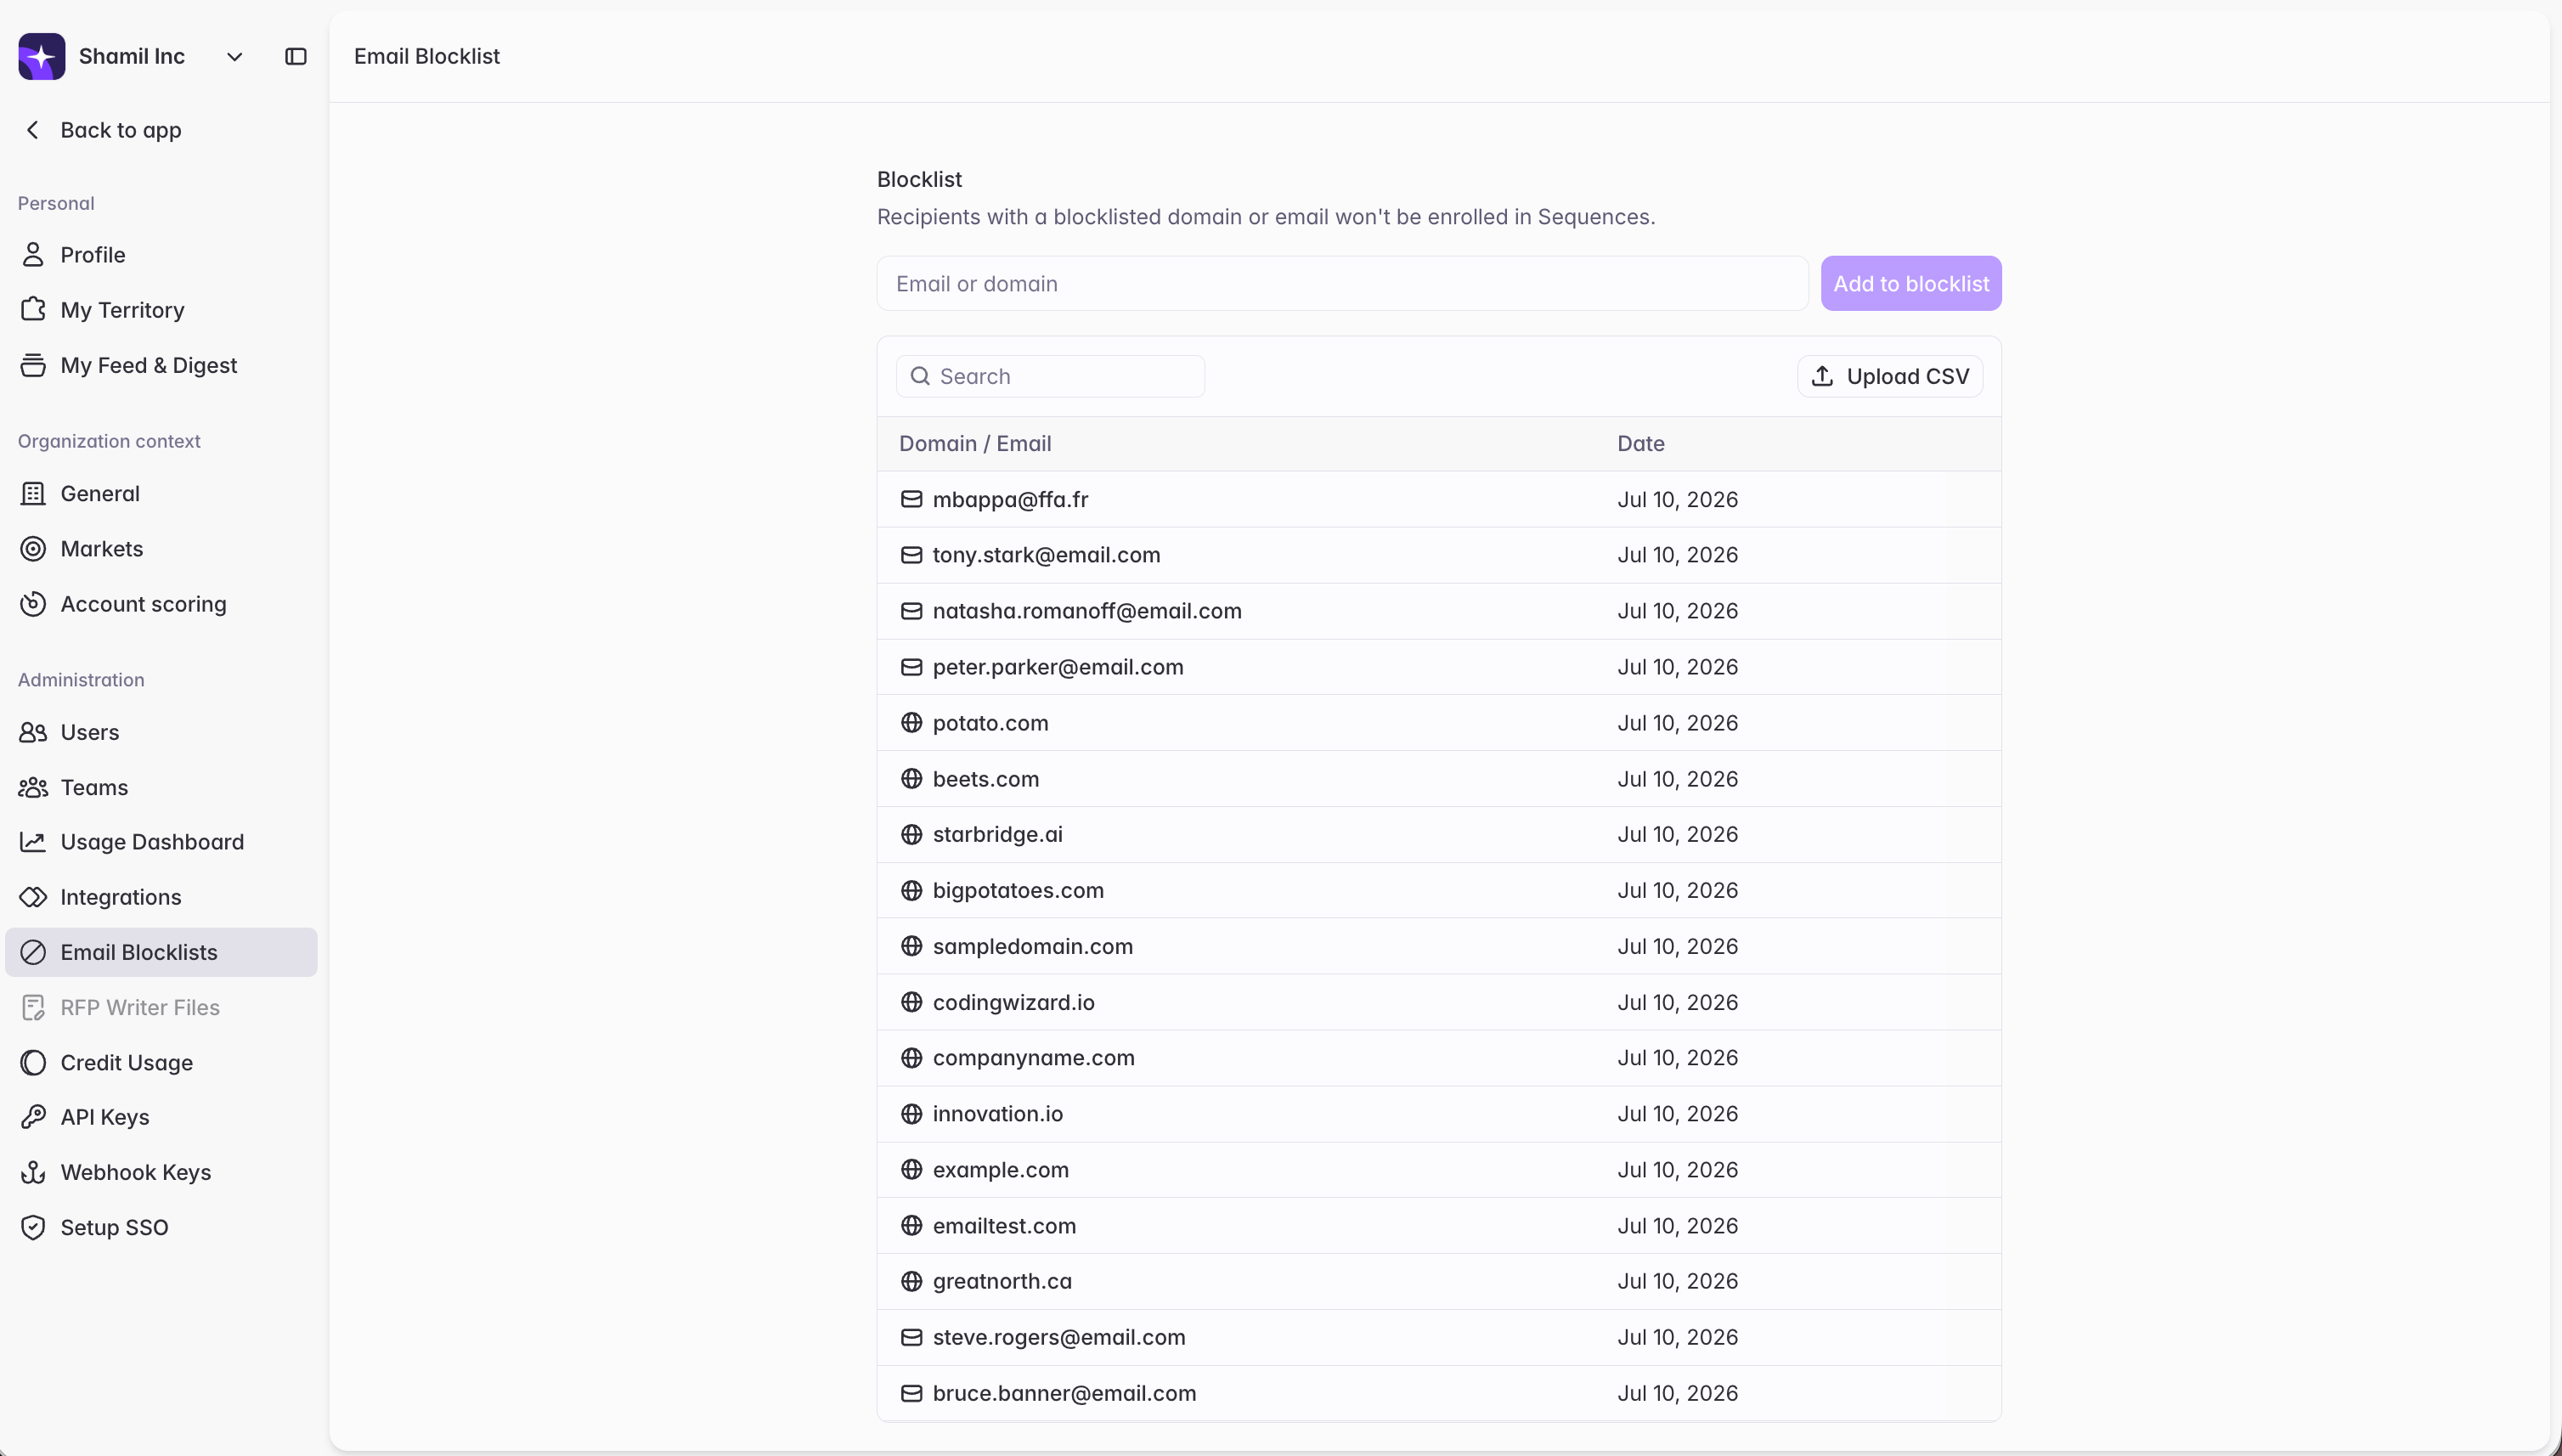
- Manual exclusions - Builders and admins can manually exclude specific contacts or accounts before or after activation by changing contact statuses in Sequences to “Removed”.
- Auto-pause on reply - A contact who replies to any email stops receiving further automated sends for that Sequence.
- Bounce handling - A hard-bouncing contact is automatically removed from that Sequence to protect the sending inbox. They can still be enrolled in other Sequences.
- Inbox daily send limits - Starbridge enforces a daily limit of 50 emails sent per inbox to protect your sender reputation and avoid spam filters.
Managing an active Sequence
While a Sequence is active you can pause it (pending sends held without losing progress), resume it (contacts pick up where they left off, with previously scheduled sends queued to go out immediately), and see the send status of each message (scheduled, queued, sent, stopped). If every assigned inbox disconnects, the Sequence automatically moves to Paused. You can also manually mark each contact as Removed to prevent further messages in the Sequence from being sent to the contact.Manage replies
Open the Replies tab on a Sequence to see contacts’ replies, each identifying the recipient with the reply and thread context, so your team can follow up in the connected inbox without monitoring it manually.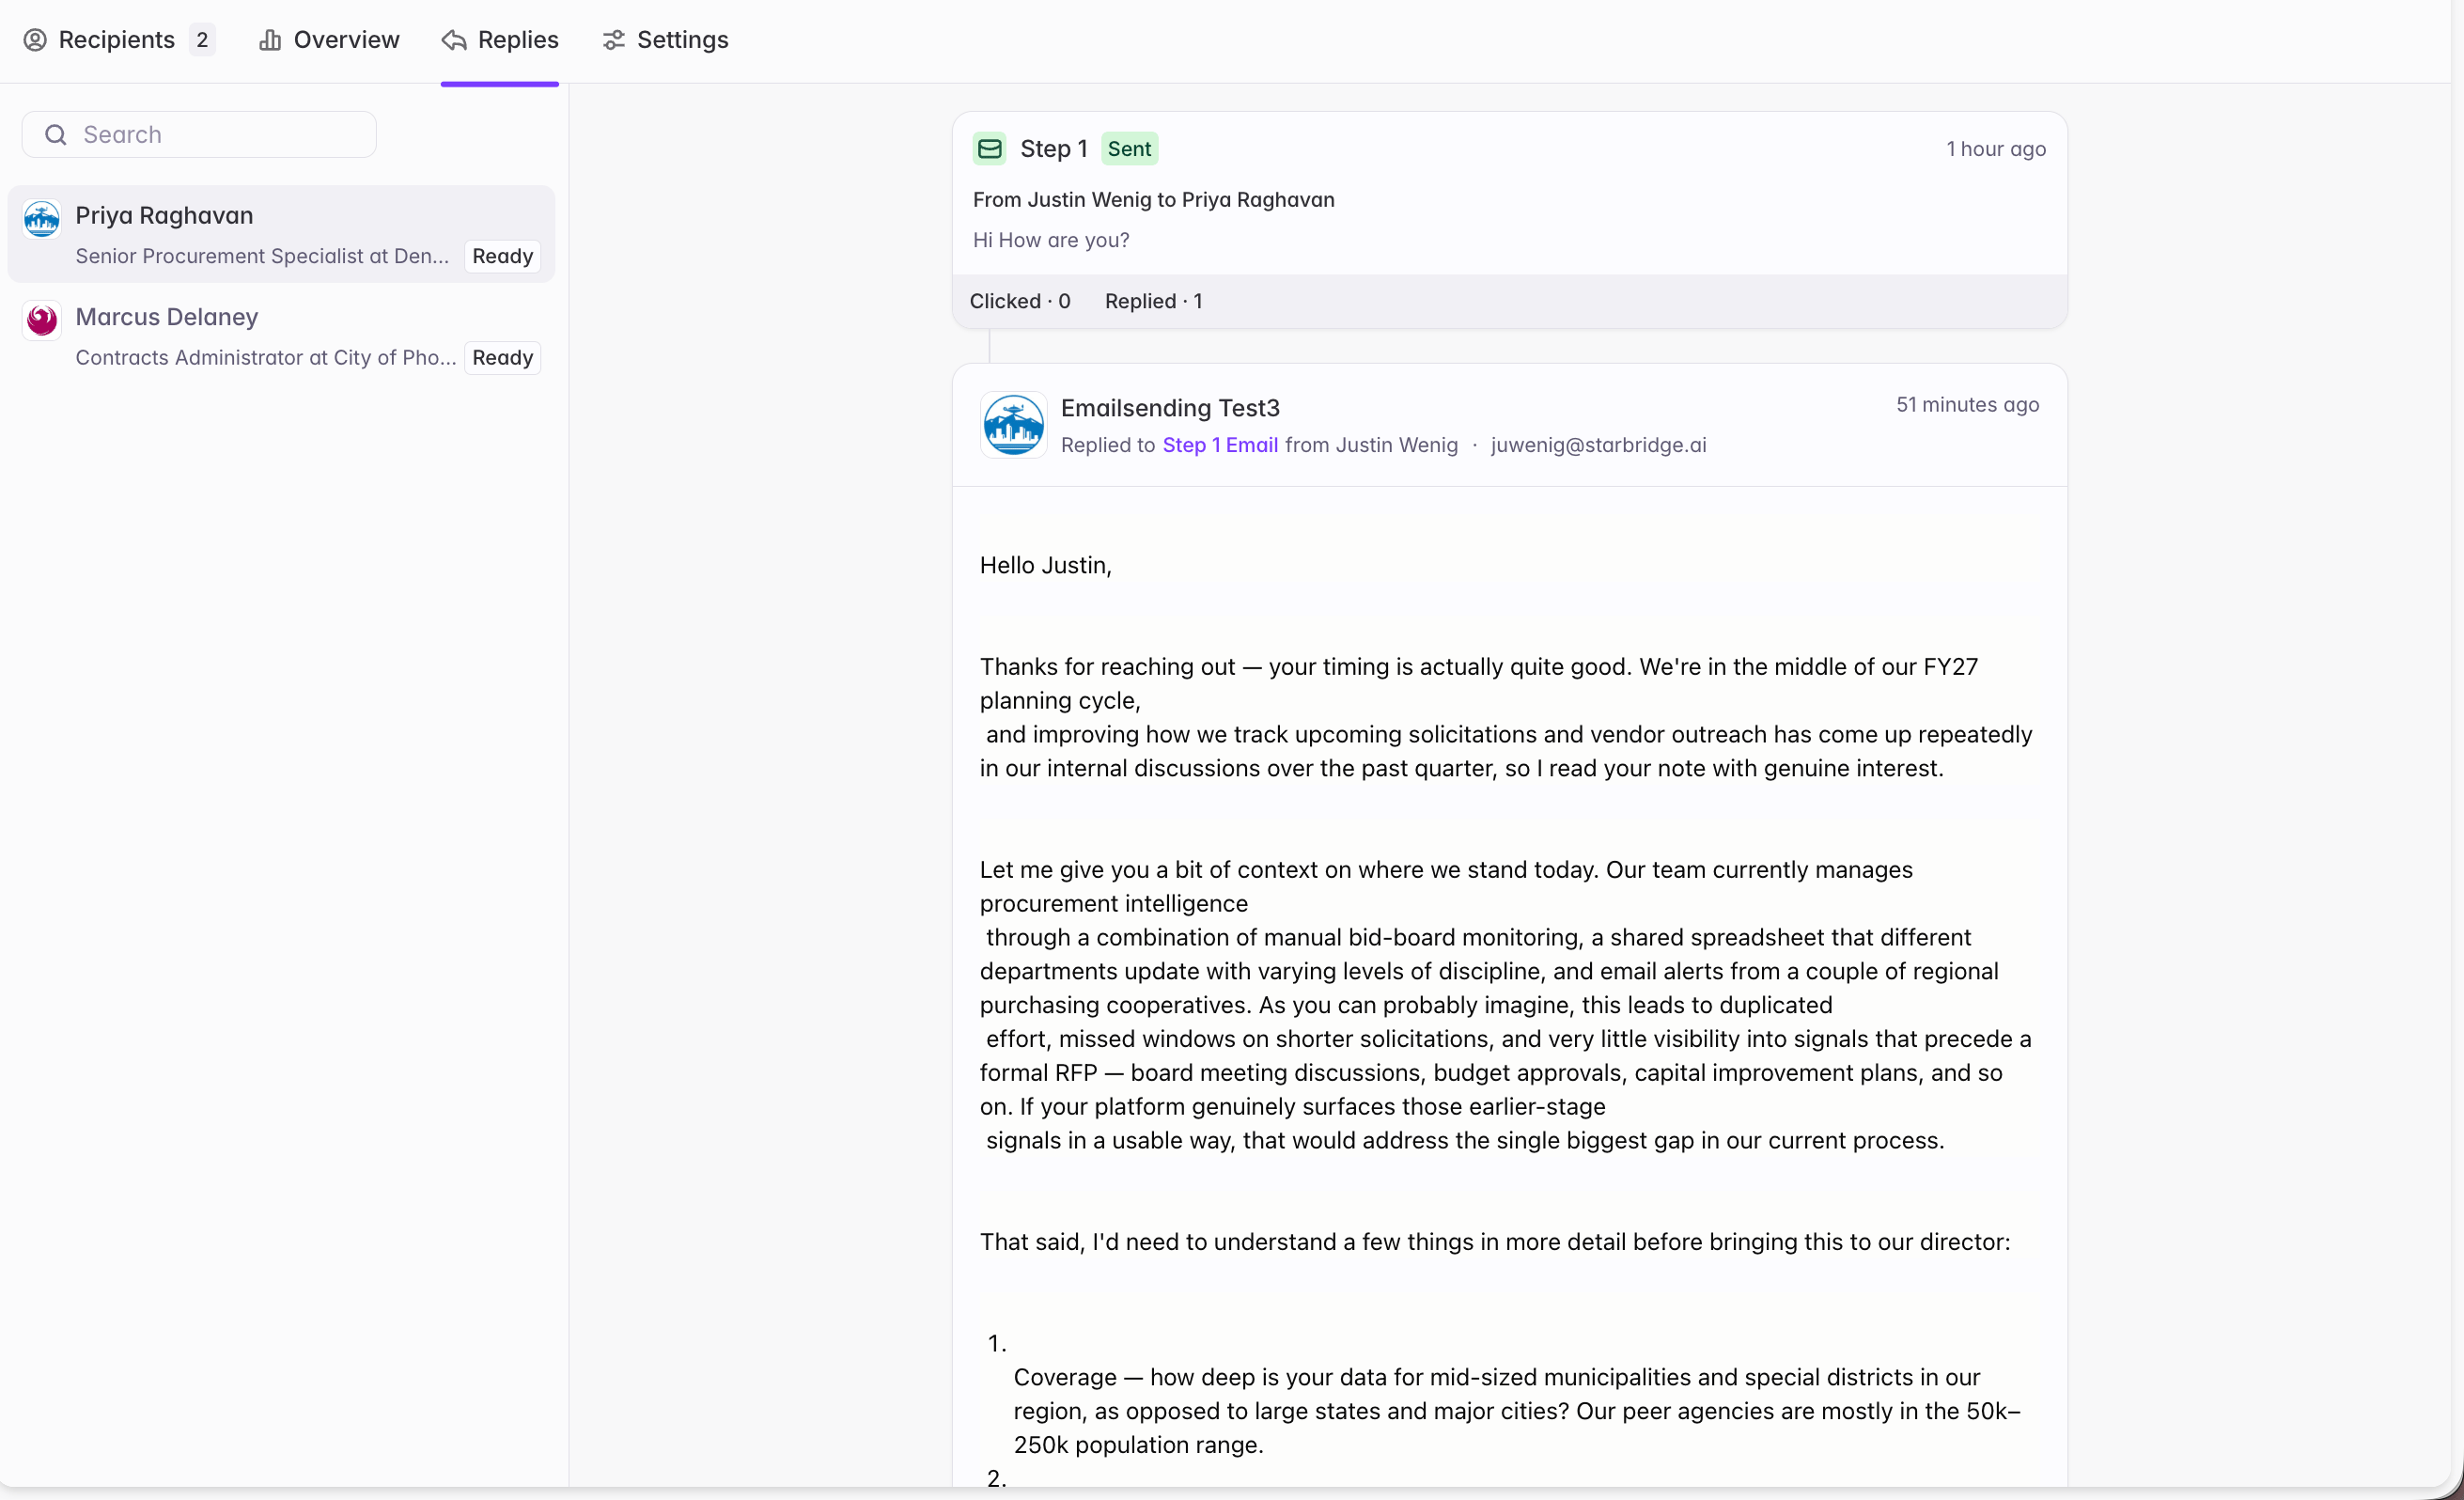
Pricing and early access
At general availability, Sequences will be a paid add-on module with usage tiers based on concurrently enrolled contacts. As an early-access partner, you get complimentary access during the beta period, with usage limits of up to 25,000 concurrently enrolled contacts. Early access runs through GA + 60 days. Before early access ends, we’ll review your usage together and recommend the tier that best fits your team’s usage - with discounted pricing for early-access customers who convert.Next steps
Vendor presence column
Add vender presence columns to your Bridges to unlock rip & replace and whitespace expansion campaigns.
Contacts Bridges
Enrich contacts by building Contact Bridges to serve as recipient sources for your Sequences.
Job Changes Bridge
Create a Job Changes bridge so you can run automated campaigns based on job changes for your key titles.
Contact column
Add a contact column to your Bridges so you can use them as sources for your Sequences.