

Why Account Scoring
Prioritizing your accounts is harder than it should be. You probably already have a gut sense of how you’d rank your accounts — but that logic usually lives in someone’s head or a spreadsheet that goes stale the moment a new signal comes in. Account Scoring fixes that. Every buyer in your market gets one clear, explainable account score (1–100), combining how well they fit your ideal customer profile with how active their buying signals are right now. With Account Scoring, you can work your territory with intent — pulling up the accounts that match a specific play you’re running, or simply working down your list starting with your hottest account. Getting Account Scoring up and running takes two setup steps, followed by building your scoring logic and sharing it with your team:1
Confirm your Market
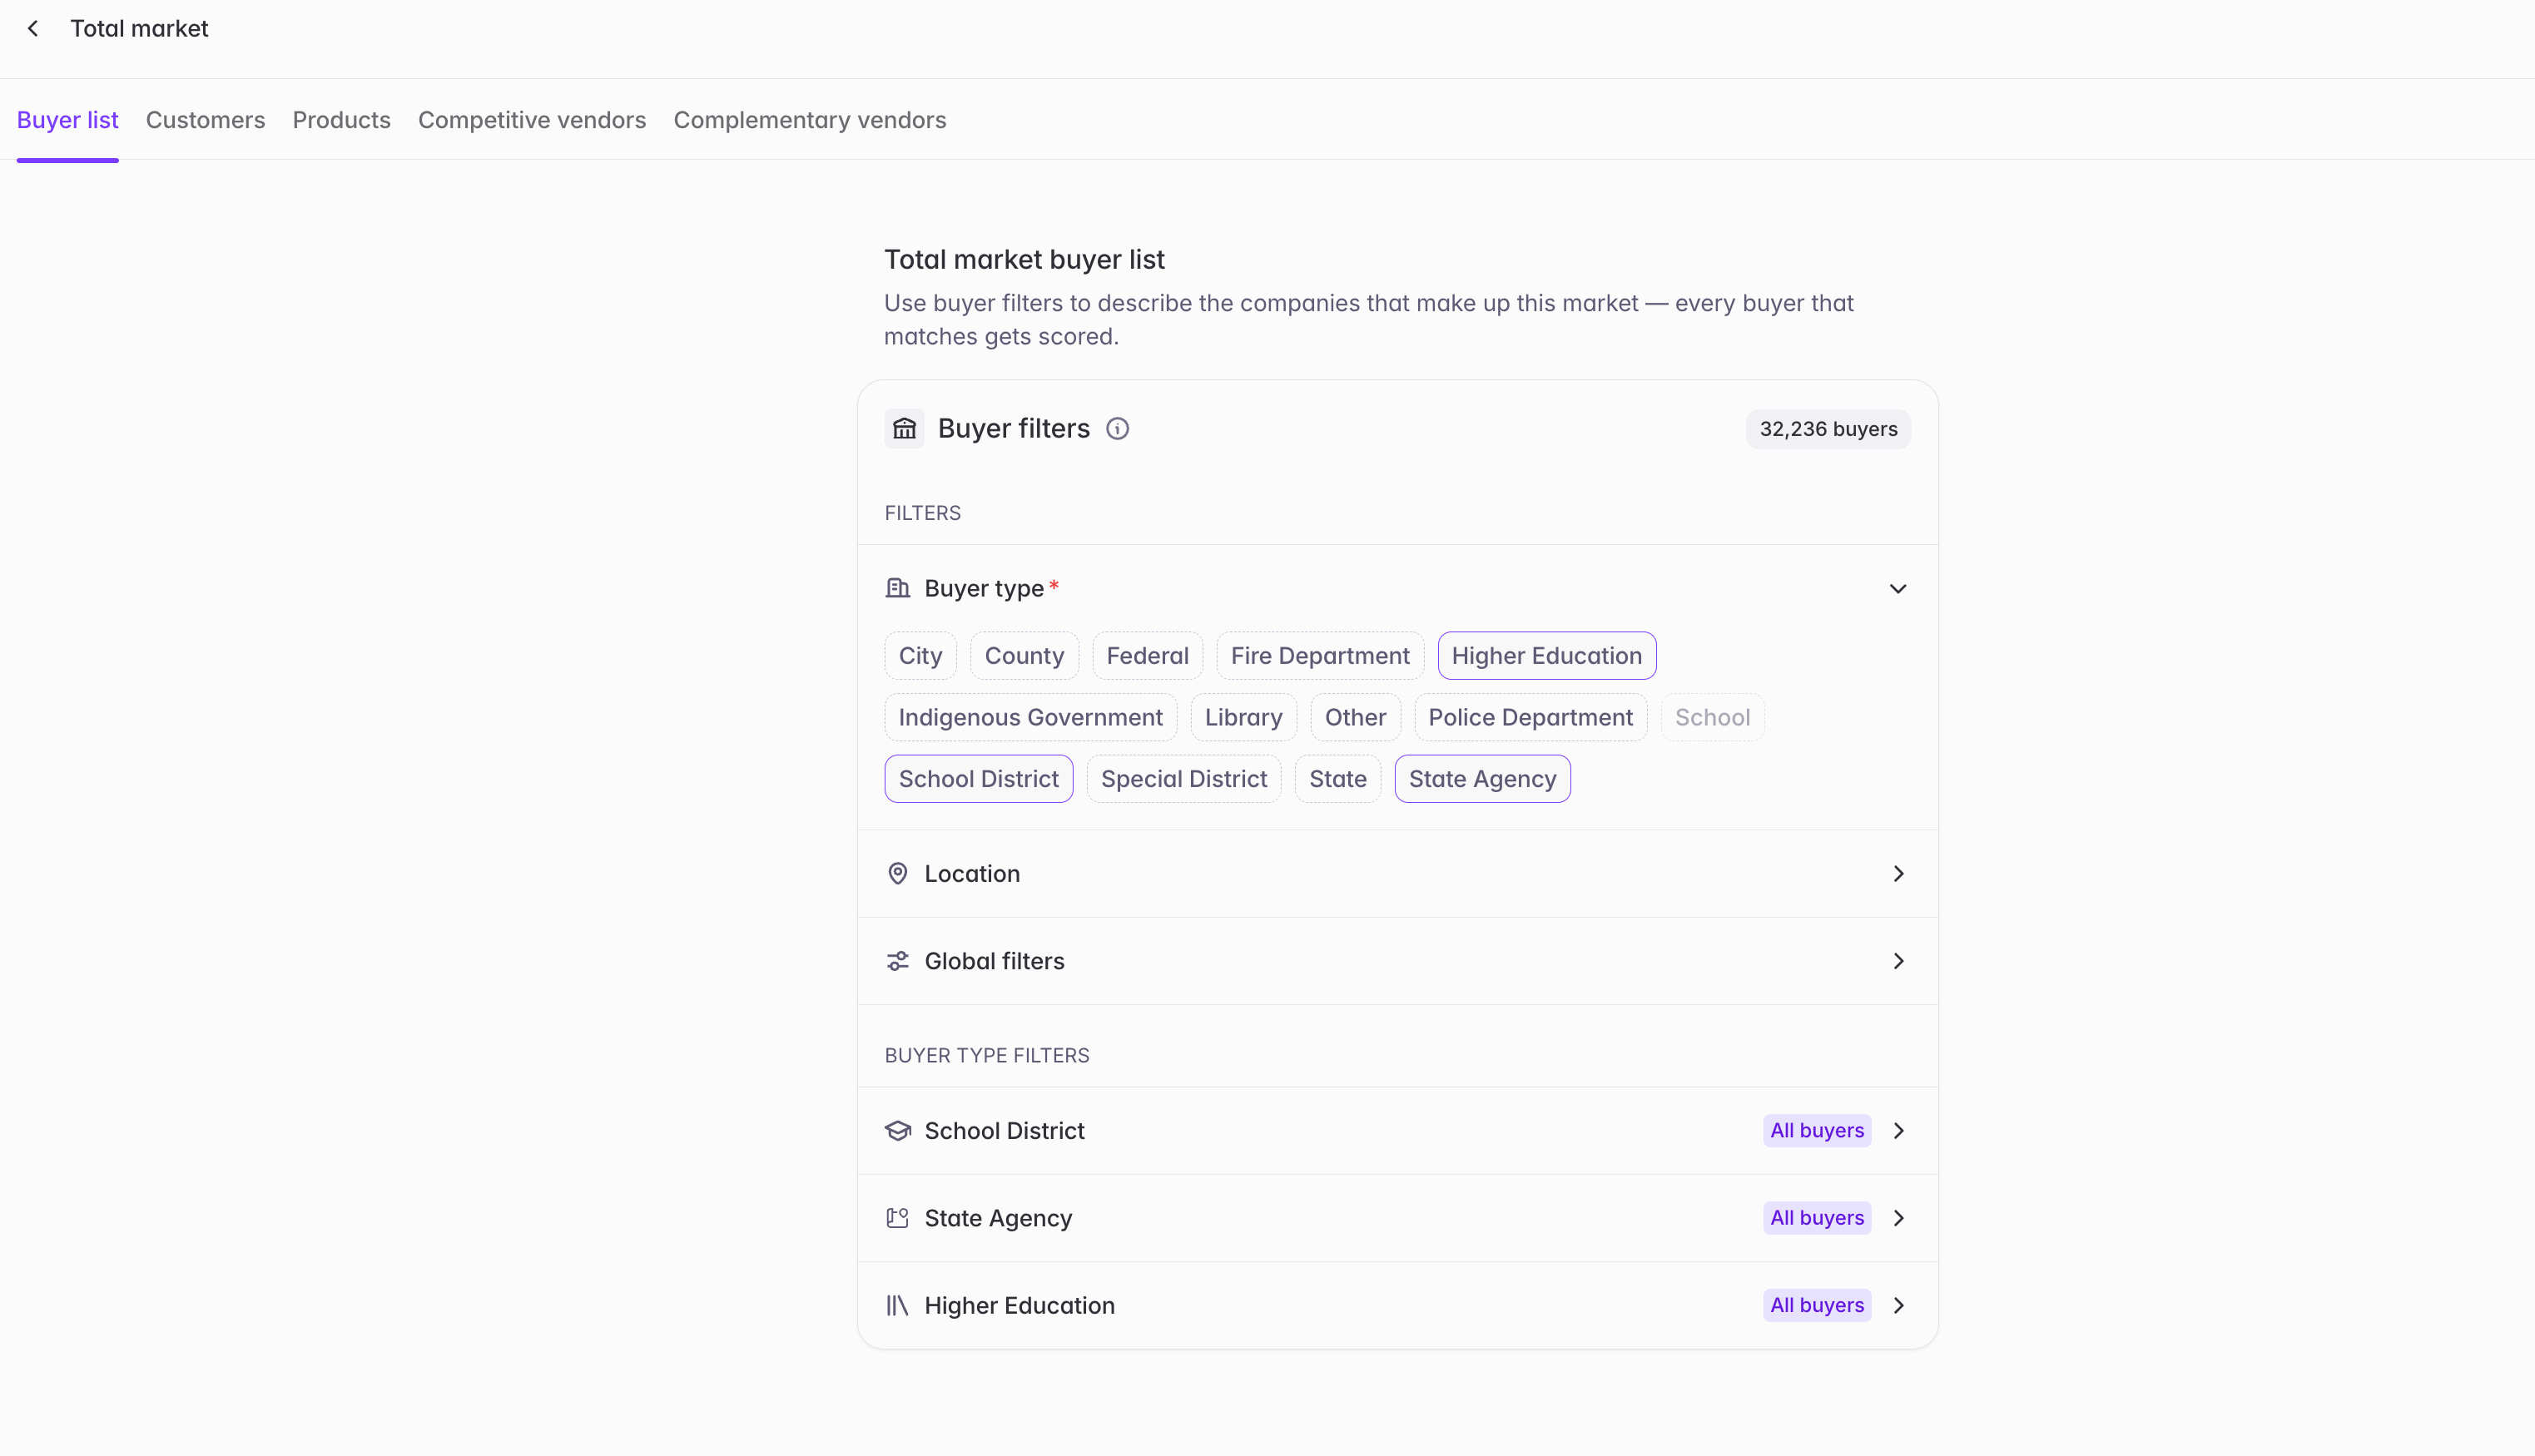
2
Set up Vendor Presence bridges (recommended)
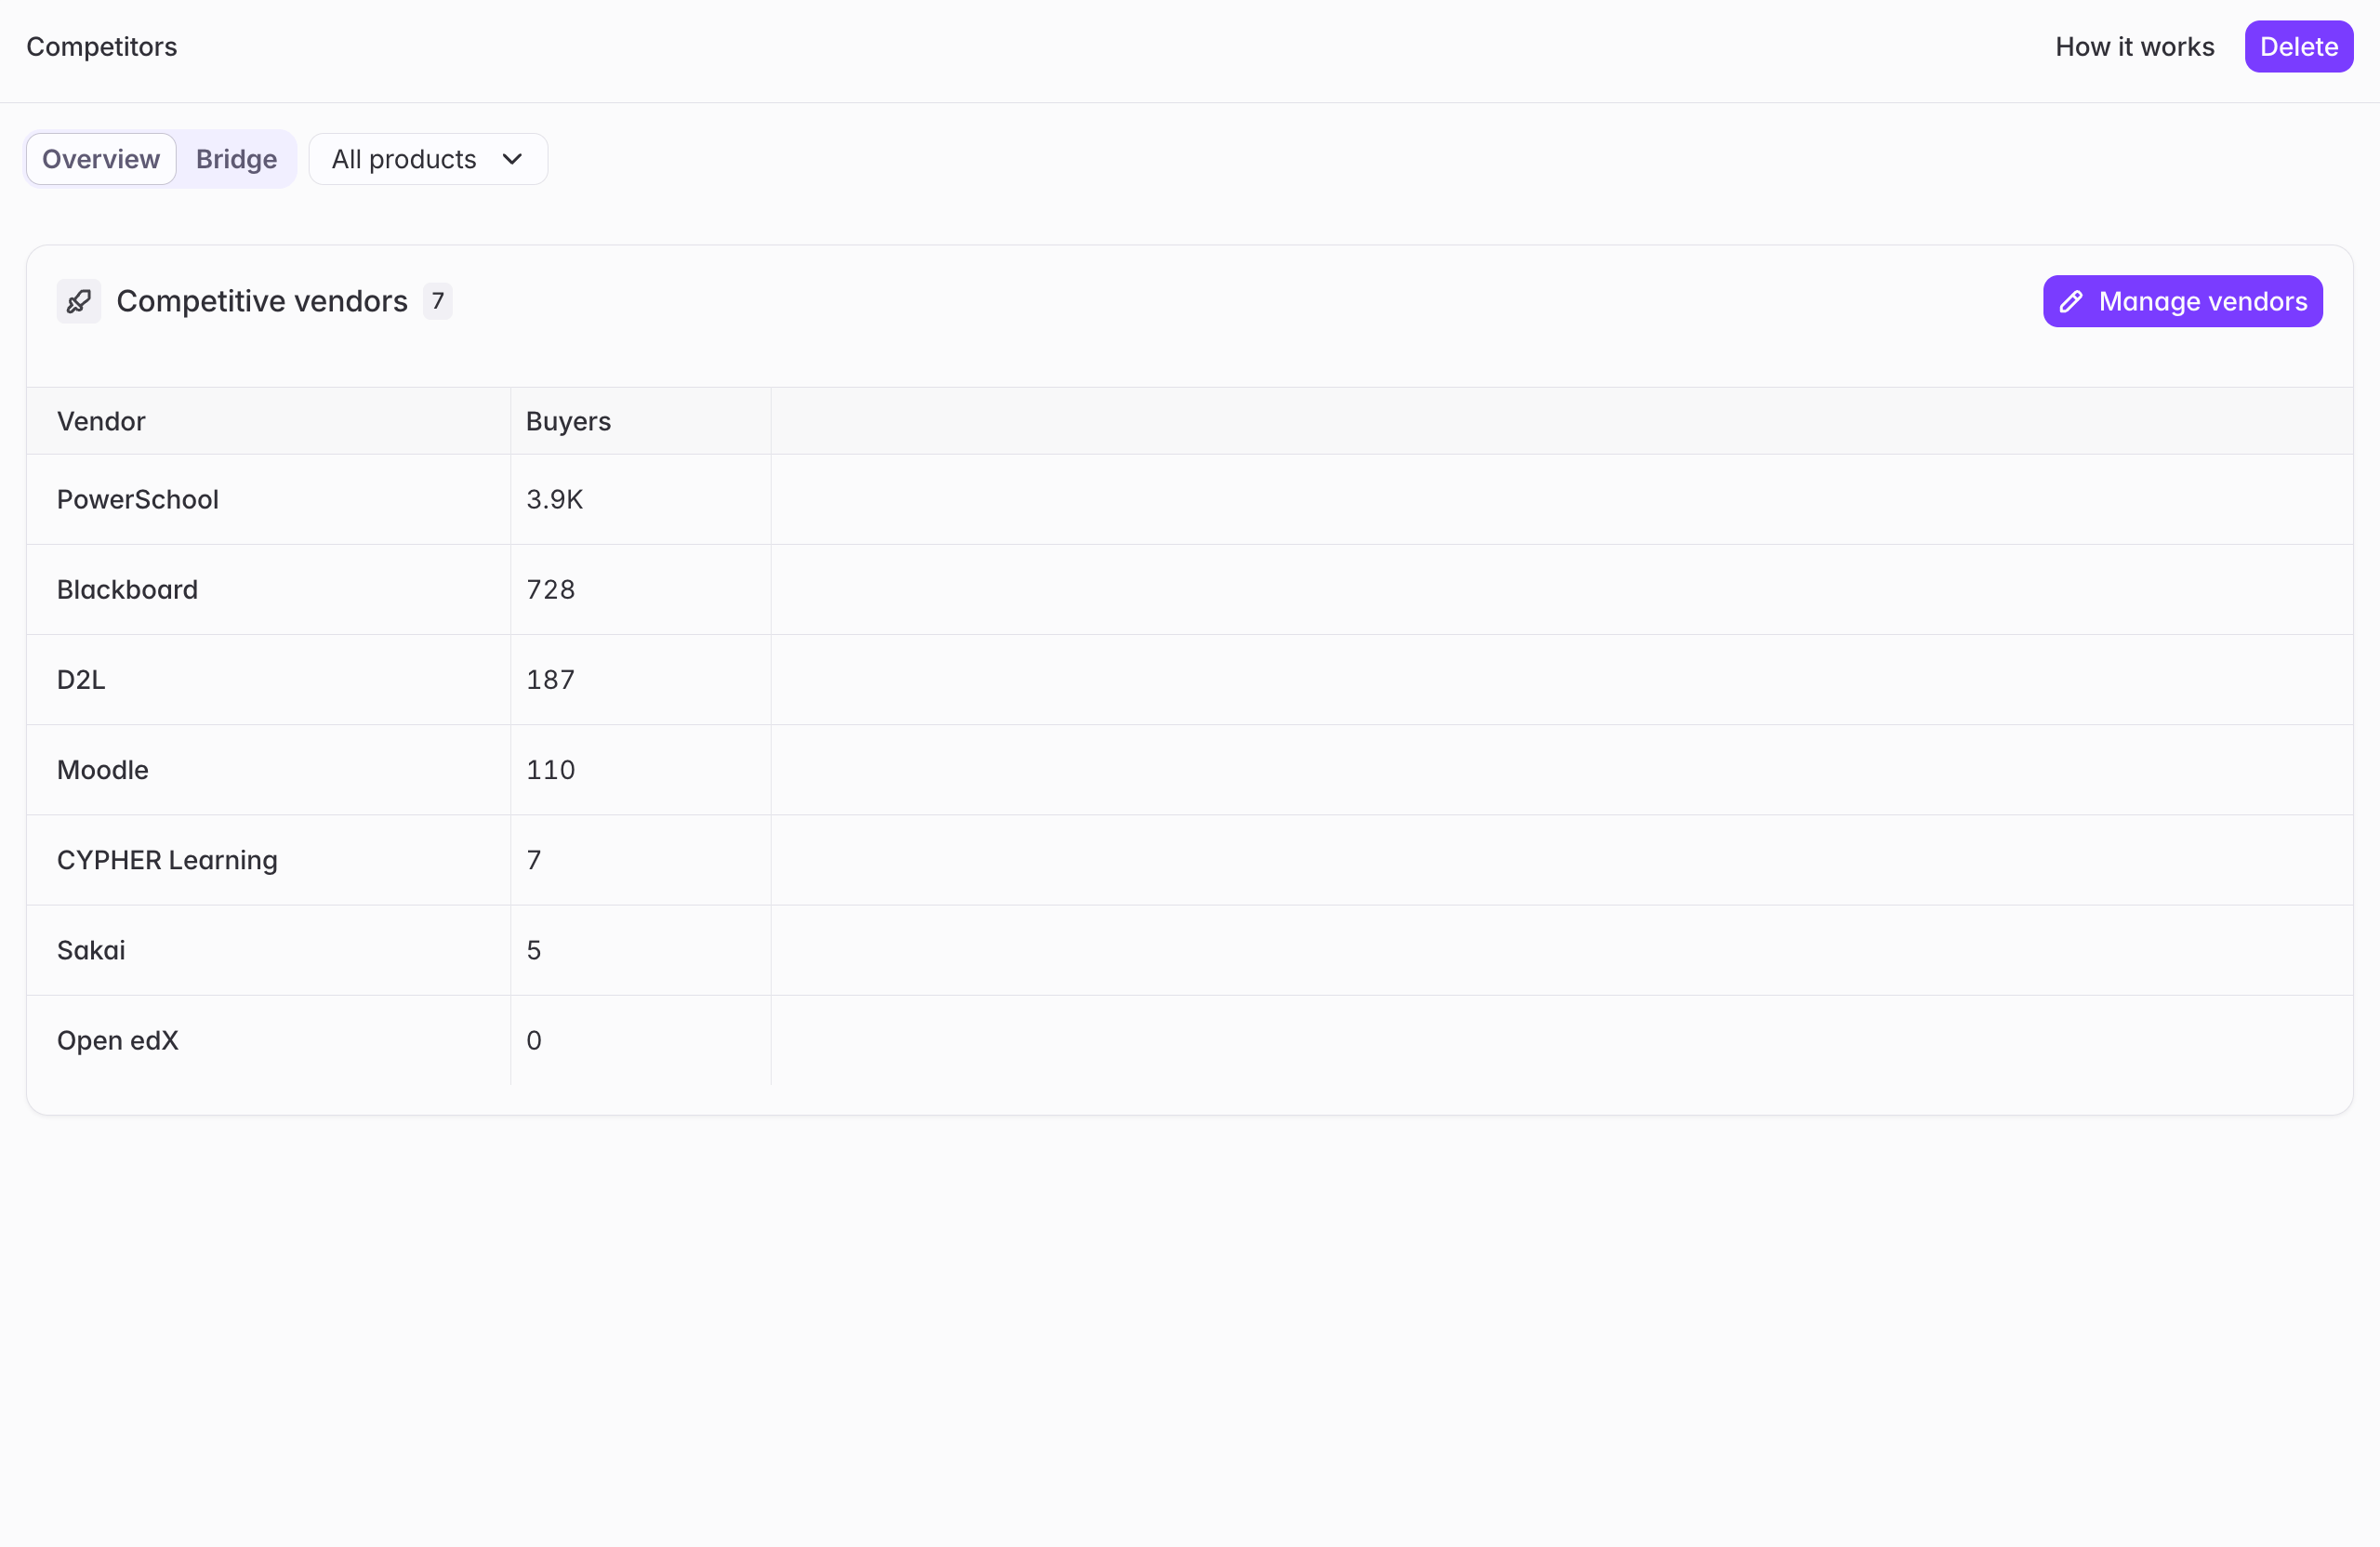
3
Build your Account Scoring bridge
Start from scratch, or migrate an existing buyer bridge you’ve already been using for scoring.
4
Share your scores with your team
Once you’re happy with your scoring quality, share it out so the rest of your team can see it too.
Step 1: Confirm your Market
Market is the org-level configuration that describes how your organization sells, so Starbridge can tailor scoring, signals, and the broader product experience to your business instead of a generic template.Market is configured by Admins. A default Market should already exist for your organization — this step is about reviewing and confirming it’s accurate, not building it from zero.
- Buyers — the accounts you sell to, defined using buyer filters or by selecting a pre-existing static buyer list. This is the most important part to get right, since it directly defines your organization’s total addressable market (TAM) — the buyer pool that both Account Scoring and Vendor Presence bridges run against.
- Customers — who your current customers are, what your ideal customer profile (ICP) looks like, and the target job titles you typically sell to.
- Products — the product categories or problems your organization solves, rather than a catalog of individual SKUs or product names.
- Competitors — the vendors you compete against, tied to the specific products they compete on.
- Complementary vendors — vendors you sell or work alongside, but don’t compete with (for example, a CRM provider like Salesforce).
Step 2: Set up Vendor Presence bridges
With your Market confirmed, the next step is setting up Vendor Presence bridges at the market level. A Vendor Presence bridge lets you run a vendor presence search across every buyer in your Market at once, checking each one for:- Any competitor vendors defined against your products
- Any complementary vendors you sell or work alongside
Step 3: Build your Account Scoring bridge
With your Market confirmed and Vendor Presence bridges in place, you’re ready to build your Account Scoring bridge — a single, org-level bridge that scores every buyer in your Market.Account Scoring bridges are set up by Admins.
1
Choose your starting point
Decide whether to build your Account Scoring bridge from scratch, or migrate an existing buyer bridge you’ve already been using to score accounts.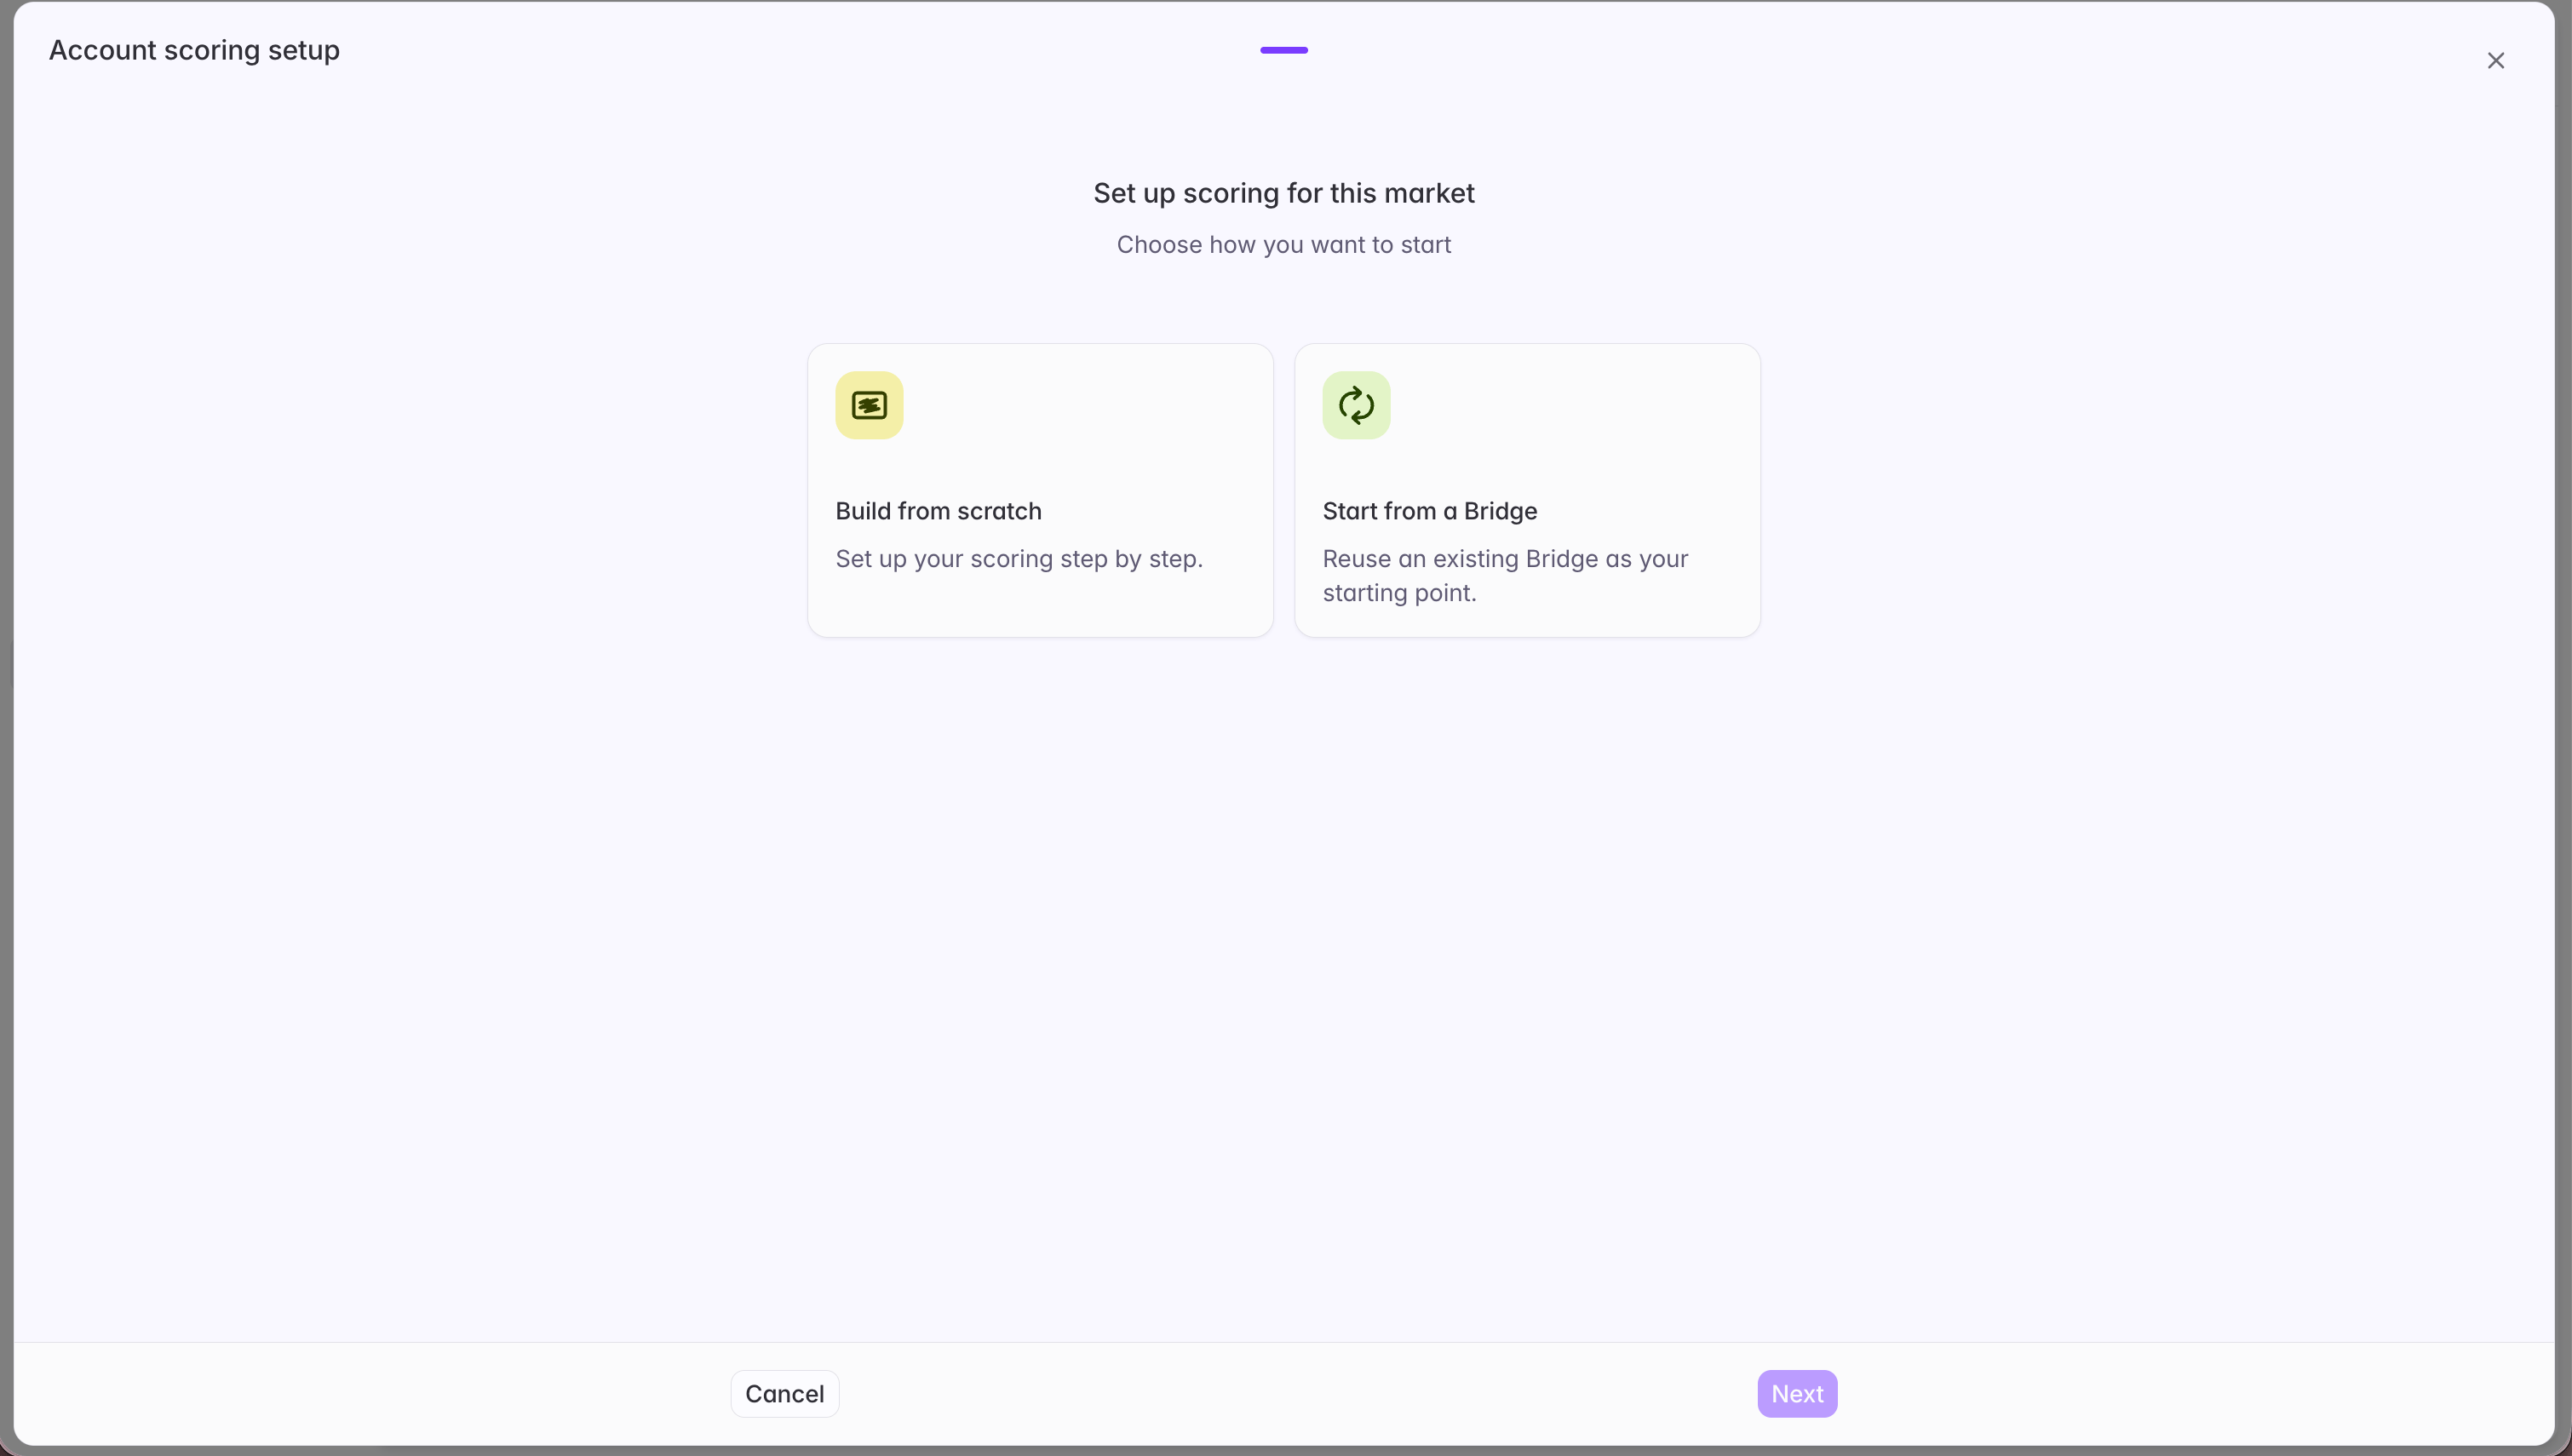
2
Confirm your buyers
Double-check that the Buyers defined in your Market are accurate — this is the buyer pool your Account Scoring bridge will run against.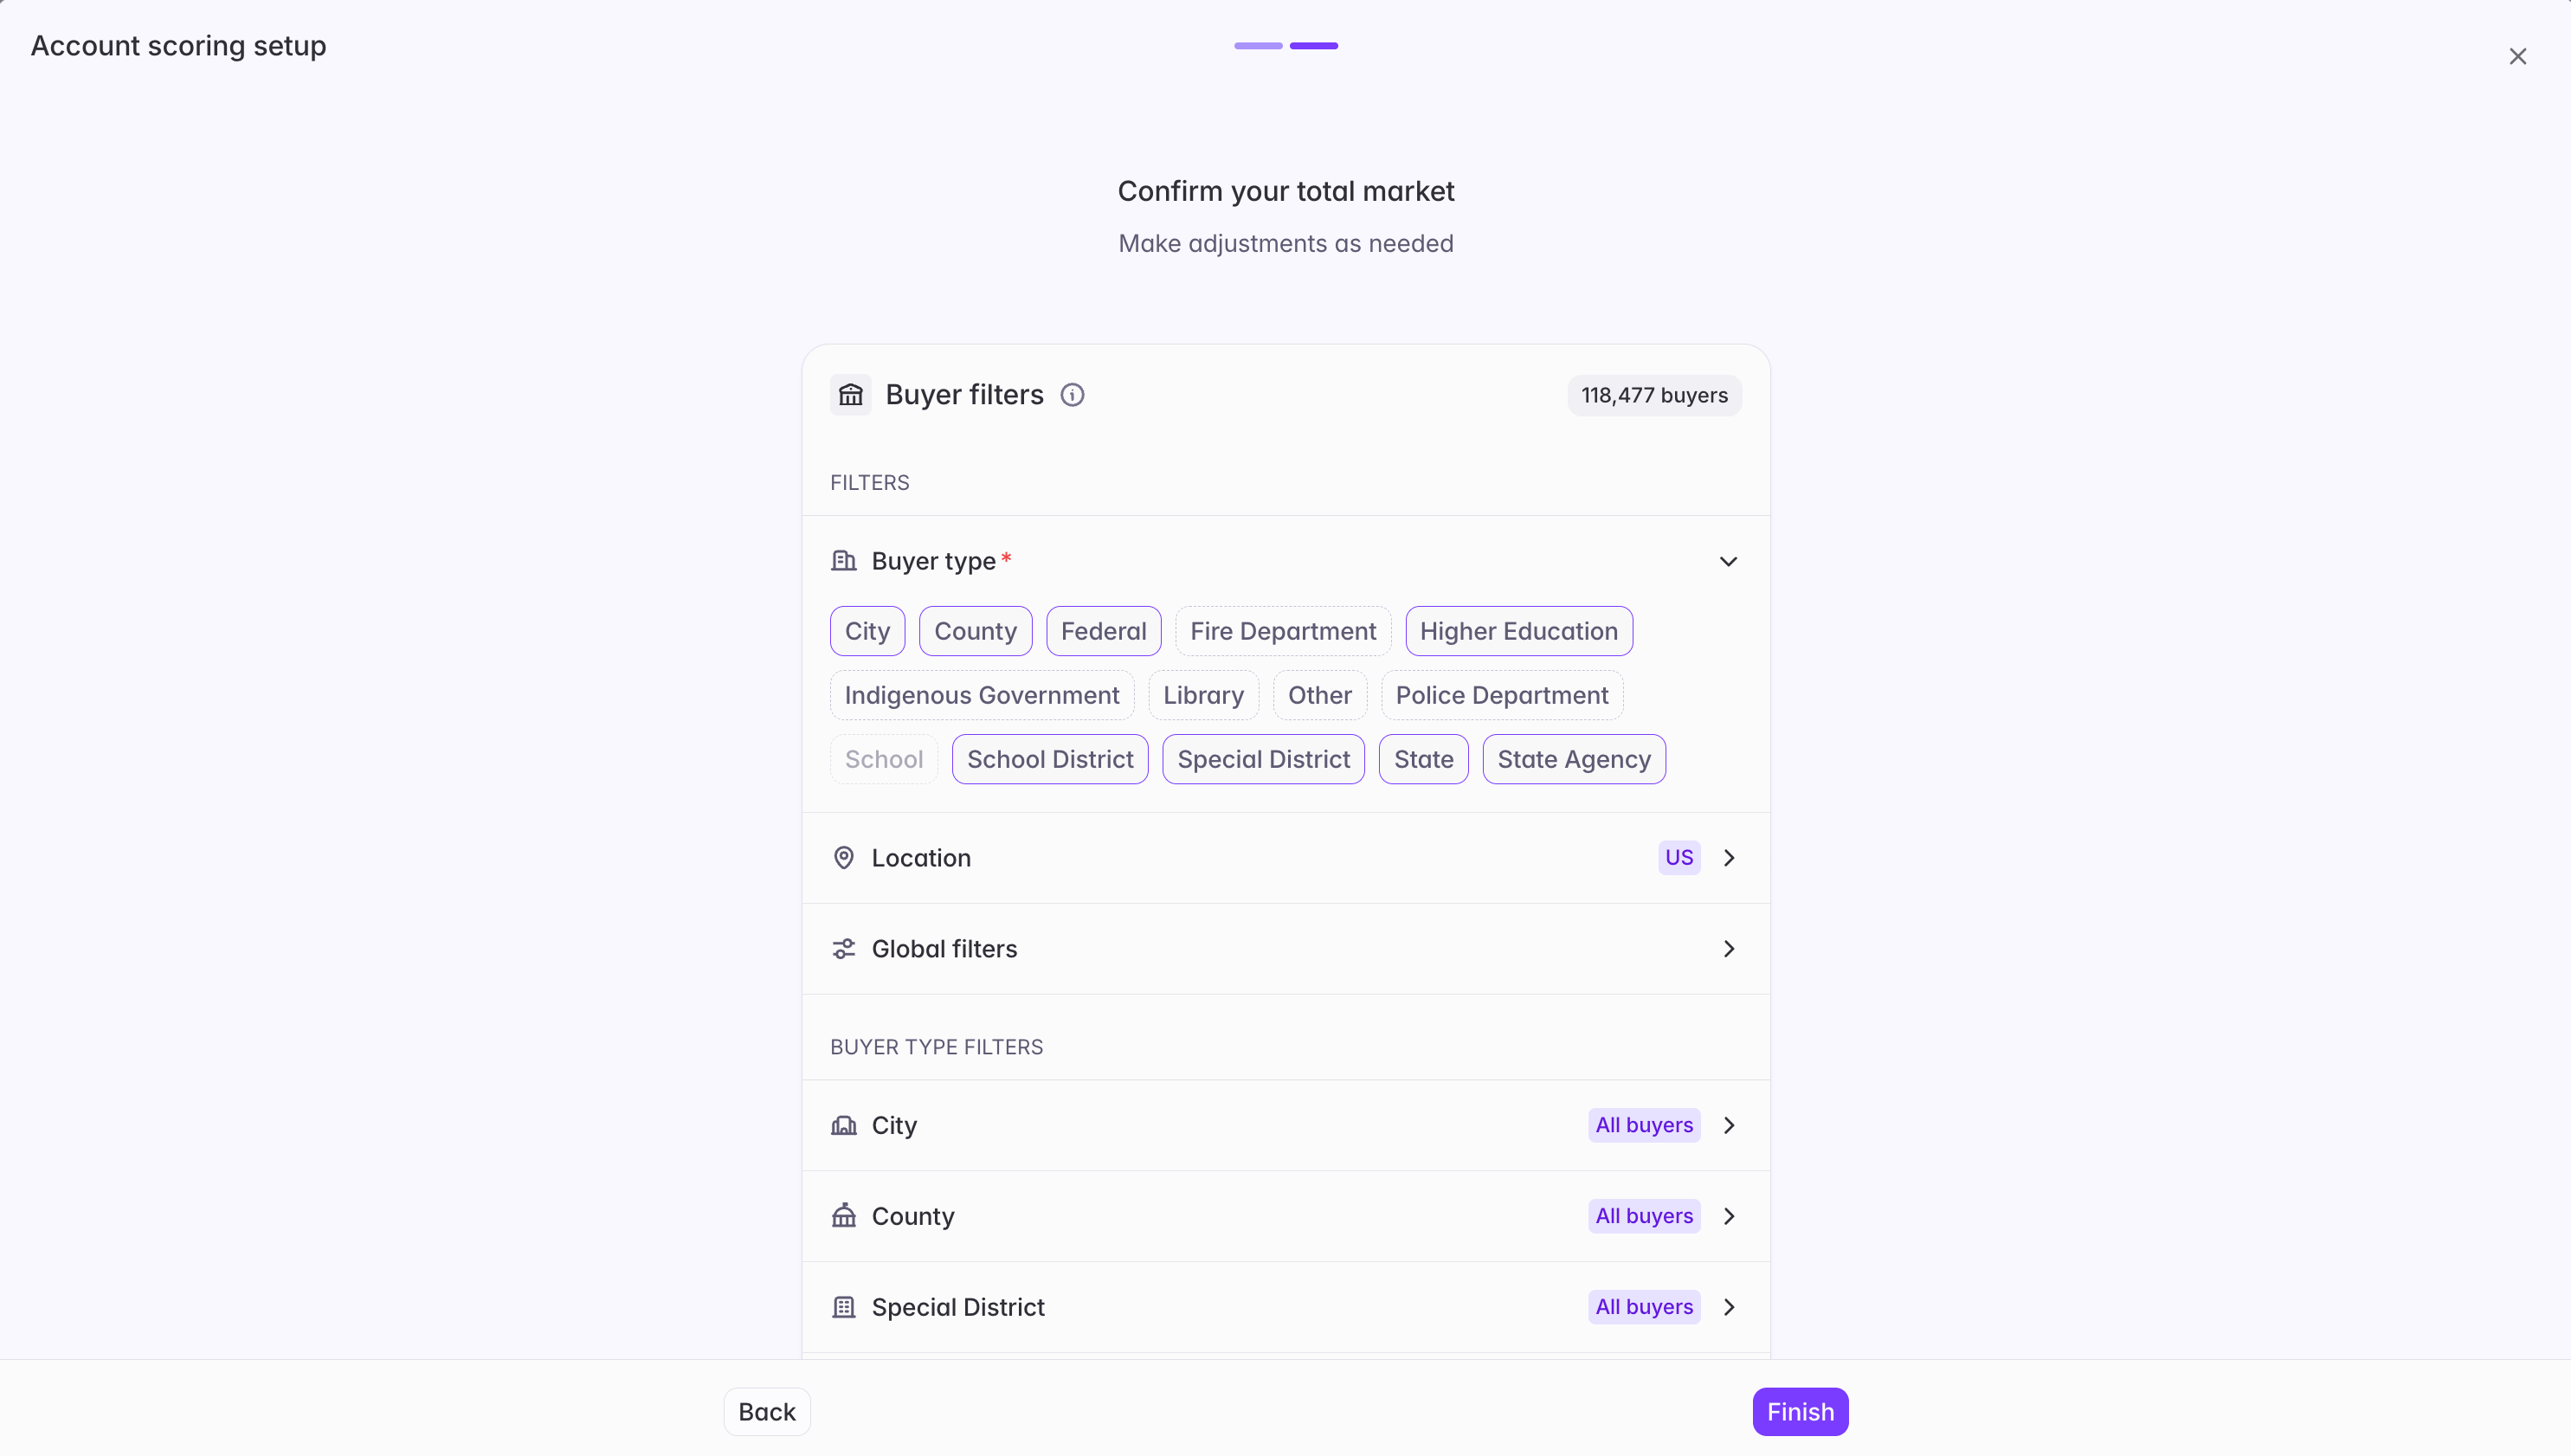
3
Add your fit attributes
Add the buyer attributes, vendor presence, and AI Analysis columns you want to count toward Fit. If you migrated an existing bridge, confirm the Fit attributes that came over are correct — you can review everything that migrated in the scoring migration report we provide once migration is complete.You can also pull in data directly from your CRM to use as a Fit input: choose Configure Integration, then Pull data from my CRM. Any CRM data you bring in this way is grouped under Fit alongside your other attributes. Common examples include account type and whether an account has an open opportunity.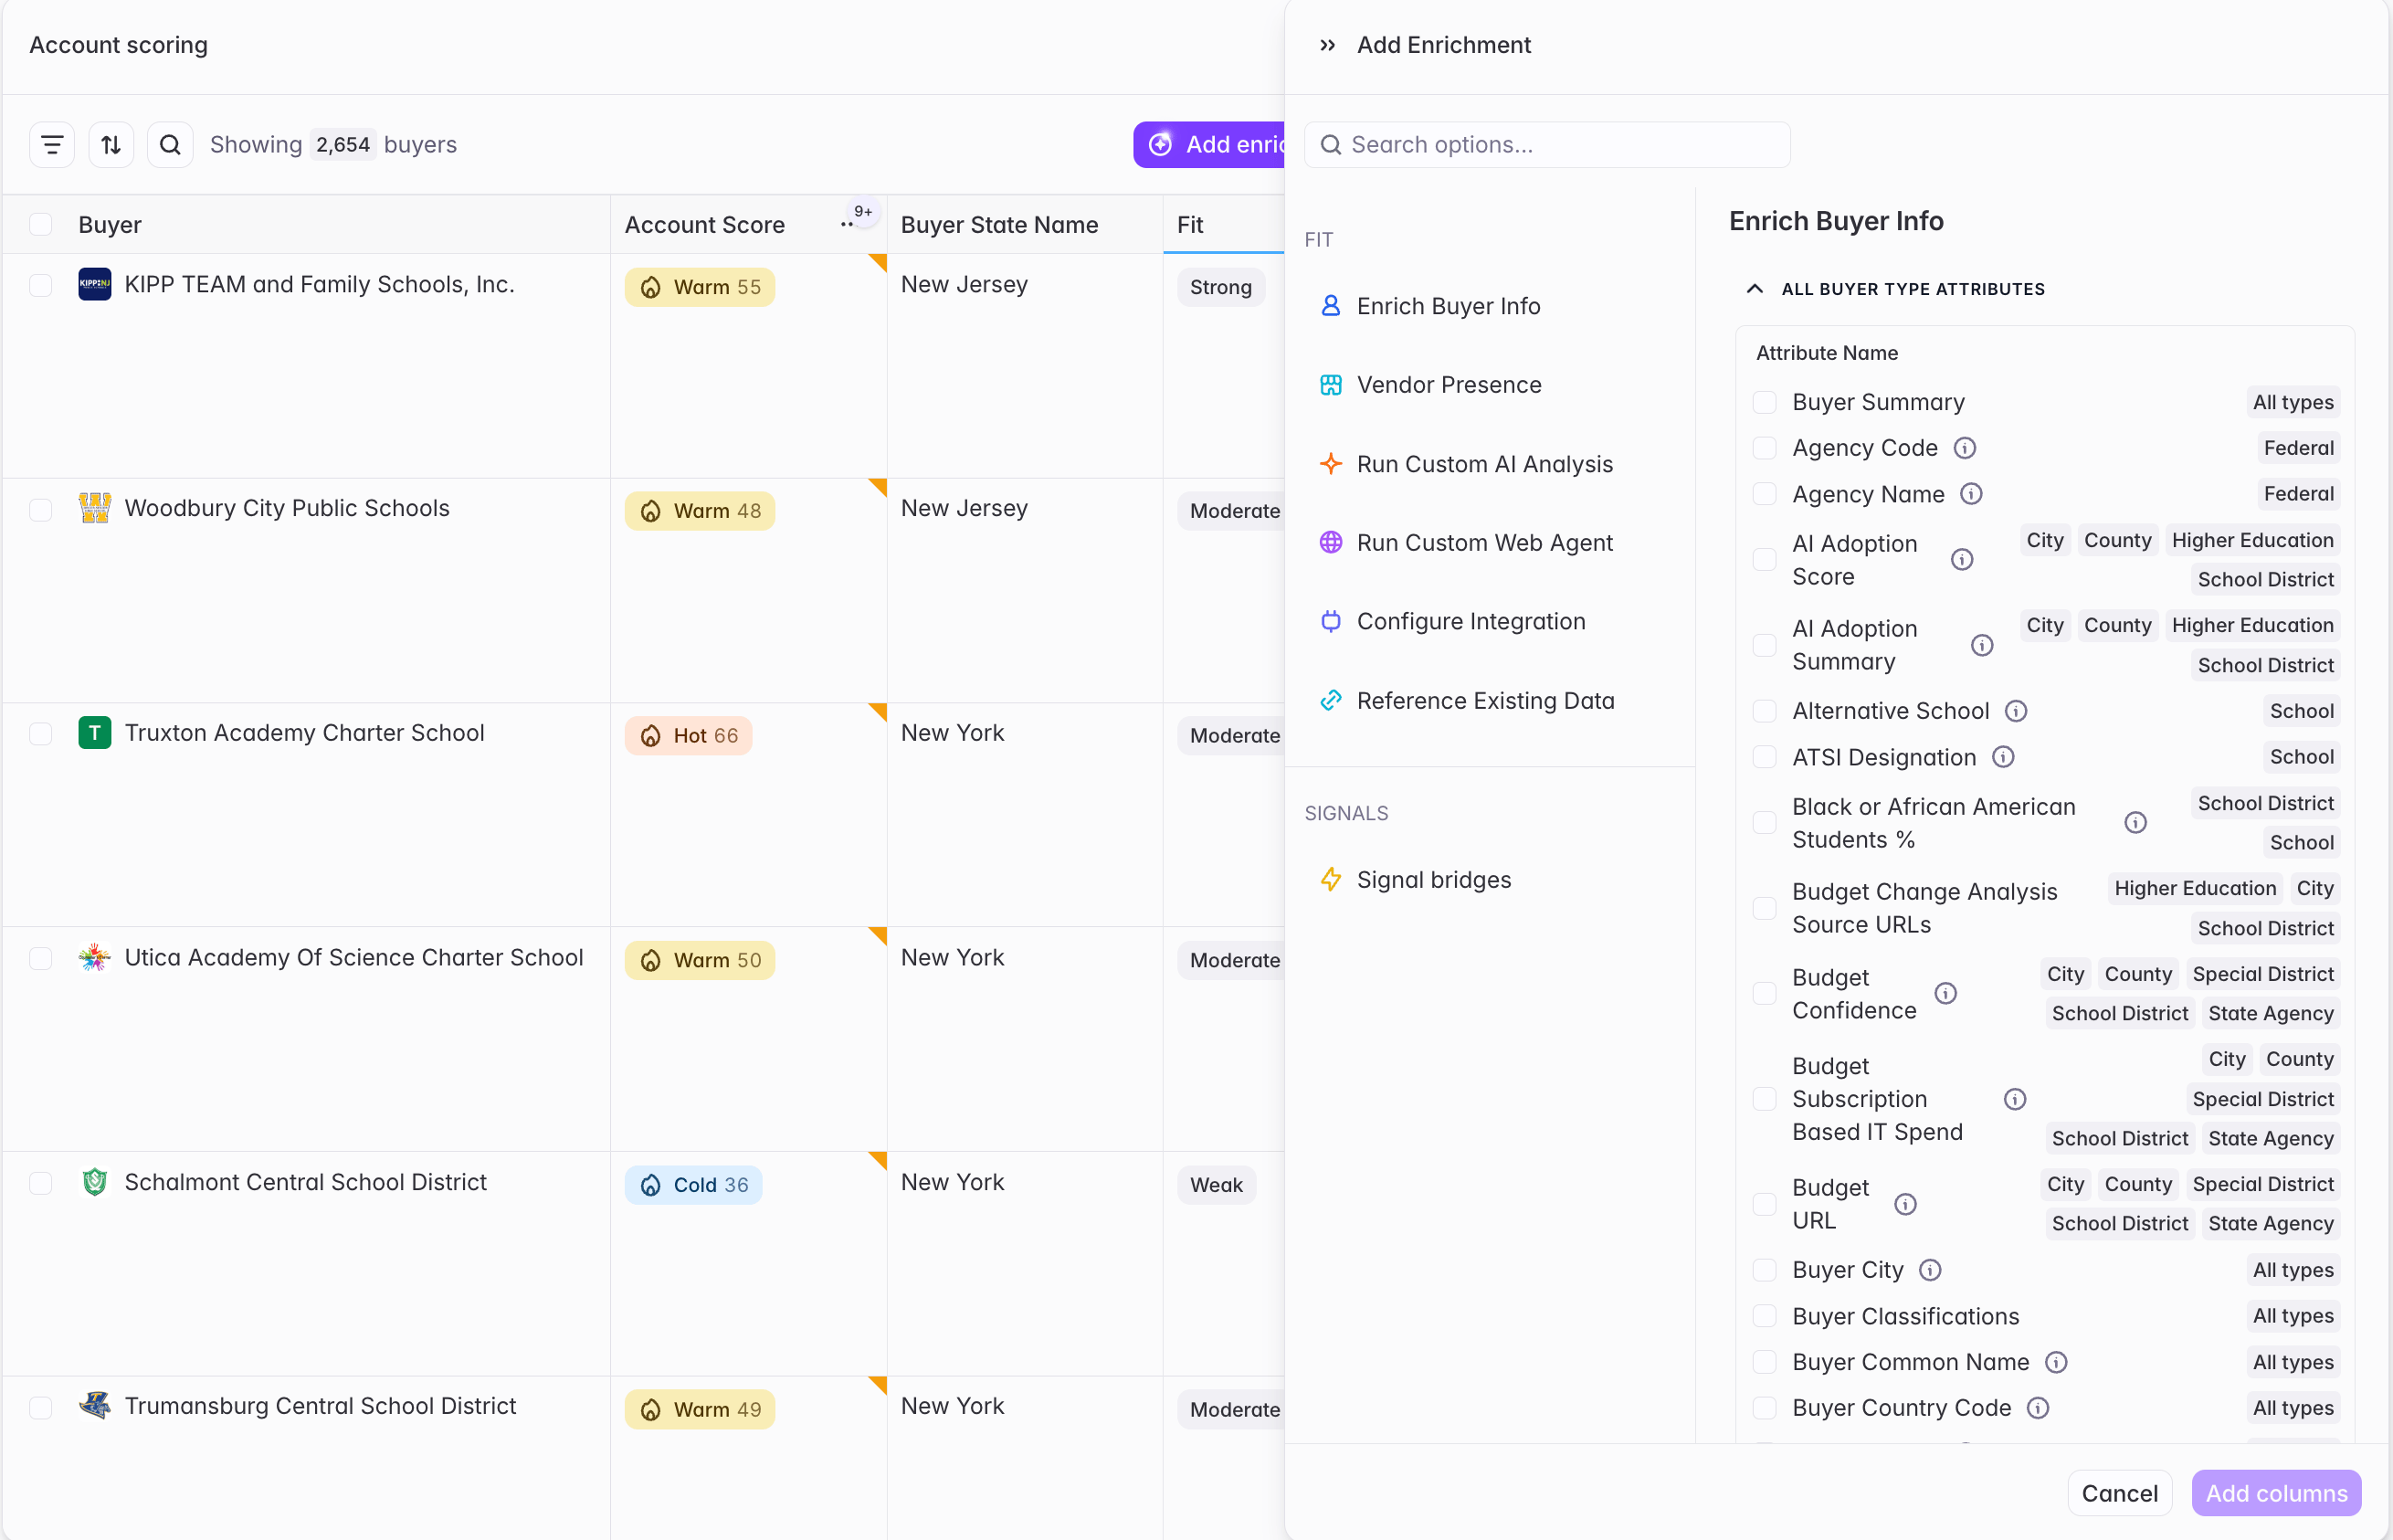
4
Add your signals
Add the bridges you want to count as signal sources. Only include bridges that represent actionable buying signals — exclude one-off analyses or bridges that don’t reflect an active buying opportunity (for example, a bridge that looks for dissatisfaction with your own product).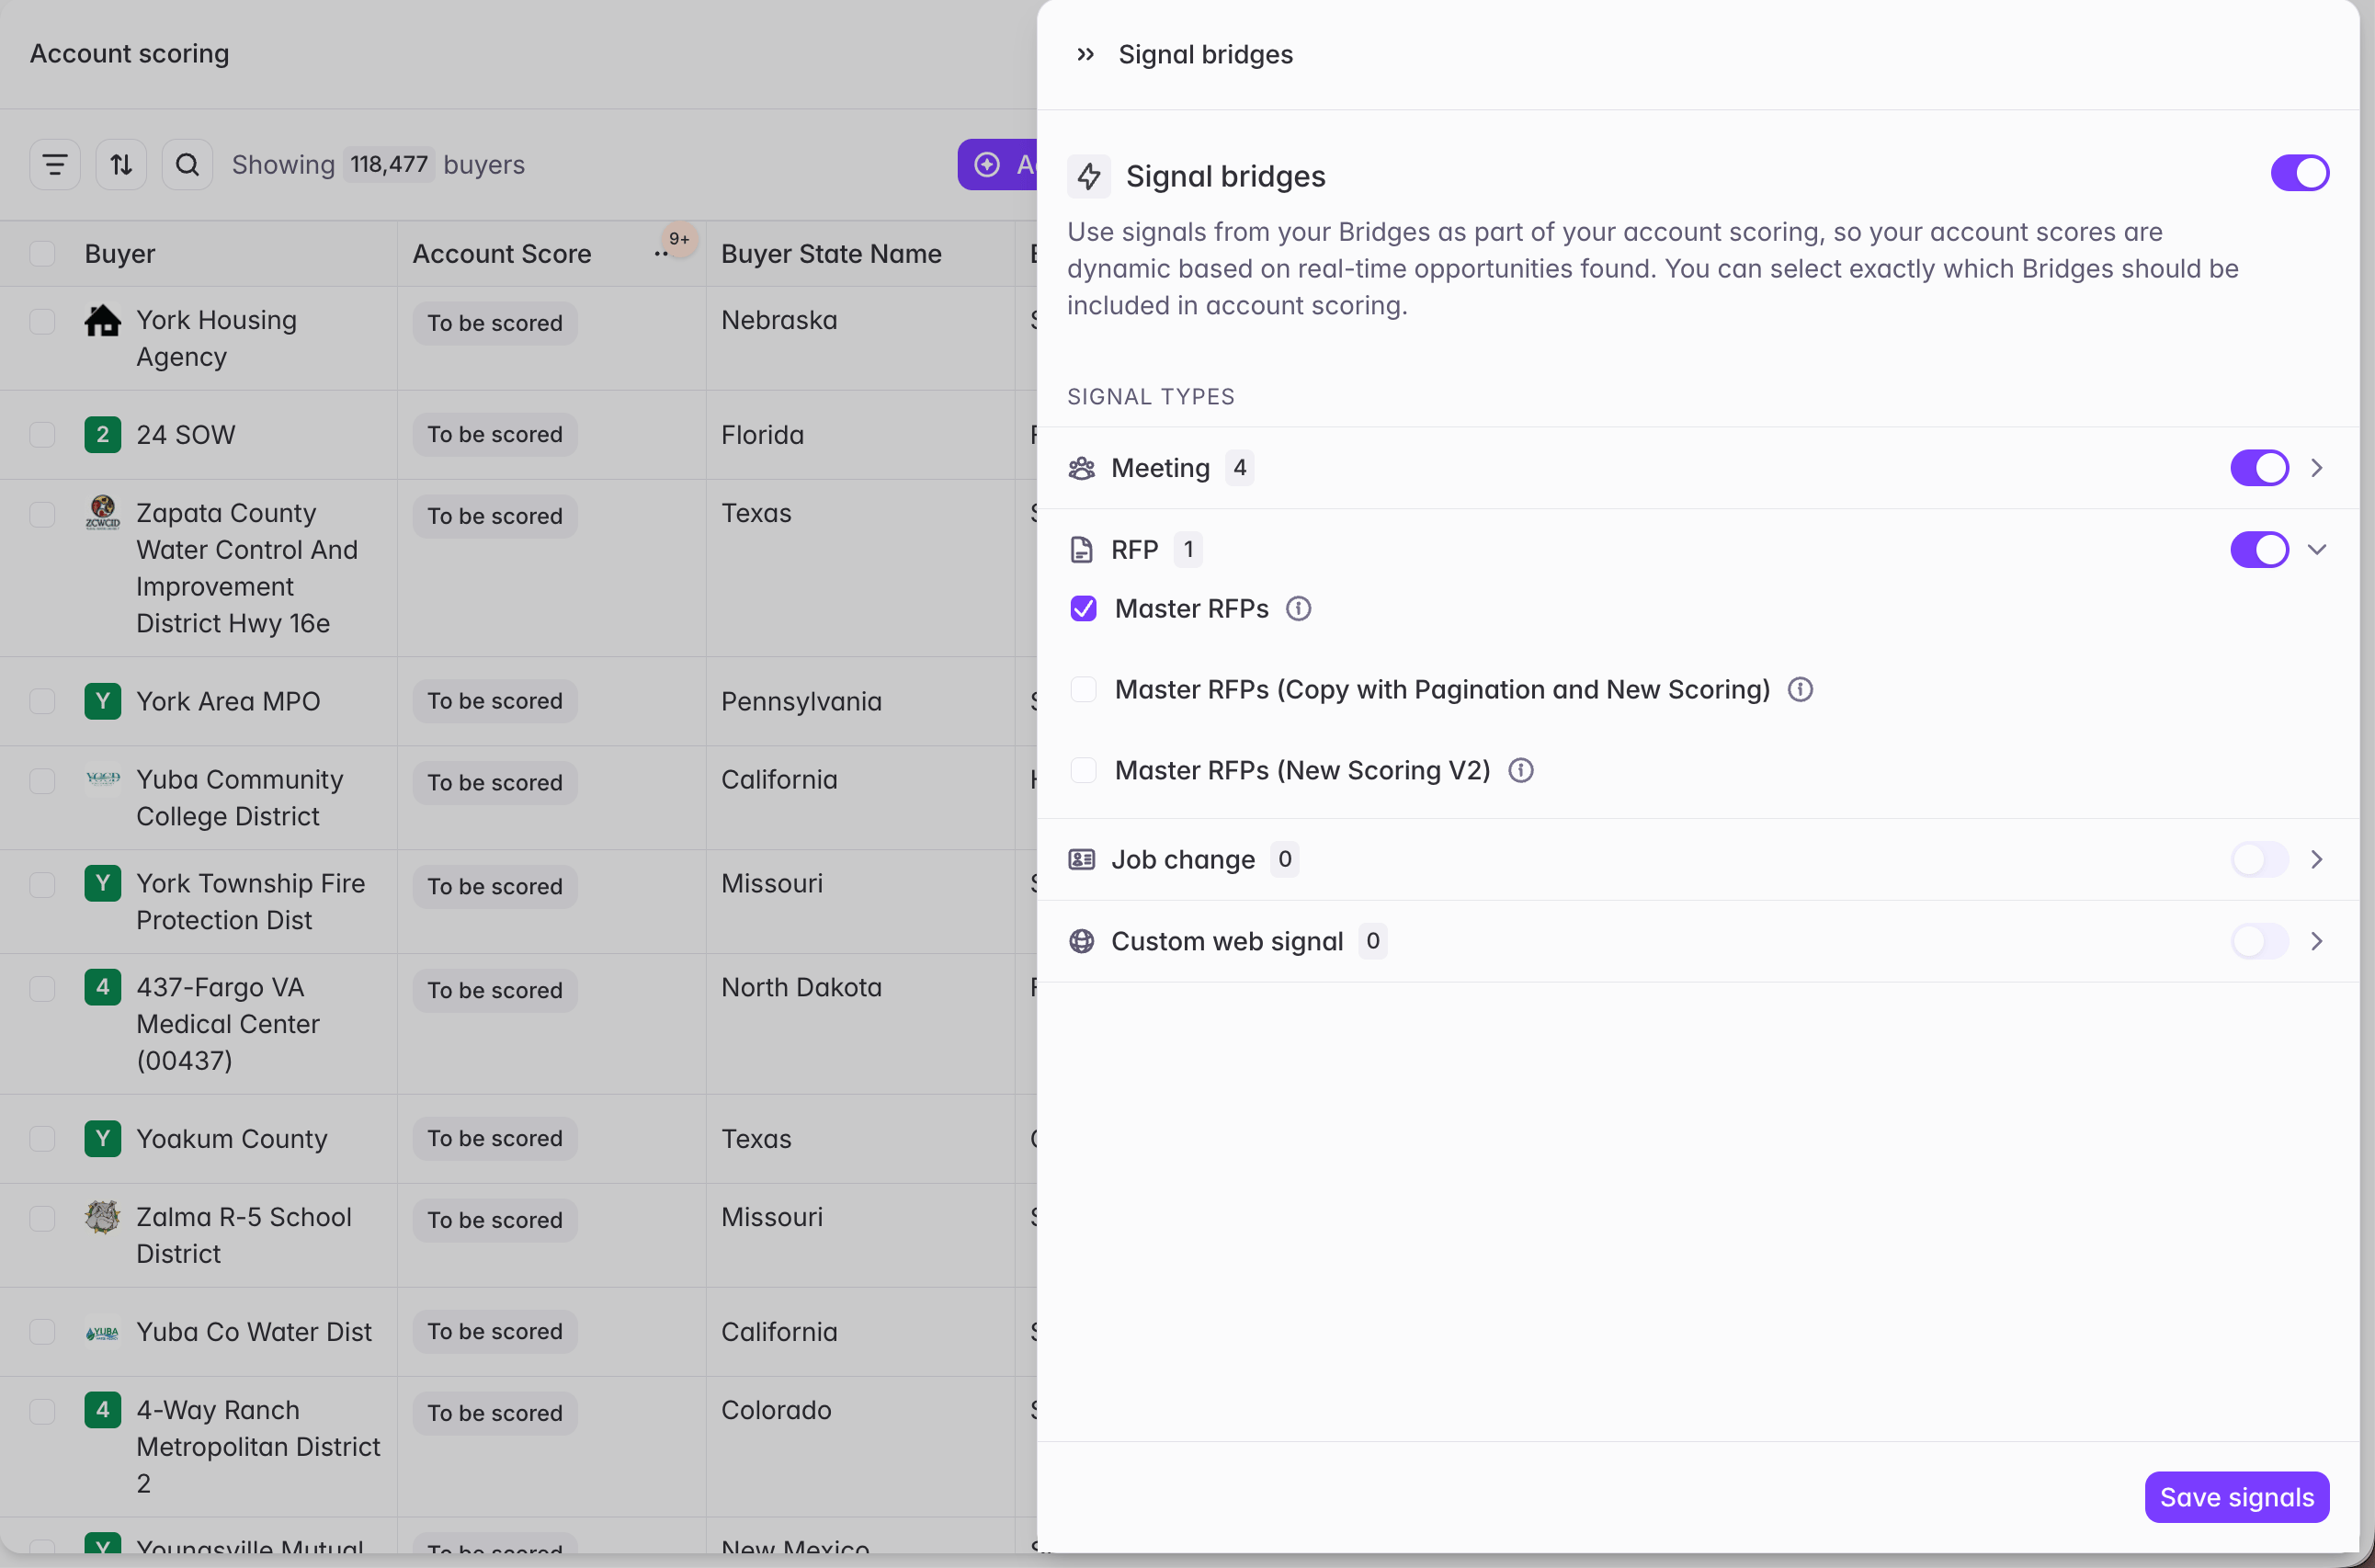
5
Configure your scoring logic
For each fit attribute you’ve included, define what value indicates a strong buyer fit. For each signal type, define what indicates a strong buying signal. For both Fit and Signals, you can optionally add a prompt describing how different attributes or signal types should be weighed against and prioritized relative to one another (for example, “an RFP is the strongest signal, even without an accompanying meeting”). If you migrated an existing account scoring bridge, your original scoring prompt is migrated in under each fit attribute for you to review and confirm.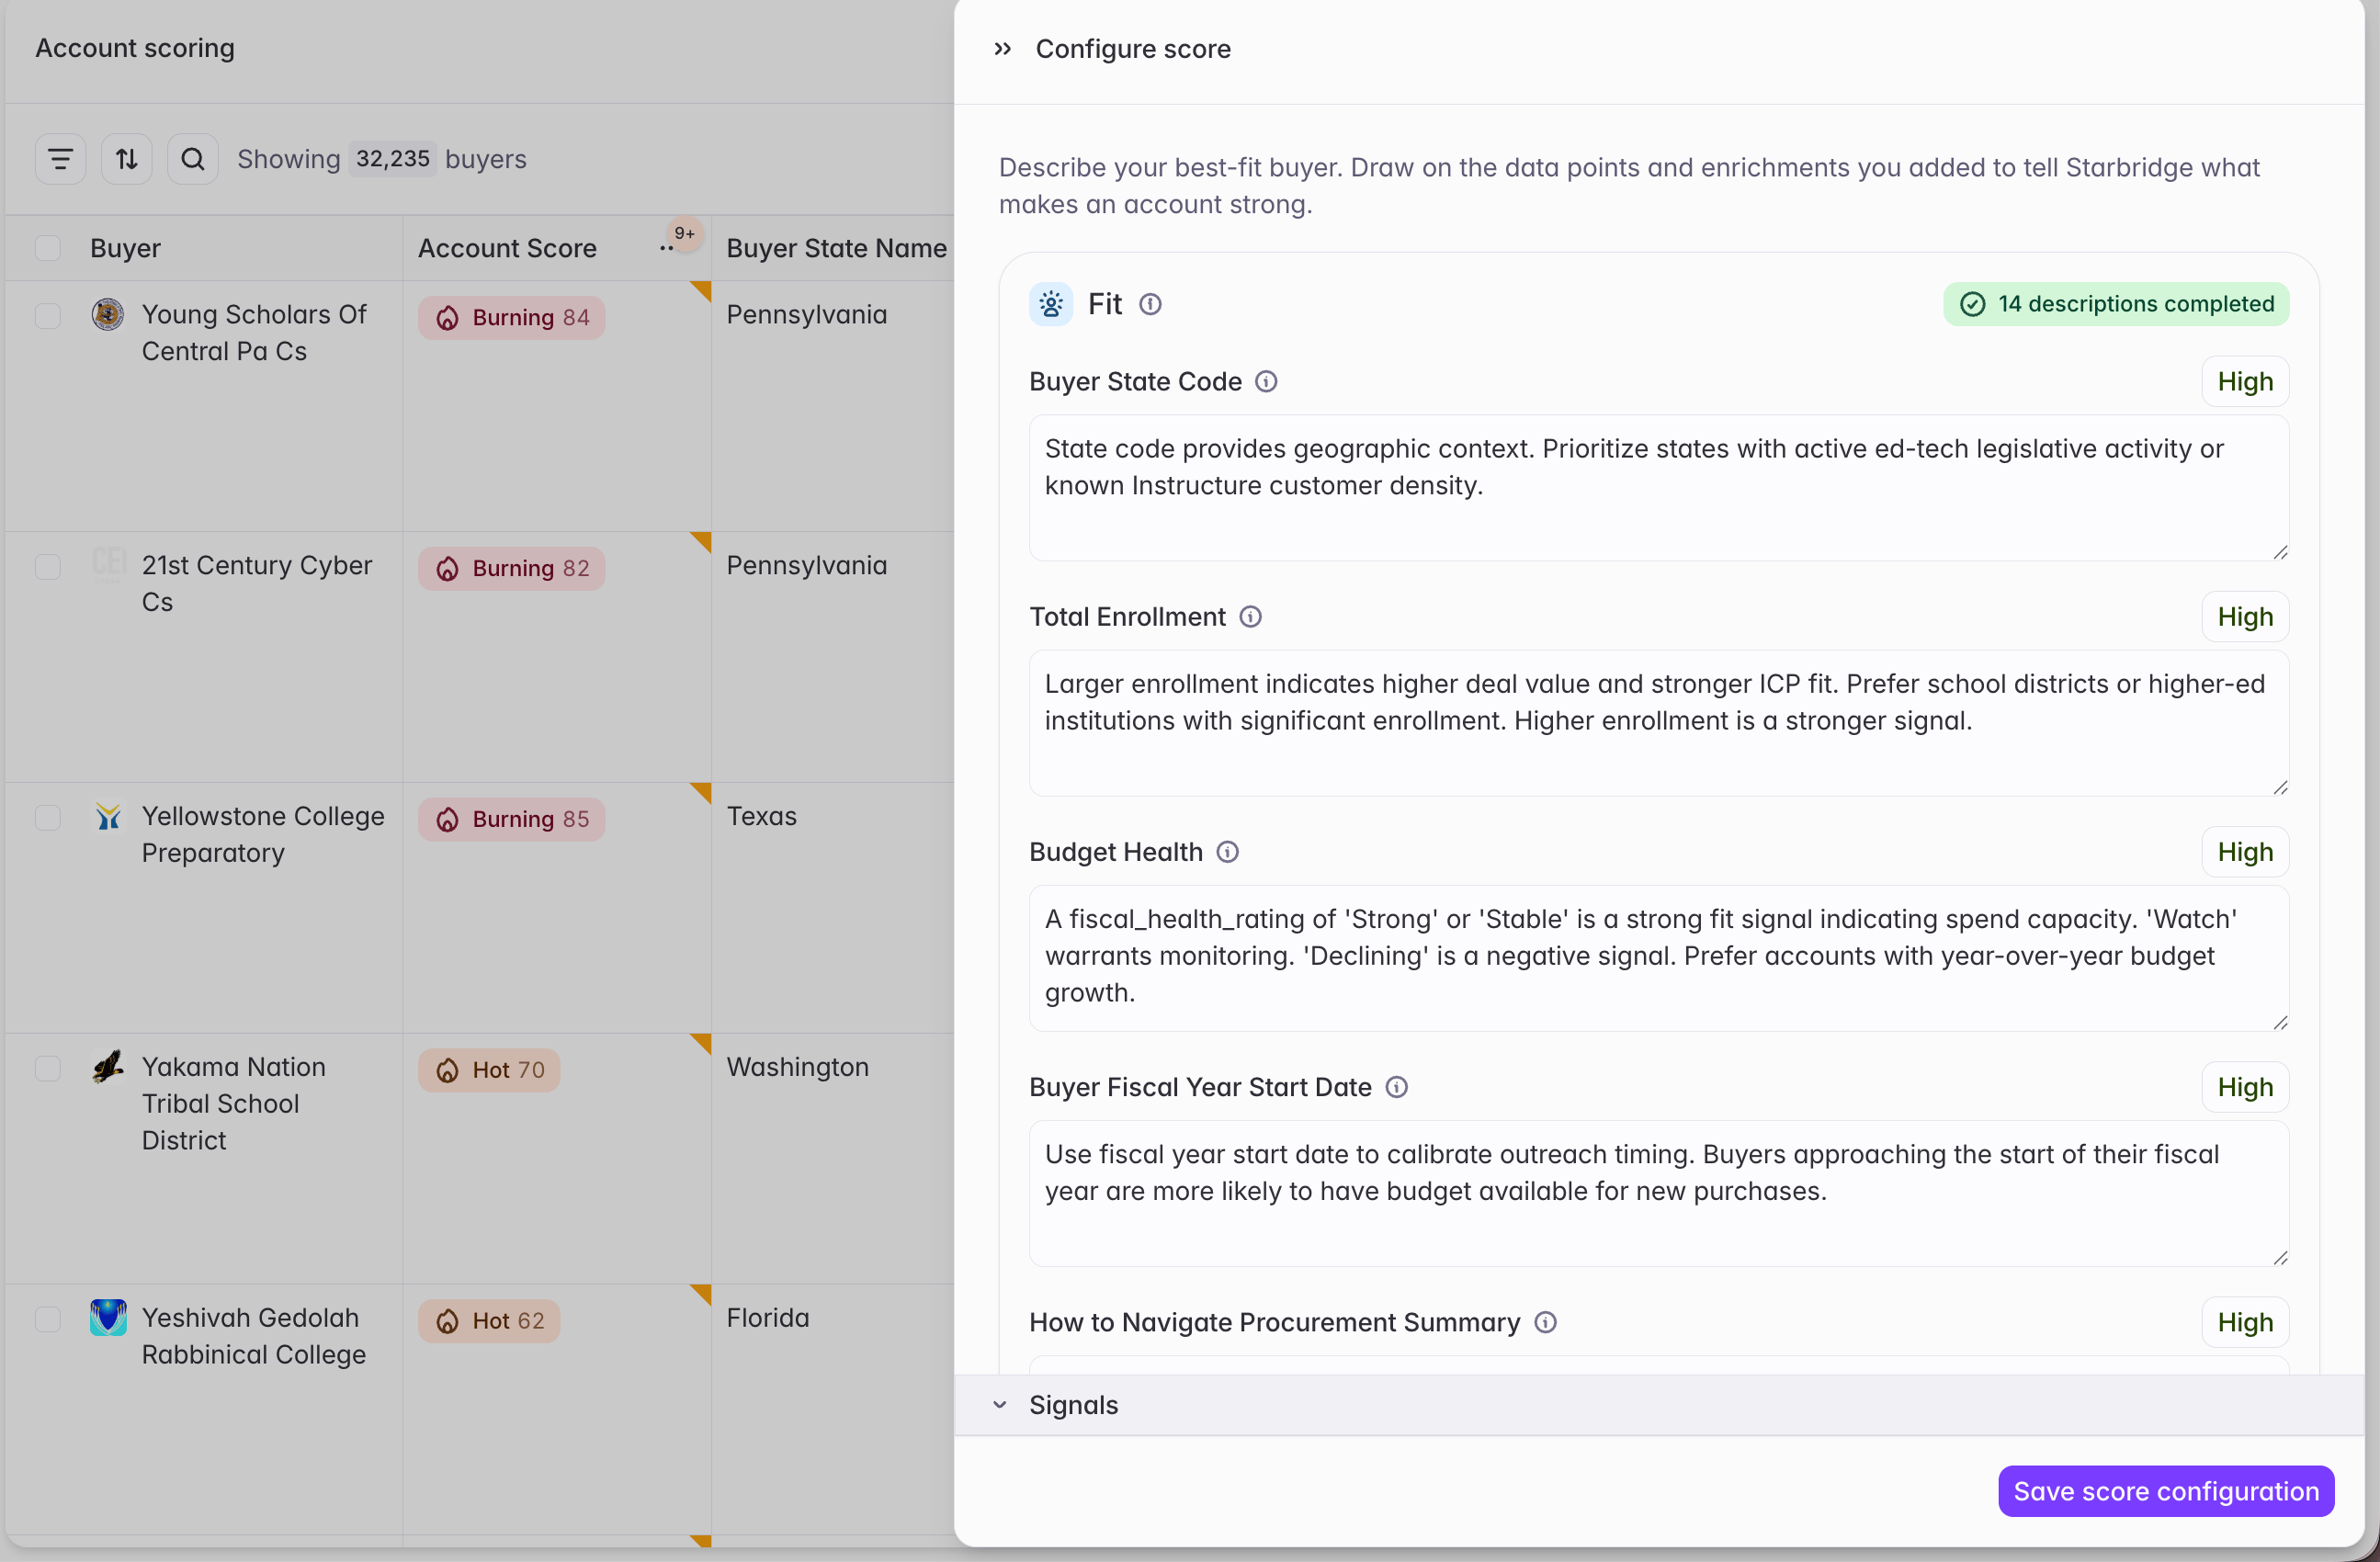
6
Test, then run at scale
Run scoring on the first 5 buyers in your bridge to confirm everything is set up correctly, making edits as needed. Once you’re happy with the results, run scoring for every buyer in your Market.
- A Fit score, shown as a band of Weak, Moderate, Strong, or Ideal — reflecting how well a buyer matches the strong-fit definition you set for each included attribute, shaped by your overall Fit prompt if you provided one.
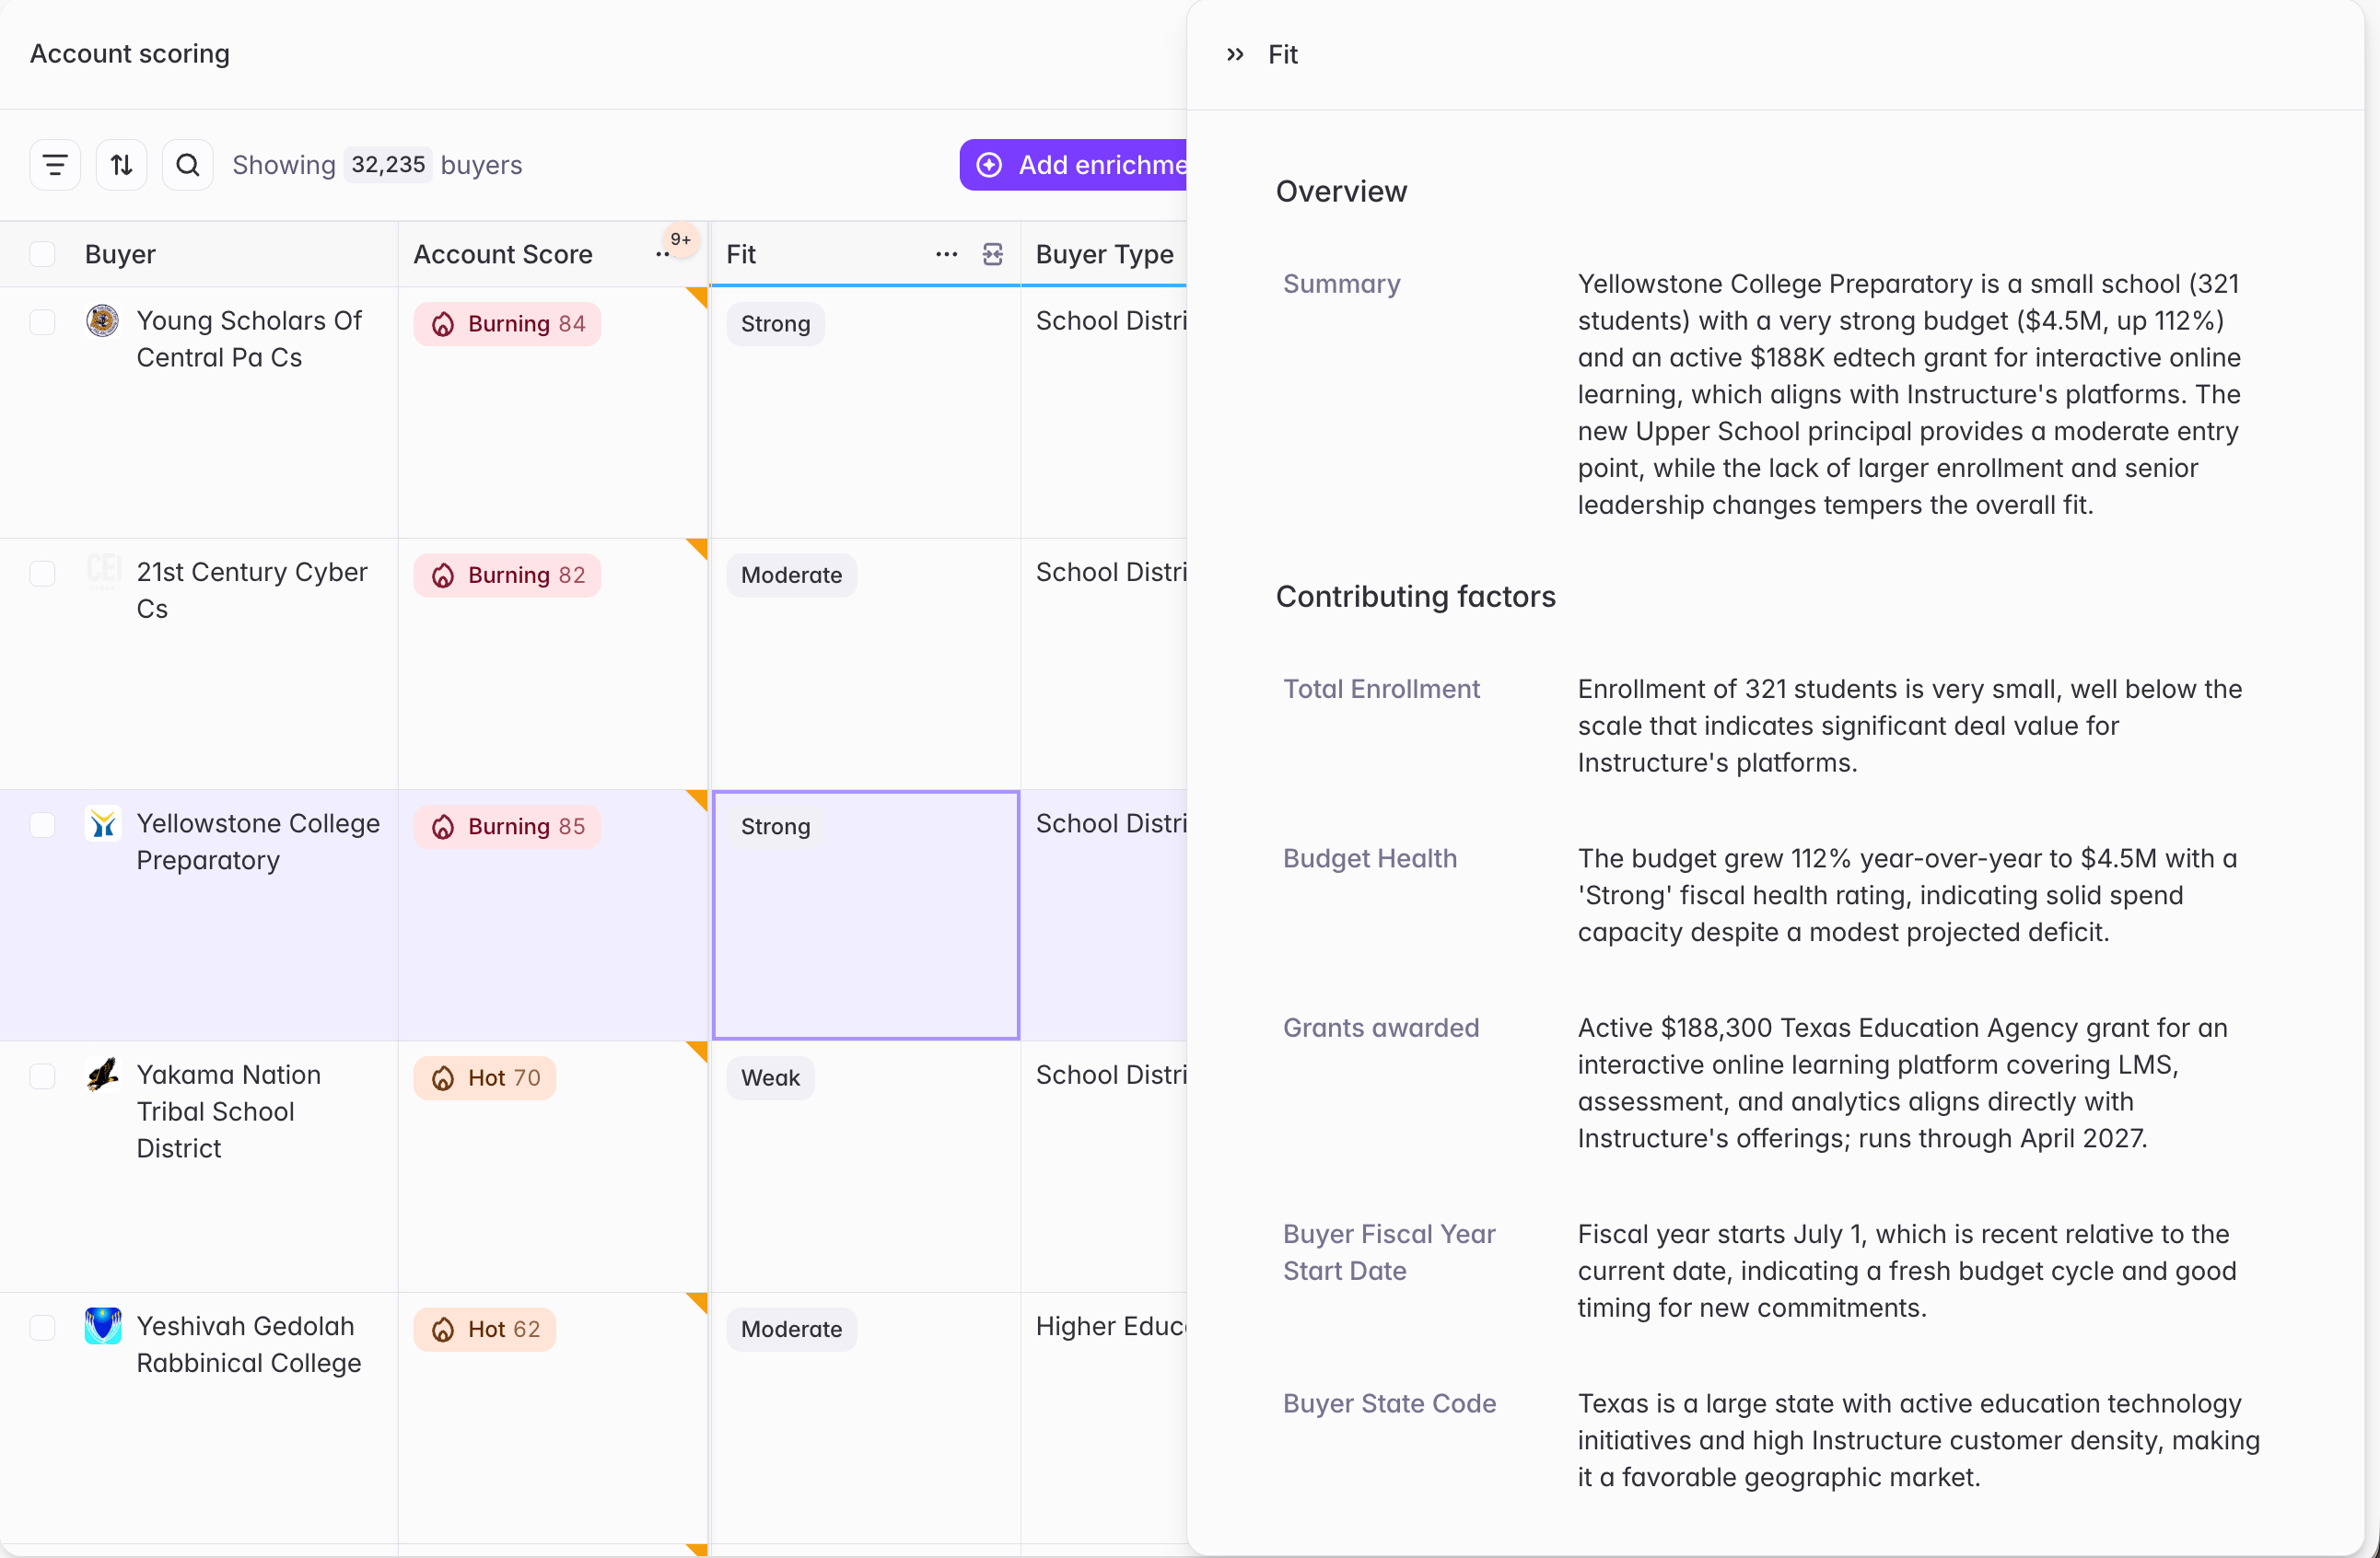
- A Signal score, shown as a band of Ice Cold, Cool, Warm, Hot, or Burning Hot — reflecting how active and timely a buyer’s included signals are, shaped by your overall Signal prompt if you provided one, along with a short explanation of the opportunity it represents.
Scores refresh daily as underlying signals refresh, but you’ll need to manually re-run scoring after changing your Fit or Signal configuration. Any column added to the bridge after initial setup is excluded from scoring by default until you opt it in.
Step 4: Share your scores and enrichment with your team
Sharing is done by Admins.
- Account scores — shares account scores with the rest of your team on the Buyers table, My Feed, and Buyer pages, along with the account enrichment data itself. When this is off, account scores are hidden everywhere across the platform — no score pills, and no filtering or sorting by account score on the Feed or Buyers views.
- Enrichment columns — shares all the account enrichment columns from your Account Scoring bridge (both Fit and Signal columns) on the Buyers table, regardless of whether account scores are set up or shared. Support for Buyer pages is coming soon.
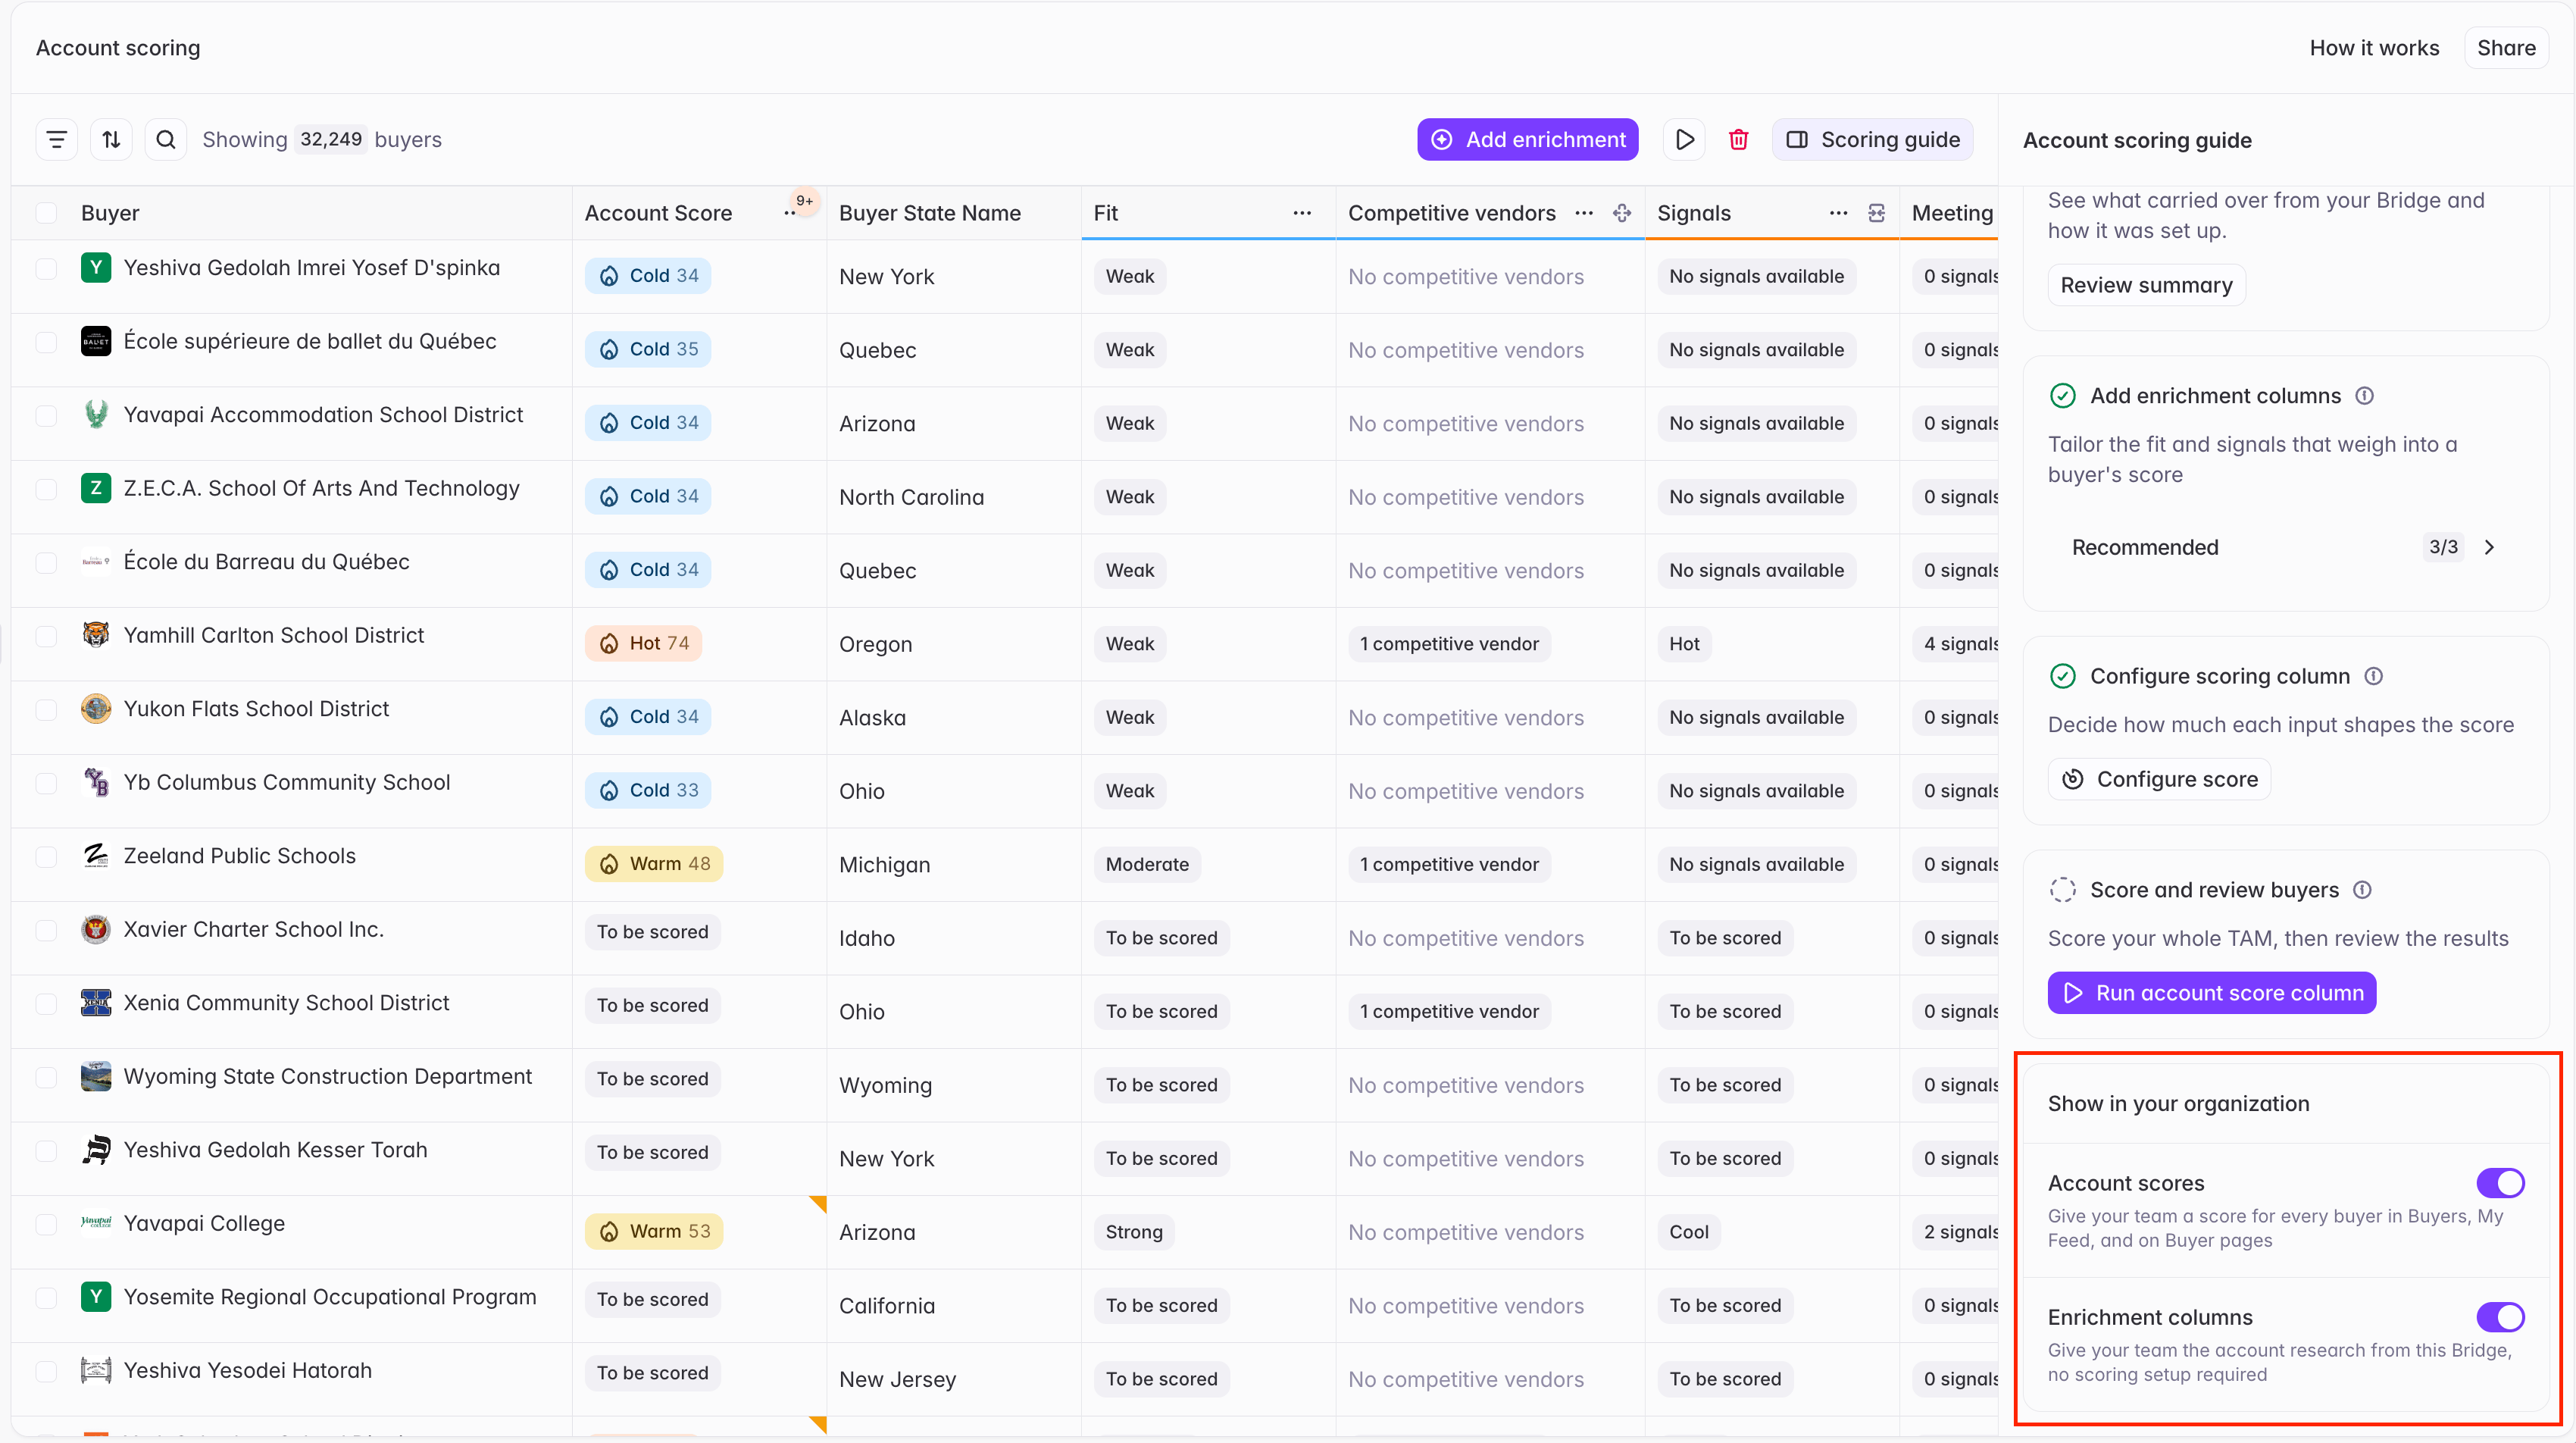
Enrichment columns is on by default for every Account Scoring bridge, so your team can see the underlying research even before you’ve finished configuring scoring.
Where scores and enrichment show up
Once your Account Scoring bridge has run, what surfaces depends on which Show in your organization toggles you’ve turned on. With Account scores shared, scores surface throughout the product:-
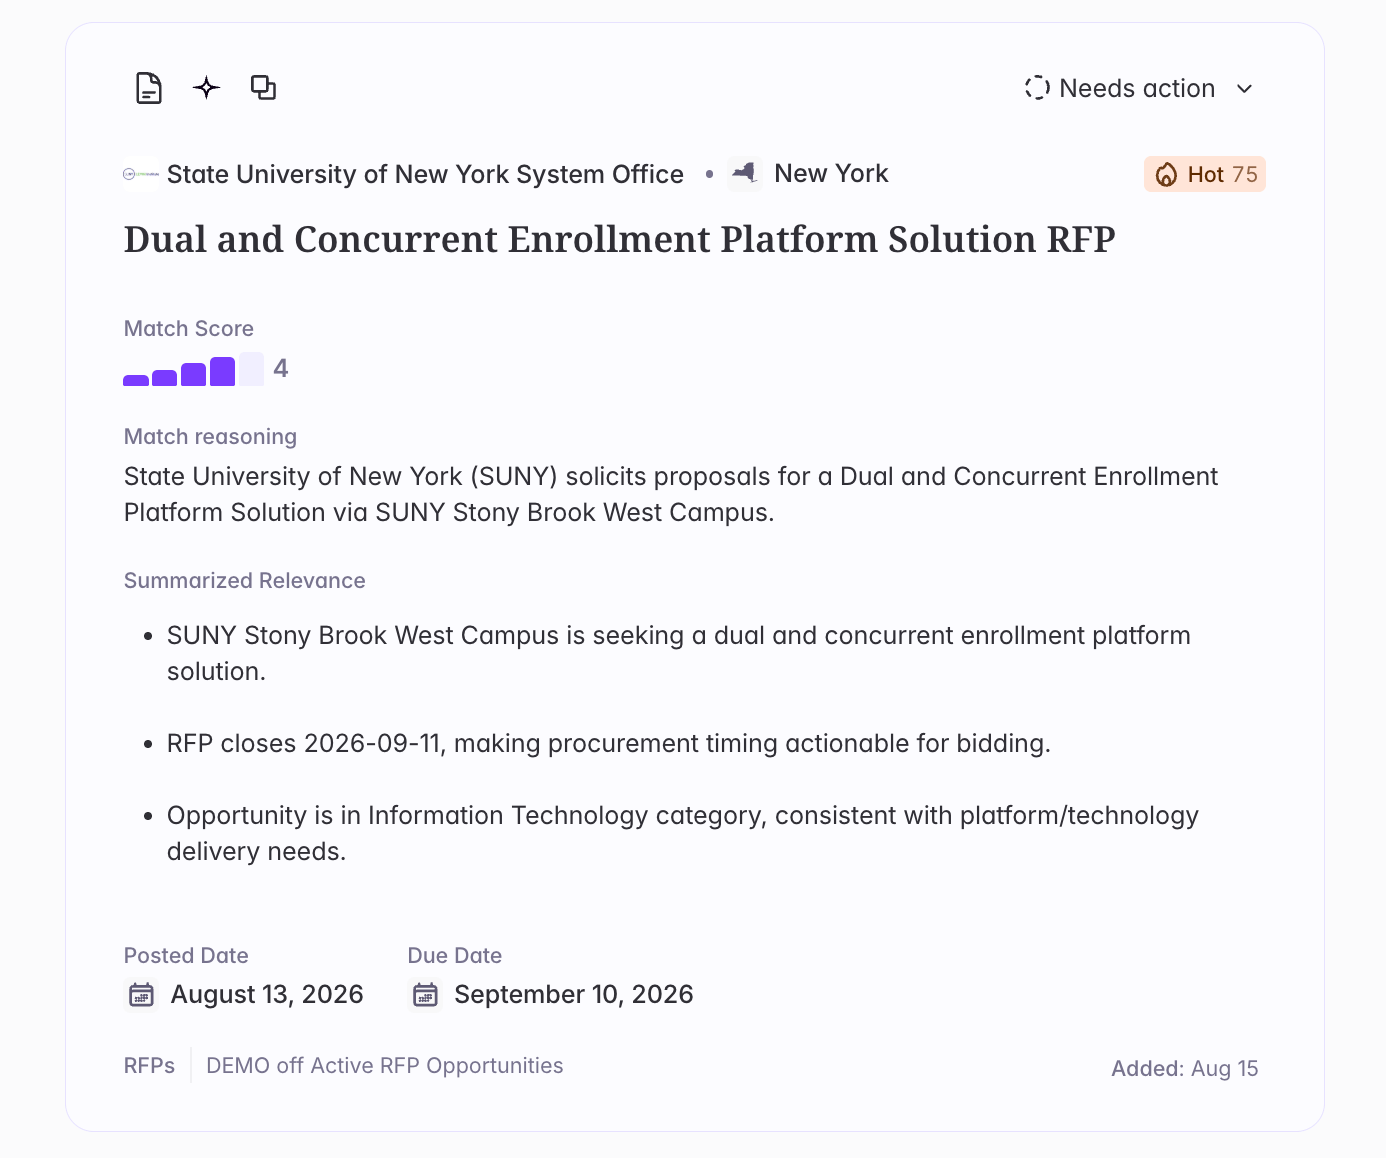
On feed cards — each account update in your feed now shows the buyer’s account score alongside the change.
- On the buyer page — see the overall score plus the underlying Fit and Signal explanations for any buyer.
-
In the new Territory and Total Market Buyers views — the Buyers page now has three tabs:
- Territory — scoped to a rep’s own territory. Sort and filter by account score and by every underlying input that feeds into it (Fit attributes, vendor presence, signal types, and more).
- Total Market — the same functionality as Territory, scoped to every buyer in your organization’s Market.
- All Buyers — the existing view you have today, unchanged. No account score or score-input columns appear here.
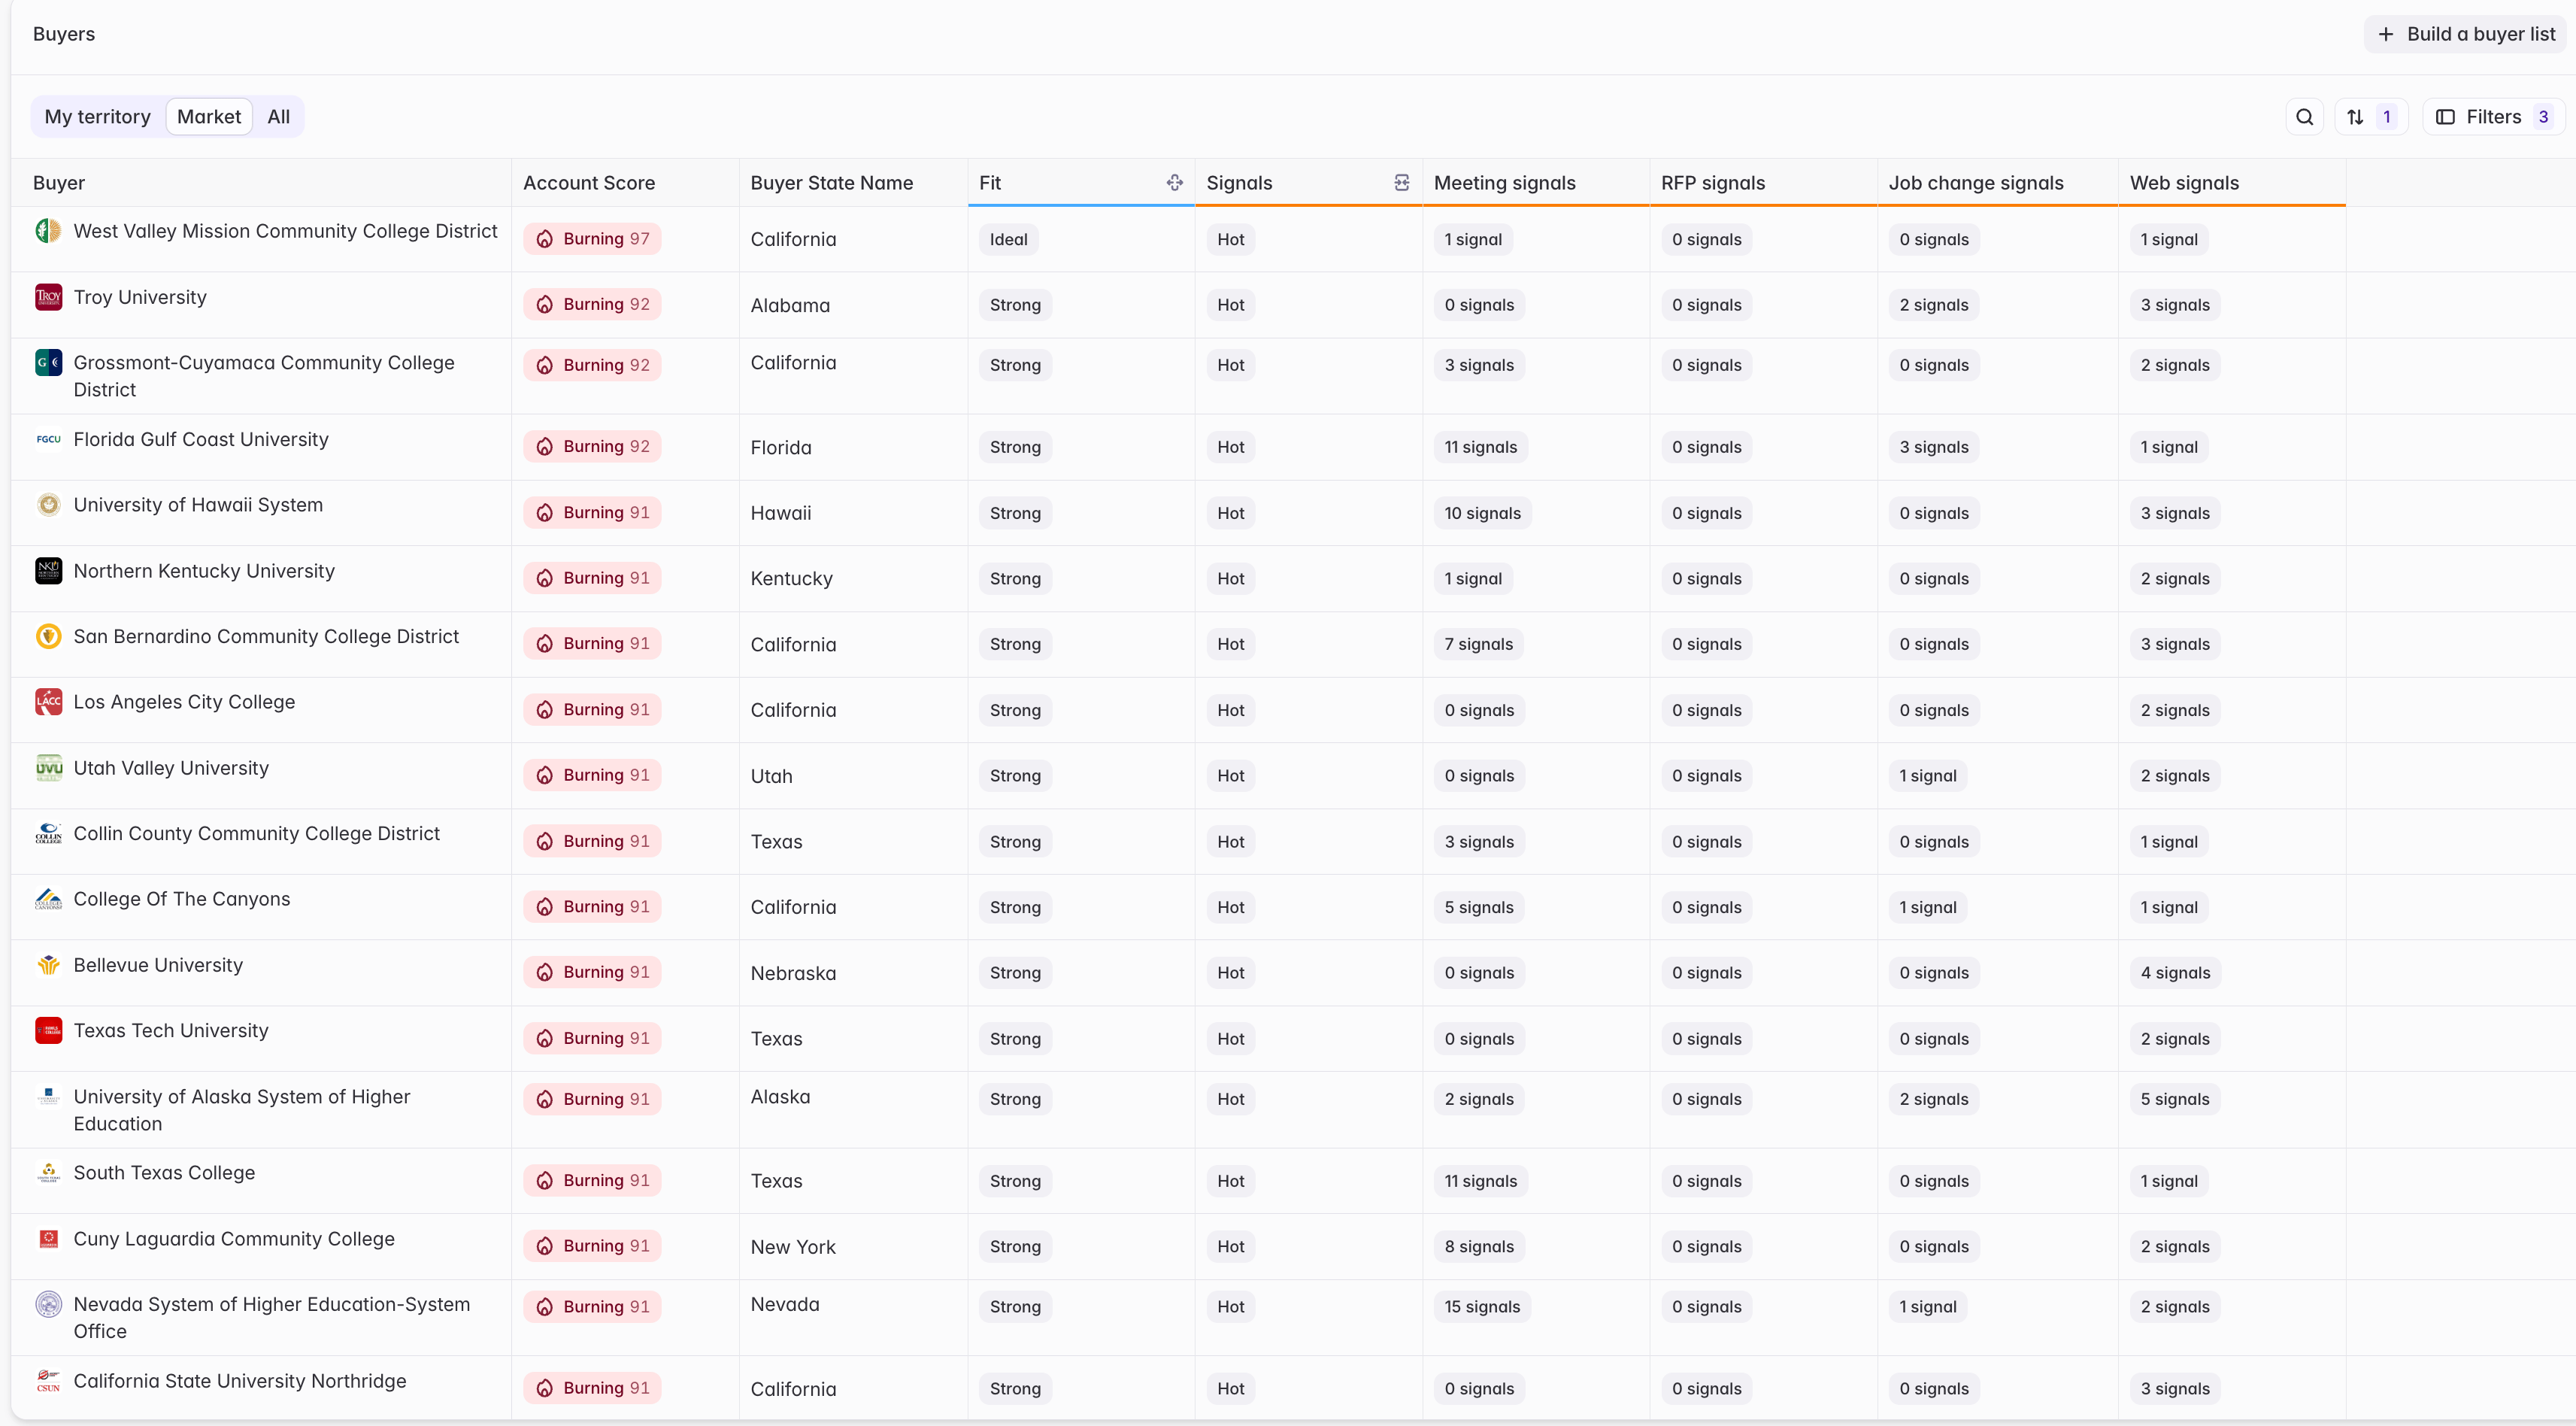
Buyer List configuration and management has moved to Settings, where it’s accessible to Builders and Admins. You can still apply Buyer Lists as a filter on all three Buyers view tabs.
FAQ
Do I need to build my Market from scratch?
Do I need to build my Market from scratch?
No — a default Market already exists for your organization. This is a review-and-confirm step, especially for your Buyers definition, not a build-from-zero step.
Can I skip Vendor Presence bridges and go straight to Account Scoring?
Can I skip Vendor Presence bridges and go straight to Account Scoring?
Yes, they’re optional, but strongly recommended. Vendor presence is one of the strongest Fit inputs, and the data is also useful on its own — for example, on buyer pages.
I already score accounts using a buyer bridge today. Do I have to start over?
I already score accounts using a buyer bridge today. Do I have to start over?
No — when you build your Account Scoring bridge, you can choose to migrate from an existing buyer bridge instead of starting from scratch. Compatible fit attributes and your existing scoring prompt are brought over for you to review, and you’ll get a scoring migration report summarizing exactly what came across. AI Analysis and custom web agent columns keep their existing values so you don’t spend extra credits re-running them.
What does the account score range mean?
What does the account score range mean?
Account scores range from 1–100, blending a Fit band (Weak, Moderate, Strong, or Ideal) with a Signal band (Ice Cold, Cool, Warm, Hot, or Burning Hot). A top score generally means both strong ICP fit and an active, timely signal.
Who can configure Market, Vendor Presence bridges for Markets, and Account Scoring?
Who can configure Market, Vendor Presence bridges for Markets, and Account Scoring?
Market, Vendor Presence bridges for Market, and the Account Scoring bridge are configured by Admins. Buyer List management in Settings is available to both Builders and Admins.
Have questions or feedback on Account Scoring? Reach out to your Starbridge contact or support@starbridge.ai.