

Prerequisites
How attribution works
Starbridge checks every opportunity against two sets of rules. An opportunity that meets any Sourced rule is Sourced. One that meets no Sourced rule but any Supported rule is Supported. An opportunity with no qualifying activity doesn’t appear in the dashboard.The pipeline dashboard refreshes nightly. Updates can take up to 24 hours to appear in the dashboard.
Sourced
Sourced means Starbridge helped create or directly initiate the opportunity. These rules look at activity before the opportunity was created.| Rule | What counts |
|---|---|
| Primary contact | Salesforce: the opportunity’s primary contact was created by Starbridge, or had their email or phone supplied by Starbridge. HubSpot: any contact associated with the deal was created by Starbridge, or had their email or phone supplied by Starbridge. |
| Account | Starbridge created the account in your CRM. |
| Signal actioned | Your team actioned or starred a Starbridge signal for the buyer in the 90 days before the opportunity was created. |
| Email reply | A contact at the buyer replied to a Starbridge email in the 90 days before the opportunity was created. Out-of-office replies don’t count. |
| Lead Source | Your team set the opportunity’s Lead Source to Starbridge. Salesforce only. A value written by Starbridge’s own sync doesn’t count. |
Supported
Supported means Starbridge was used to research or engage the account in the 90 days before the opportunity was created, or while it was open.What doesn’t count
Renewals are never Sourced. A renewal exists because of a previous deal your team closed, so Starbridge doesn’t claim it. Renewals can still be Supported when Starbridge activity accompanied them. Note the only exception to this rule: If your team sets Lead Source to Starbridge on a renewal, it stays Sourced, because your team explicitly marked it as sourced by Starbridge.Starbridge began tracking most Sourced activity in April 2026. Deals created before then have less activity to draw from and are less likely to be marked Sourced.
Reading the dashboard
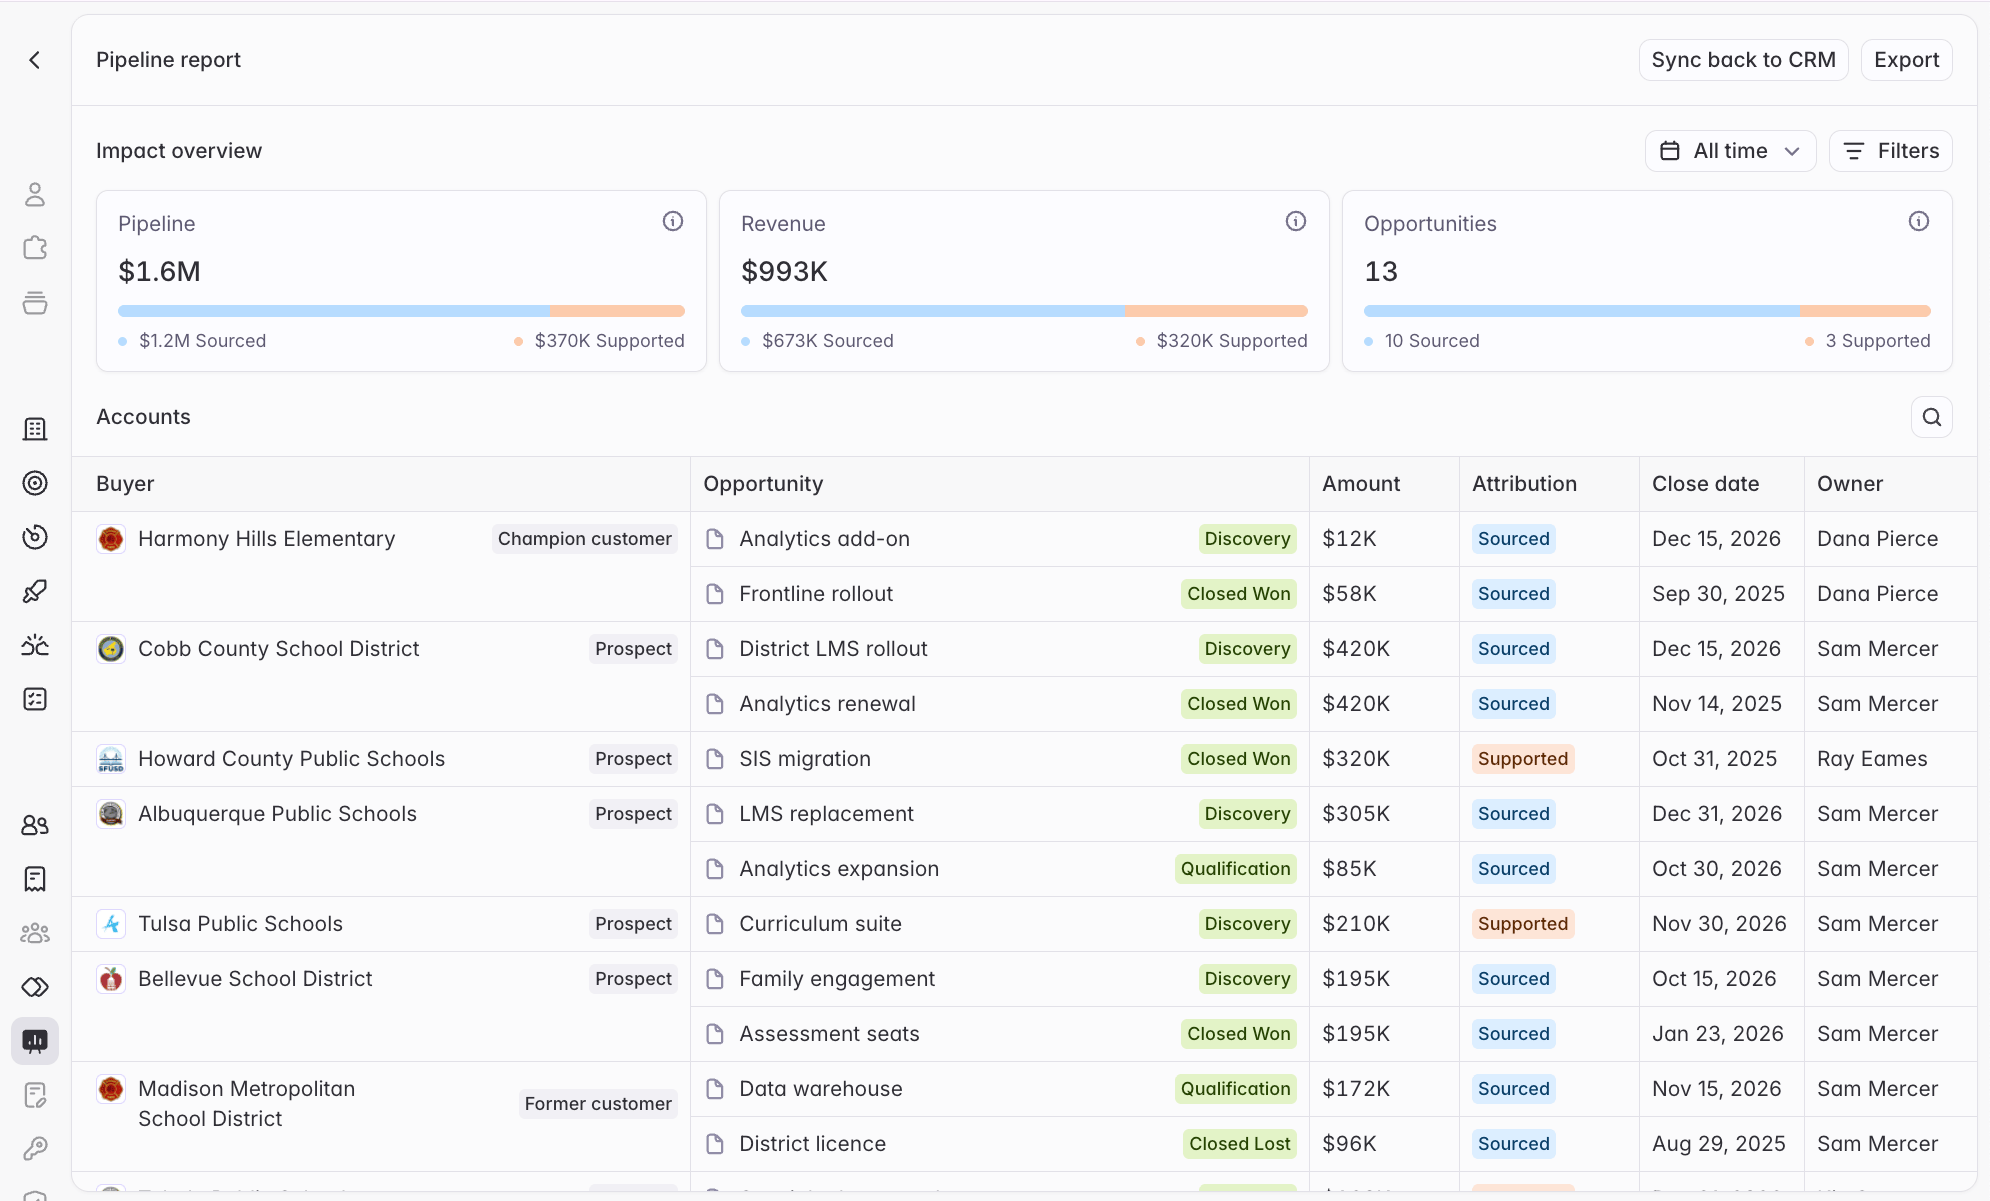
Go to Settings → Pipeline dashboard.If your CRM isn’t connected, or the objects the dashboard reads aren’t synced, the dashboard shows a prompt to finish setup instead of numbers. See Troubleshooting.

Filters
Hide stale deals is on by default. It hides open deals whose close date is more than 30 days past, and open deals with no close date that were created more than 30 days ago. Net-new business only is off by default. Turn it on to see Starbridge’s impact on your net-new business excluding all renewals, upsells, and cross-sells. The filter shows the first closed-won deal on each account, plus open deals on accounts with no closed-won deals.Opportunity details
Click any opportunity to open Opportunity info. The Why this is sourced (or Why this is supported) box briefly explain Starbridge’s reasoning for marking the opportunity as Sourced or Supported. Below it, a dated timeline shows the activity behind the determination: signals surfaced and actioned, contacts unlocked, contacts and accounts Starbridge created or updated in your CRM, emails sent, replies received, and questions your reps asked about the buyer.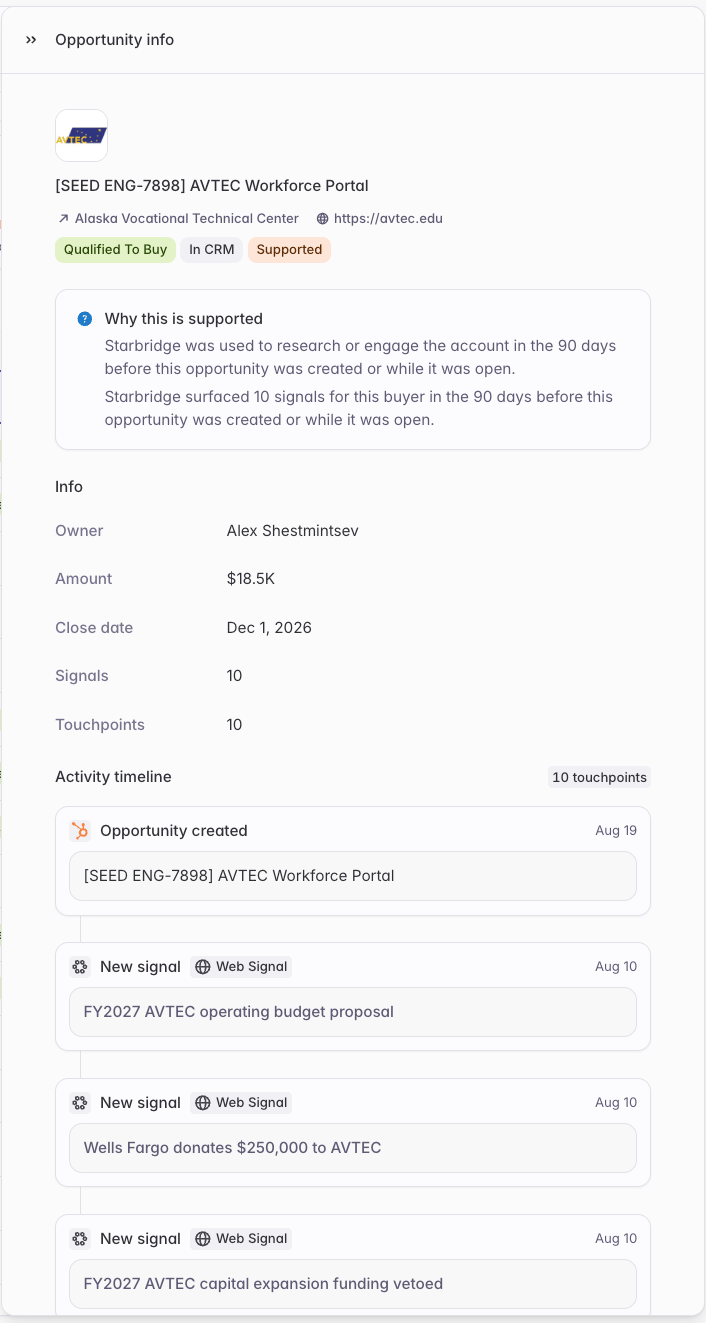
Export
Click Export to download the table as a CSV.Sync back to CRM
Click Sync back to CRM and choose the integration to write to.Write the determination to an Opportunity field
Starbridge can write Sourced or Supported to a custom field on the Opportunity or Deal object. Create the Starbridge Attribution fieldStep-by-step instructions for Salesforce
Step-by-step instructions for Salesforce
Before turning this on, create a custom picklist field on the Opportunity object for Starbridge to write to.
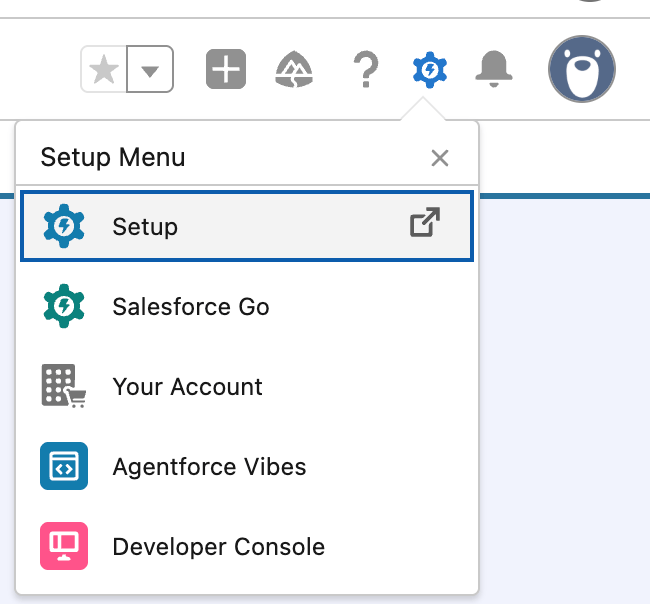
- In Salesforce, click the Gear icon (⚙) → Setup
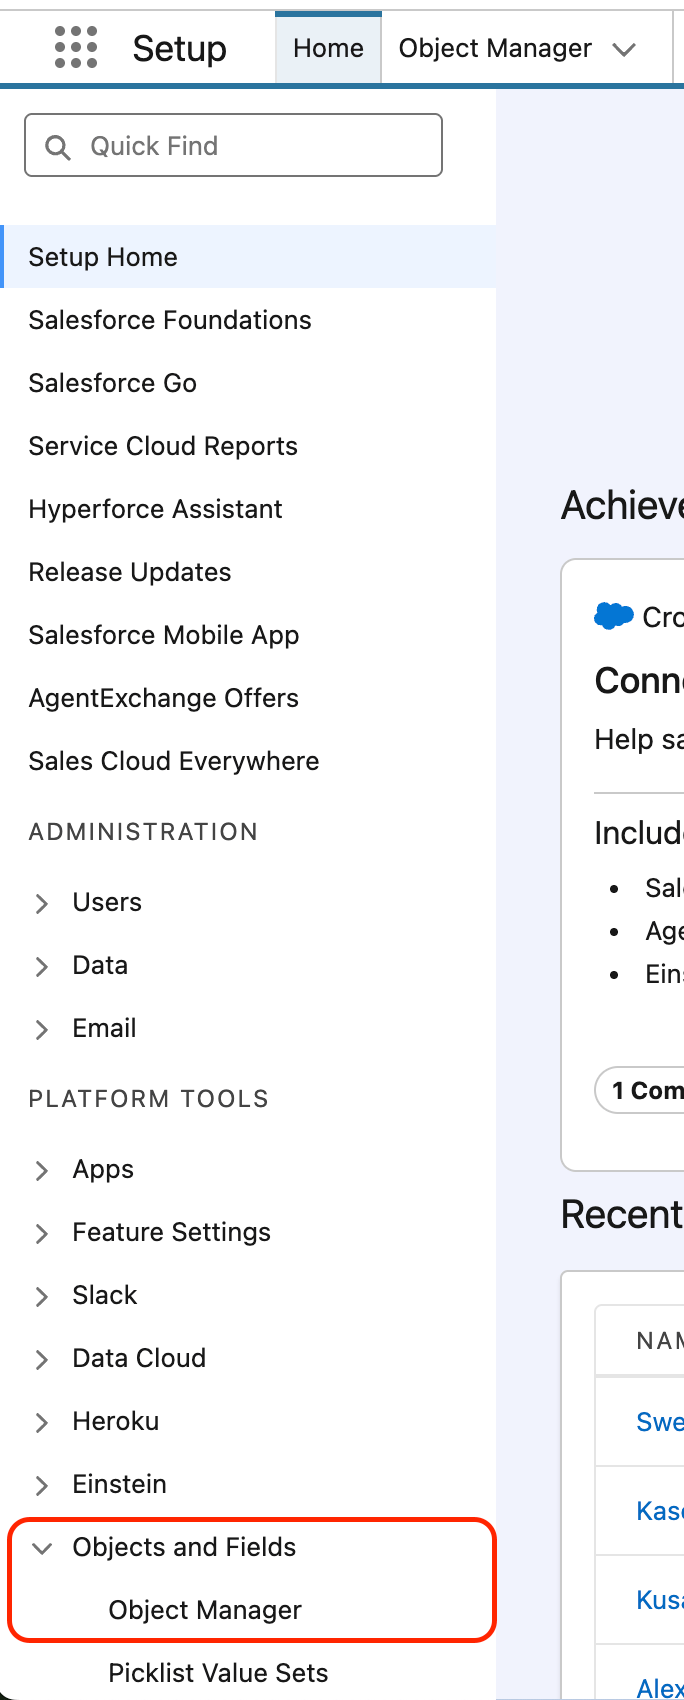
- In the left sidebar, search for Object Manager and open it, or directly click Objects and Fields → Object Manager
- Click Opportunity → Fields & Relationships → New
- For the data type, select Picklist, then click Next.
- Create the Starbridge Attribution field:
Salesforce automatically appends
__c to custom field API names (e.g. Starbridge_Attribution__c). This is expected.-
Connect this field to Starbridge
Go to Starbridge > Settings > Integrations > [your CRM integration] > Objects & fields. Click Refresh in the top right corner. Wait until the connection finishes refreshing (you will see the blue Refreshing icon in the top left change to a green Connected icon once it’s done), which will let Starbridge know you created the new field. Then, toggle on Starbridge Attribution on the Opportunity object and click Save changes. Once your changes are saved and synced, the field no longer shows as Missing in the Sync back to CRM modal.
If you also sync a Salesforce Sandbox, repeat these steps in your sandbox. The field label and API name are the same.
Step-by-step instructions for HubSpot
Step-by-step instructions for HubSpot
- In HubSpot, go to Settings (Gear icon ⚙) → Properties
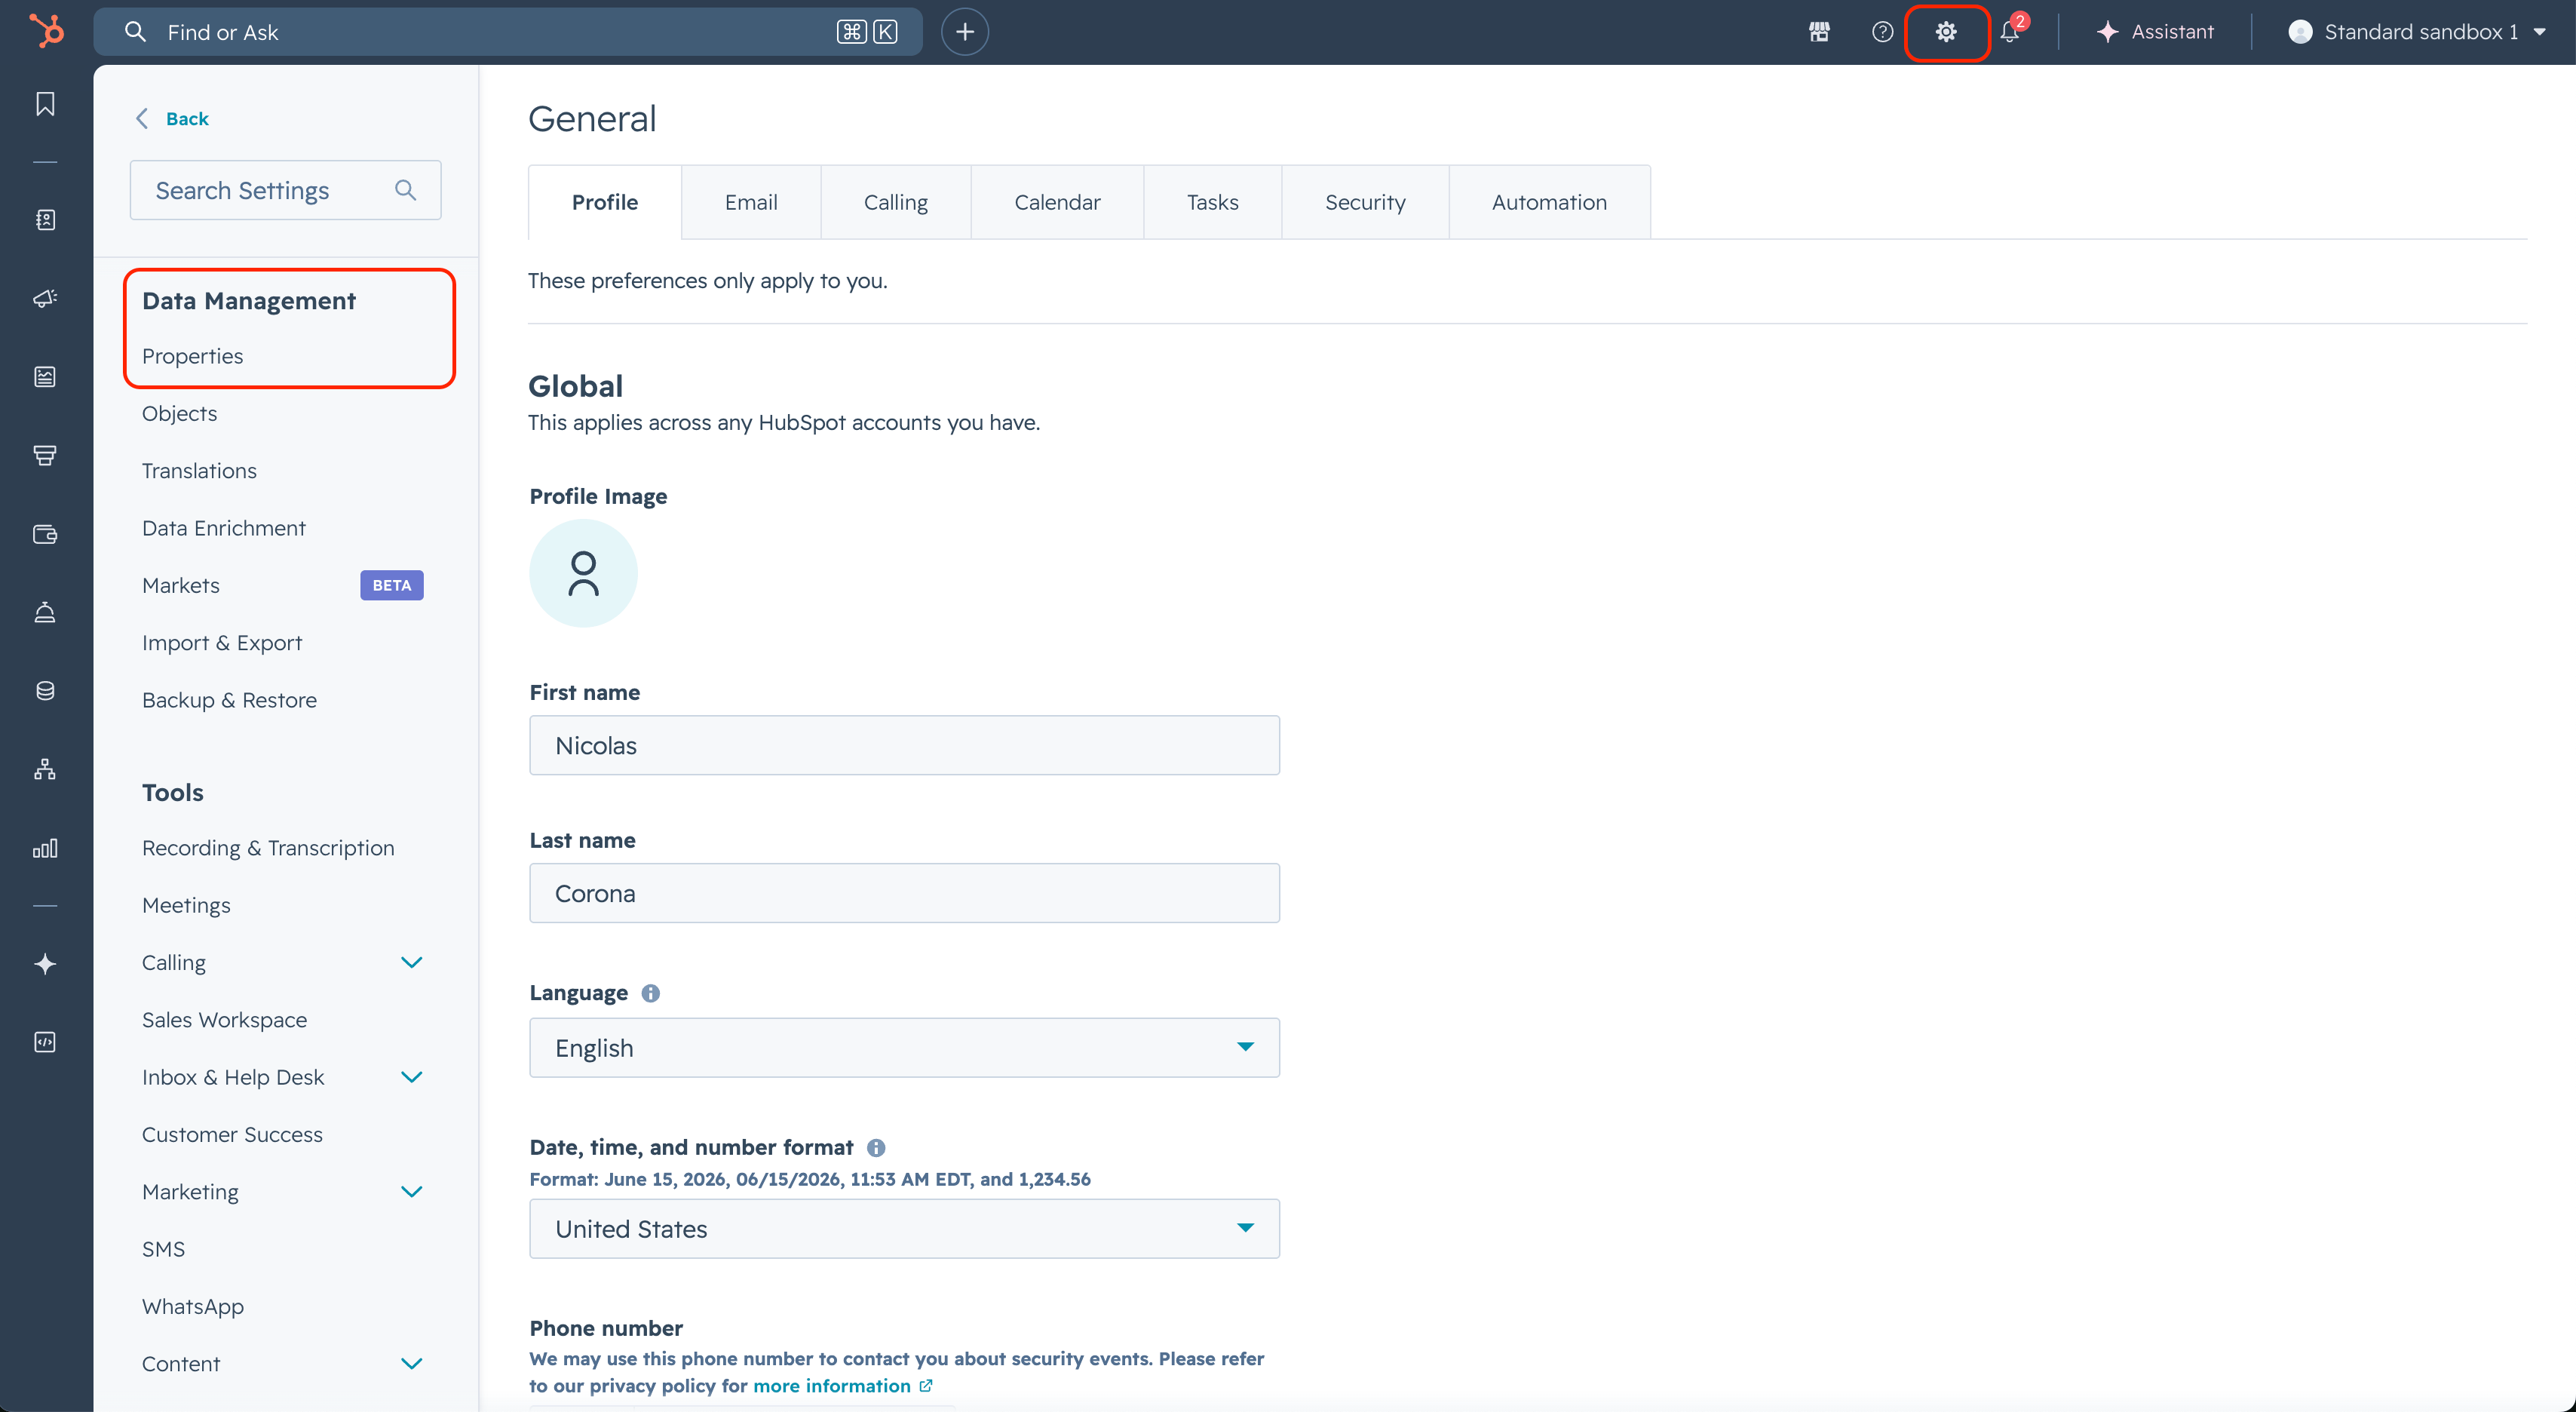
- In the Select an object dropdown, select Deal properties, then click Create property (top right)
- Create the Starbridge Attribution property. On the Basic info step:
- On the Field type step:
- Open the new property and check that its internal name reads
starbridge_attribution.
- Connect this property to Starbridge
Go to Starbridge > Settings > Integrations > [your CRM integration] > Objects & fields. Click Refresh in the top right corner. Wait until the connection finishes refreshing (you will see the blue Refreshing icon in the top left change to a green Connected icon once it’s done), which will let Starbridge know you created the new property. Then, toggle on Starbridge Attribution on the Deal object and click Save changes.
Set Lead Source to Starbridge
Salesforce only. Choose whether Starbridge writes to the Lead Source field on your opportunities. The option is disabled until your Lead Source picklist has aStarbridge value.
Add Starbridge to your Lead Source picklist
Step-by-step instructions for Salesforce
Step-by-step instructions for Salesforce
Before turning this on, add
Starbridge as a value on the Opportunity Lead Source picklist. This option is available for Salesforce and Salesforce Sandbox only.-
In Salesforce, click the Gear icon (⚙) → Setup
-
In the left sidebar, search for Object Manager and open it, or directly click Objects and Fields → Object Manager
- Click Opportunity → Fields & Relationships, then click Lead Source
- In the Lead Source Picklist Values section, click New
-
Add the new value:
-
Connect this value to Starbridge
Go to Starbridge > Settings > Integrations > [your CRM integration] > Objects & fields. Click Refresh in the top right corner. Wait until the connection finishes refreshing (you will see the blue Refreshing icon in the top left change to a green Connected icon once it’s done), which will let Starbridge know you added the new value. Confirm that Lead Source is toggled on for the Opportunity object, and click Save changes if you turned it on. Once your changes are saved and synced, the Set Lead Source to Starbridge option is available in the Sync back to CRM modal.
If you also sync a Salesforce Sandbox, repeat these steps in your sandbox.
Troubleshooting
The dashboard asks me to connect my CRM
The dashboard asks me to connect my CRM
The dashboard needs a Salesforce or HubSpot integration. Connect your CRM in Settings → Integrations, following Connect your CRM. Then sync the dashboard’s objects and complete Account matching.
The dashboard asks me to connect CRM objects
The dashboard asks me to connect CRM objects
Your CRM is connected, but the objects the dashboard reads aren’t synced yet. In Objects & fields, turn on Account, Opportunity, and User for Salesforce, or Company, Deal, and Owner for HubSpot, then click Save changes. See Connect your CRM.
"Complete account matching to see pipeline and revenue attributed to Starbridge"
"Complete account matching to see pipeline and revenue attributed to Starbridge"
Complete Account matchingto proceed.
"Not enough Starbridge activity to report on this yet"
"Not enough Starbridge activity to report on this yet"
Starbridge does not have enough data to generate the pipeline dashboard. Talk to your GTME.
What’s next
Account matching
Required before the dashboard has anything to show.
Connect your CRM
Choose the objects and fields Starbridge syncs.